Create a Standard Processing Job
Review the information below for instructions on how to create a standard processing job.
Processing Jobs (PJ) are created from completed Discovery Jobs. If the Discovery Job was not indexed, searching is not available. You can create a Processing Job based on one or more Discovery Jobs. Search, filter, and cull the data for processing either manually or set up rules using the Flex Processor Rules Manager.
To create a standard Processing Job, perform the following steps:
-
Right-click Processing Jobs underneath the proper Custodian on the Client Management tab.
-
Click New Processing Job. The Processing Job dialog box appears.

-
Enter a Processing Job Name.
-
Enter a Description.
-
Choose Standard.
-
Select one or more of the Discovery Jobs you want to use for this Processing Job.
-
(Optional) If you want to create a new Discovery Job at this time, click New Discovery Job. After creating the Discovery Job and selecting the Discovery Job options, the newly created Discovery Job displays in the Discovery Jobs list (in the Processing Job dialog box) and is selected. The Discovery Job also displays in the Job Queue grid of the eCapture Controller.
-
(Optional) If you do not want the Case (Project) Options to display, clear the Show Job Options after creation check box.
-
(Optional) If you want the job pushed to the front of the queue, select the Expedite Job check box.
-
Select a task table from the Task Table drop-down menu. The task table that displays in the field is based on the last task table selected for the Custodian.
-
Click OK. The Processing Job displays in the Job Queue grid of the eCapture Controller or the Processing Job Options dialog box appears.
-
Set the Job Options as appropriate. Click the following sections to learn more about options for Processing Jobs.
 Processing: General Options
- Click the General Options tab.
-
Set the OCR options. For more information, see the table below.
Option
Description
OCR pages missing text
Select OCR Pages missing text to OCR pages within documents that are missing text. Optionally, select PDF page character threshold and indicate a value. The default value is 25 characters. The maximum value is 10000. If the value is less than 25, eCapture will send the page to be OCRed. If necessary, enter a different value.
PDF Page Character Threshold
Optional: Select PDF page character threshold and indicate a value. The default value is 25 characters. The maximum value is 10000. If the value is less than 25, eCapture will send the page to be OCRed; otherwise, the text will just be indexed. If necessary, enter a different value.
Minimum average OCR confidence [1-100]
The level range settings are from 1 up to 100. The default is 50. The OCR Confidence Level is the average percentage of confidence for each document for all pages within a document on which OCR was performed. Success or failure of a document for indexing preparation is based on the average confidence level of the document. If the average confidence level is below the selected threshold, the page will be considered as an indexing error and is available for re-queueing. The Discovery Job Status Information Panel displays OCR Applied[Errors], where Applied shows the number of documents that required OCR (not OCRed) and where [Errors] shows the number of those documents that did not meet the specified average confidence level.

Note: For calculating average document confidence, pages in PDF docs with text behind them are considered 100%. OCR failures are considered 0%.
Use OCR Workers
Optional: Select to enable the OCR Worker Task Table drop-down list and select a task table. If a custom task table is selected, Enterprise OCR tasks are sent to those Workers assigned to the selected task table. See Assign Task Tables to Workers and Assign IPRO (Cloud) Workers for additional information.
OCR Languages
eCapture includes multi-language OCR capability. The QC document will contain the original OCR languages that were selected for the Data Extract job. A valid multi-language OCR license must be available in order to modify the original selected languages, if necessary.
To reserve a portion of the multi-language OCR licenses for QC and to keep the Worker from consuming all available licenses, use the Multi-Language OCR License slider located in the Controller System Options dialog box.
Click OCR Languages to display the Language OCR dialog box.
After selecting the languages, click OK to close the dialog box. The selected languages appear in the OCR Languages field. Place the mouse pointer on the OCR Languages field to display a tool tip that lists all the selected languages that were not visible in the OCR Languages field. The OCR Languages field is a read-only field.
Click
here to view a list of supported languages.-
English
-
Arabic
-
Chinese Simplified
-
Chinese Traditional
-
Japanese
-
Korean
-
Afrikaans
-
Albanian
-
Basque
-
Belarusian
-
Bulgarian
-
Catalan
-
Croatian
-
Czech
-
Danish
-
Dutch
-
Estonian
-
Faorese
-
Finnish
-
French
-
Galician
-
German
-
Greek
-
Hungarian
-
Icelandic
-
Indonesian
-
Italian
-
Latvian
-
Lithuanian
-
Macedonian
-
Norwegian
-
Polish
-
Portuguese
-
Portuguese Brazil
-
Romanian
-
Russian
-
Serbian
-
Serbian Cyrillic
-
Slovak
-
Slovenian
-
Spanish
-
Swedish
-
Turkish
-
Ukrainian
Click here to view some
caveats to OCR Language handling.English is the only language that is selected by default. The more languages that are selected, the lower the confidence level will be for correctly identifying the languages in a document.
-
If English is selected, Arabic will not be available for selection.
-
If Arabic is selected, all other languages will not be available for selection.
-
If one of the CJK (Chinese, Japanese, Korean) languages are selected, then all remaining CJK languages will not be available for selection. Other languages (excluding Arabic) may be selected.
-
If Chinese Simplified is selected, Chinese Traditional, Japanese, and Korean will not be available for selection.
-
If Chinese Traditional is selected, Chinese Simplified, Japanese, and Korean will not be available for selection.
-
If Japanese is selected, Chinese Simplified, Chinese Traditional, and Korean will not be available for selection.
-
If Korean is selected, Chinese Simplified, Chinese Traditional, and Japanese will not be available for selection.
-
- Set the Color Depth, Paper Size, and other basic options.
General Color Depth - Applies to everything else outside of the five types (Word, Excel, PowerPoint, PDf, and Native TIFF) that eCapture does not process through Oracle (formerly Stellent). There are three exceptions to this rule: Lotus Notes, Internet Explorer, and Outlook Express, which also fall under the General type. All other email, except for Lotus Notes and Outlook Express at this time, are always Group 4 TIFF because it is rendered from text.
Single Page Output Type
General Color Depth Options
Rendered as
Black&White (1-bit)
Group 4 TIFF
Grayscale (8-bit)
LZW TIFF
256 Color (8-bit)
LZW TIFF
True Color (24-bit)
JPEG
Multi-Page TIFF Output Type
General Color Depth Options
Rendered as
Black&White (1-bit)
Group 4 TIFF
Grayscale (8-bit)
LZW TIFF
256 Color (8-bit)
LZW TIFF
True Color (24-bit)
JTIFF - (JPEG compressed TIFF)
Image Color Depth - Applies to: BMP, TIFF, PCX, GIF, WPG, WINDOWSICON, WINDOWSCURSOR, MACPAINT, CGM, DCX, SUNRASTER, KODAKPCD, PNG, DGN, PBM, and ADOBE PHOTOSHOP. However, if Lead fails to open a file, it then goes to Oracle (formerly Stellent) and uses the General Color Depth options.
Image Color Depth Options
Rendered as
As Is
If Original is Black&White, then Group 4 TIFF; otherwise, it will be a JPG matching bit depth.
Black&White (1-bit)
Group 4 TIFF
Grayscale (8-bit)
LZW TIFF
True Color (24-bit)
JPG
PDF Color Depth - Select a PDF Color Depth. A PDF always uses the selected color depth setting in the PDF area. There are two possible outcomes:
Successful Use of the Adobe Library
PDF Color Depth Options
Rendered as
As Is
If Original is Black&White, then Group 4 TIFF; otherwise, it will be a JPG matching bit depth.
Black&White (1-bit)
Group 4 TIFF
Grayscale (8-bit)
JPG (8-bit)
True Color (24-bit)
JPG
Unsuccessful Extraction of the Adobe Library
PDF Color Depth Options
Rendered as
As Is
Always 24-bit JPG
Black&White (1-bit)
Group 4 TIFF
Grayscale (8-bit)
JPG (8-bit)
True Color (24-bit)
JPG
- PDF Paper Size - Select an output paper size for PDFs. When the As Is option is selected, the internal PDF document size is used to draw the image.
Paper Size - Click the drop-down menu and select an output paper size for documents during processing.
-
Set the Appropriate Option for Time Zone Handling.

- Convert all times to UTC
- Specify Time Zone
For more information about Time Zone Handling, see Date Handling (Time Zones) in eCapture.
-
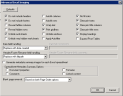
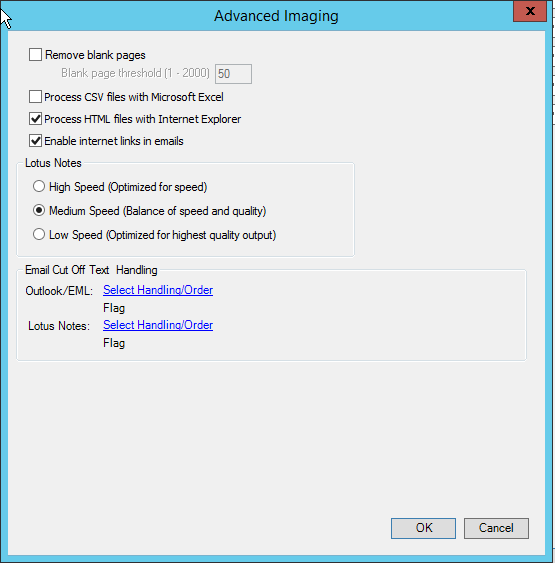
Click the Advanced Options button to set more complex General Options rules. The Advanced Imaging dialog box appears.

- Remove blank pages - Select this option and then set the Blank Page Threshold (1 to 2000) to a value that eliminates the speckles without eliminating any punctuation marks from the pages. eCapture will remove any images that have fewer "dots" than this threshold. If this setting is too high, you may lose images with a few short words. As a starting point, we suggest a setting of 50.
- Process CSV files with Microsoft Excel - Select this option to process .CSV files with Microsoft Excel instead of Oracle (formerly Stellent).
- Process HTML files with Internet Explorer - Select this option to process HTML files with Internet Explorer instead of Oracle (formerly Stellent).
- Enable Internet links in emails - This option controls whether inline images are downloaded from the internet. Clearing this option can improve performance on environments without internet access.
-
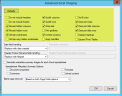
Set Lotus Notes options, as appropriate:
- High Speed (Optimized for speed)
- Medium Speed (Balance of speed and quality)
- Low Speed (Optimized for highest quality output)
-
Click the Outlook/EML link, Select Handling/Order. The Outlook/EML Text Cutoff Handling dialog box appears. Select an option and click either the
 or
or  to move it to a specific order location. Repeat for additional options. Options include:
-
Attempt in Landscape w Shrink to Fit
-
Attempt in Portrait w Shrink to Fit
-
Attempt in RTF
-
Attempt in Text
-
Assign Text Cutoff Flag and Manage in QC - This is the default setting. It cannot be repositioned.
-
-
Click the Lotus Notes link, Select Handling/Order. The Lotus Notes Text Cutoff Handling dialog box appears. Select an option and click either the
or to move it to a specific order location. Repeat for additional options. Options include:-
Attempt in Landscape
-
Attempt in Text
-
Assign Text Cutoff Flag and Manage in QC - This is the default setting. It cannot be repositioned.
-
- Click OK to exit the Advanced General Options dialog box.
Processing: Excel Options
-
Click the Excel tab to set the processing options for Excel files.
-
Process with Outside-In (Stellent) - Select this option to:
- Allow for faster and more consistent generation of images on the first pass
- Reduce the amount of time spent manually QCing these document types
When selected, only Outside-In (Stellent) is used to process images; the Microsoft related options are grayed out by default. Full metadata is extracted and time zone imaged output reflects the time-zone handling options configured for the Processing Job. All files processed by Outside-In (Stellent) receive the Stellent Processed flag in QC.
The processing output differs when using Outside-In (Stellent) to view and image documents. However, the QC applied flags, metadata, and optional summary reports are similar if processing was done without Outside-In (Stellent). Other processing options, including Flex Processor processing options, are respected when using Outside-In (Stellent).
- Comments - Set where you want comments displayed. Select from None, At end of sheet, or As displayed on sheet.
-
Color Depth - Set the Color Depth options. Color processing for Excel files is handled separately from color processing of other types of files. This setting is independent of the General Color Depth.
Single Page Output Type
General Color Depth Options
Rendered as
Black&White (1-bit)
Group 4 TIFF
Grayscale (8-bit)
LZW TIFF
256 Color (8-bit)
LZW TIFF
True Color (24-bit)
JPEG
Multi-Page TIFF Output Type
General Color Depth Options
Rendered as
Black&White (1-bit)
Group 4 TIFF
Grayscale (8-bit)
LZW TIFF
256 Color (8-bit)
LZW TIFF
True Color (24-bit)
JTIFF - (JPEG compressed TIFF)
-
Paper Size - Click the drop-down menu and select an output paper size for documents during processing.
Note: For Excel Only - For Custom[8.5x11.0in], the Custom Paper Size dialog box appears.
The Custom Paper size defaults to 8.5x11 inches. The range values are shown for both inches and millimeters. Maximum size in inches is 50.00x70.00; for millimeters, it's 1270.00x1778.00. When this option is selected, the document will be processed through the PDF driver (Text-Based PDF creation) regardless of the Flex Processor option selected. OCRing is not applicable in this instance. Export settings will be limited to Text-Based PDF Output only, even if image format is selected. Non-Excel documents will export as usual.
-
Center on Page - Determines where to center the image on the page.
-
Horizontally
-
Vertically
-
-
Page Order - Determines the page order to be used for imaging.
-
As is
-
Down, and then over
-
Over, and then down
-
-
Orientation - Determines the orientation of the page at the time of printing.
-
As is
-
Portrait
-
Landscape
-
-
Scaling - Specifies whether the image should be scaled and how. If scaling is used, the options are adjusted to a percent of the current size or fit to page.
-
As is
-
Adjust to % normal size
-
Fit to page
-
-
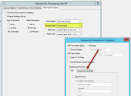
If you want to set more granular processing options for Excel files, click the Advanced Options button and the Advanced Excel Imaging dialog box appears.
-
At the top of the dialog box, set the options for how to handle headers, footers, and other content in the Excel workbook. Click the Defaults button to revert to the default settings for these options, as shown in the following image:
If you have trouble locating the referenced options in Excel, click
here to view information about how to navigate in Excel to the option.-
Do not include headers - View > Header and Footer: Header/Footer Tab, Header drop-down list, None.
-
Do not include footers - View > Header and Footer: Header/Footer Tab, Footer drop-down list, None.
-
Reveal hidden columns - Format > Column > Unhide
-
Reveal hidden rows - Format > Row > Unhide
-
Unhide worksheets - Format > Sheet > Unhide
-
Unhide very hidden worksheets - Unhides worksheets that were hidden by a Microsoft Visual Basic for Applications program that assigned the property xlSheetVeryHidden. (From the Microsoft Excel Help File: If sheets are hidden by a Microsoft Visual Basic for Applications program that assigns the property xlSheetVeryHidden, you cannot use the Unhide command to display the sheets. If you are using a workbook with Visual Basic macros and have problems with hidden sheets, contact the owner of the workbook for more information.)
-
Autofit columns - Double click the right boundary of the column heading for that row.
-
Autofit rows - Double click the boundary below that row heading.
- Wrap text - Format > Cells: Alignment Tab, Wrap Text Option.
-
Print gridlines - File > Page Setup: Sheet Tab, Under Print, select Gridlines checkbox.
-
Unhide windows - Window > Unhide.
-
Apply Autofilter - Data > Filter > AutoFilter
- No fill color (for cells) - Format > Cells: Patterns Tab, Under Color, click No Color.
-
Clear print area - File > Print Area > Clear Print Area.
-
Clear print title columns - File > Page Setup: Sheet Tab, under Print Titles select the columns to repeat range.
-
Clear print title rows - File > Page Setup: Sheet Tab, under Print Titles select the rows to repeat range.
-
Display headings - File > Page Setup: Sheet Tab, under Print, select the Row and column headings checkbox.
-
Expand Pivot Tables - Right click Pivot Table to display context menu. Choose Expand/Collapse > Expand.
-
-
Set the remaining settings in the Advanced Excel Imaging dialog box.
The table below provides a list of the available options.
Setting
Options
Date field handling:
-
Replace with date created - will replace with creation date.
-
Replace with date last saved - will replace current date with last saved dated.
-
Replace with comments - displays the Date Field Comments field where you can enter the text that should replace the contents of the date field.
-
Replace with field code
-
Do not replace - will not replace the date (e.g., Macros)
Header/Footer Filename field handling
If path or filename options are found in an Excel header or footer, you can select from the following options to handle these occurrences.
-
Replace with filename (no path) - inserts the unqualified filename
-
Replace with filepath - inserts the fully-qualified path of the original file
-
Replace with comments - displays the Header/Footer Filename field comments field where you can enter your own comments
-
Replace with field code - replaces outputs &[Path] and/or &[File]
-
Remove - removes the codes entirely
Generate metadata
Select Generate a metadata summary images for each Excel spreadsheet, and then under Spreadsheet Metadata Summary Options select the individual types of metadata to capture.
-
Document Properties
-
Comments
-
Formulas
-
Linked Content - The data collected will include hyperlinks and OLE linked files. If any linked content exists in a document, a QC flag will be added. A separate page entitled Document Properties is generated and is placed at the end of each Microsoft Excel document.
For more information about metadata, click
here.Who creates the metadata? The native program (such as Microsoft Excel or Outlook) creates the metadata and maintains it with the native file (the letter or email).
What does eCapture do with this data? When a document is processed, the metadata is collected from the document and stored in the database.
How is metadata useful? It gives you valuable information as to “Who knew what, and when.” It can tell you who wrote a document and who edited it last. It also shows you a file’s revision number, the character count, and many other pieces of information about a file summary image for each Excel spreadsheet.
Blank page removal
This option is available if the Remove Blank Pages option is selected under the General Options tab. Select from the following two options to remove blank pages:
-
Based on selected Page Order: Down, then over or Over, then down.
-
If Down, then over is selected, all vertical page columns that are blank will be removed.
-
If Over, then down is selected, all horizontal page rows where all pages in a horizontal run are blank will be removed.
-
-
Based on both Page Order options: This bases the removal of blank pages on both horizontal page-rows and vertical page-columns.
Example of Page Removal
The following example pertains to using a spreadsheet with 12 pages that will be rendered.

-
If the sheet's page order is Over, then down, eCapture removes all horizontal page rows where all pages in a horizontal run are blank. In order to do that, eCapture steps through all HPageBreaks and makes sure the range from the first column to the last column is blank.
-
If eCapture determines that 1-3 is blank, then they will be hidden. If eCapture determines that 4-6 is blank, then they will be hidden, and so on.
-
If the sheet's page order is Down, then over, eCapture will remove all vertical page columns that are blank.
-
If eCapture determines that 1-A is blank, then they will be hidden. If eCapture determines that 2-B is blank, then they will be hidden, and so on.
By using this algorithm, all blank pages will not be eliminated, though many of them will be.
Note: All page-hiding is done by setting horizontal regions' RowHeight properties and vertical regions’ ColumnWidth properties to 0.
-
- Click OK to exit the Advanced Excel Imaging dialog box.
Processing: Word Options
-
Process with Outside-In (Stellent) - Selecting this option:
- Allows for faster and more consistent generation of images on the first pass
- Reduces the amount of time spent manually QCing these document types
When selected, only Outside-In (Stellent) is used to process images; the Microsoft related options are grayed out by default. Full metadata is extracted and time zone imaged output reflects the time-zone handling options configured for the Processing Job. All files processed by Outside-In (Stellent) receive the Stellent Processed flag in QC.
The processing output differs when using Outside-In (Stellent) to view and image documents. However, the QC applied flags, metadata, and optional summary reports are similar if processing was done without Outside-In (Stellent). Other processing options, including Flex Processor processing options, are respected when using Outside-In (Stellent).
-
Select the option Show Hidden Text to see hidden text, if any, contained in Word documents.
-
Select the appropriate revision option. The option you select determines how the system handles revisions within Word documents.
-
As is - Print the document as it is according to the Office Settings on the machine.
-
Detail Revisions - Print the document with revisions shown.
-
Final Copy (hide revisions) - Print the document with no revisions shown.
-
Both Copies - Documents are printed. If a document has revisions, it's printed again with the revisions shown. Documents with revisions will then have two sets of images, one right after the other.
-
-
Select the appropriate orientation option. The option you select determines how the system orients images of Word documents.
-
As is
-
Portrait
-
Landscape
-
-
Select the Scale to Page option to scale the contents of the page to fit in the printable area. This sets the PrintZoomPageWidth and PrintZoomPageHeight to the paper size of the printer when printing Word documents.
-
Color Depth - Color processing for Word documents is handled separately from color processing of other types of files. This setting is independent of the General Color Depth options located on the Processing Options: General Options tab.
Single Page Output Type
General Color Depth Options
Rendered as
Black&White (1-bit)
Group 4 TIFF
Grayscale (8-bit)
LZW TIFF
256 Color (8-bit)
LZW TIFF
True Color (24-bit)
JPEG
Multi-Page TIFF Output Type
General Color Depth Options
Rendered as
Black&White (1-bit)
Group 4 TIFF
Grayscale (8-bit)
LZW TIFF
256 Color (8-bit)
LZW TIFF
True Color (24-bit)
JTIFF - (JPEG compressed TIFF)
- Select the appropriate Paper Size for Word documents.
- If you want to set more granular options for handling of Word documents, click the Advanced Options button.
In the Field Handling section, select the Date Field Handling options:
Replace with date created - will replace with creation date.
Replace with date last saved - will replace current date with last saved dated.
Replace with comments - displays the Date Field Comments field where you can enter the text that should replace the contents of the date field.
Replace with field code
Do not replace - will not replace the date (e.g. Macros)
Remove - removes the codes entirely.
In the Field Handling section, select the Filename handling options:
Replace with filename (no path)
Replace with filepath
Replace with comments - displays the Filename Comments field where you can enter the text that should replace the filename.
Replace with field code
Do not replace
Set the metadata options for Word documents.
- Select Generate metadata. The native program, in this case Word, creates the metadata and maintains it with the native file. When a document is processed, the metadata is collected from the document and stored in the database. Metadata gives you valuable information as to “Who knew what, and when.” It can tell you who wrote a document and who edited it last. It also shows you a file’s revision number, the character count, and many other pieces of information about a file.
- Select the individual types of metadata to capture under Document Metadata Summary Options:
Document Properties
Revisions
Comments
Routing Slips
Linked Content - The data collected can include hyperlinks and OLE linked files. If any linked content exists in a document, a QC flag is added.
A separate page entitled Document Properties is generated and is placed at the end of each Microsoft Word document. For example, The Document Properties page may contain the following data:
Title
Author
Company
Attached Template
Page Count
Paragraph Count
Line Count
Word Count
Character Count (spaces excluded)
Character Count (spaces included)- When finished setting Advanced Options, click OK to exit the Advanced Word Imaging dialog box.
- When finished setting Word Options, click OK to exit the Options for Processing dialog box.
Processing: PowerPoint Options
-
Select Original Settings (As Is) to use Microsoft PowerPoint’s default settings.
-
Select the Page Orientation. The options are: As is, Portrait, and Landscape.
-
Select the Slide Orientation. The options are: As is, Portrait, and Landscape.
-
Select the Color Depth to be used for processing PowerPoint presentations. Color processing for PowerPoint presentations is handled separately from color processing of other types of files. This setting is independent of the General Color Depth and applies to everything else outside of the five types (Word, Excel, PowerPoint, PDF, and Native TIFF) that eCapture does not process through Oracle (formerly Stellent). There are three exceptions to this rule: Lotus Notes, Internet Explorer, and Outlook Express, which also fall under the General type. All other email, except for Lotus Notes and Outlook Express, are always Group 4 TIFF because it is rendered from text.
Color Depth options under the General Options tab in the Options for Processing Job dialog box are:
Single Page Output Type
General Color Depth Options
Rendered as
Black&White (1-bit)
Group 4 TIFF
Grayscale (8-bit)
LZW TIFF
256 Color (8-bit)
LZW TIFF
True Color (24-bit)
JPEG
Multi-Page TIFF Output Type
General Color Depth Options
Rendered as
Black&White (1-bit)
Group 4 TIFF
Grayscale (8-bit)
LZW TIFF
256 Color (8-bit)
LZW TIFF
True Color (24-bit)
JTIFF - (JPEG compressed TIFF)
-
Select the Output Type. The options are:
Slides
Outline
Notes Pages (notes and slide on one page)
Notes Pages Split (notes and slide on separate page)
Handouts
-
Select a Slide Size or As Is from the drop-down menu.
-
Select an output Paper Size or As Is from the drop-down menu.
-
To select more complex PowerPoint options, click Advanced Options.
- Print Hidden Slides - Select this option to print slides that are hidden from the slide show.
- Print Comments - Select this option to print comments for your slides.
- Frame Slides - Select this option to print a border around each slide.
- Scale to Fit Page - Select this option to ensure all available text displays on the slide that was imaged from eCapture,
-
Handouts - Select the desired handout options:
-
Slides per Page
-
Order (if generating 4 or more slides per page)
-
- Include Linked Content Summary - Select this option to ensure that the data collected will include hyperlinks and OLE linked files. If any linked content exists in a document, a QC flag will be added.
-
Headers and Footers - For Headers and Footers, you can set options for Slides or Notes and Handouts. The tabs that display are based on the Output Type selected on the basic PowerPoint Options tab. The options are:
- Slides
- Outline
- Notes Pages (notes and slide on one page)
- Notes Pages Split (notes and slide on separate page), or Handouts.
Slides: For the Output type of Slides, select from the following options from the Slide tab:

- Select Date and time if you want to display the Date last saved or the Date created at the top of the image.
-
If Date and time is selected, you can choose Update automatically. Select Date last saved or Date created.
-
Format: Select a format option for the date and time.
-
Choose Fixed if you want to manually enter a fixed date and time to display in the image header.
- Select Footer if you want a footer to display at the bottom of the image.
-
If Footer is selected, enter static text that you want printed at the bottom of the image or select As is to maintain the existing footer.
- If Footer is selected, define whether a slide number should show on the image by selecting an option in the Slide Number drop-down menu. The options are: As is, Show, Do not show.
-
If Footer is selected, define whether to show the footer on the title slide image by selecting an option in the Show on title slide drop-down menu. The options are: As is, Show, Do not show.
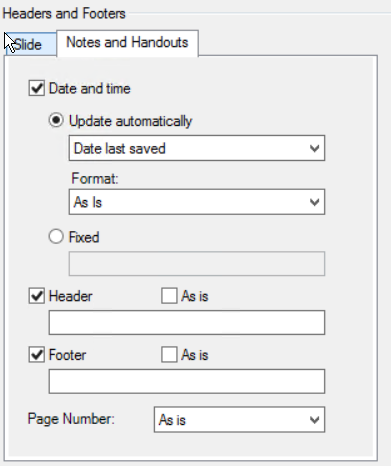
Other than Slides: If, on the basic PowerPoint imaging options tab you set the Output type to anything other than Slides, select from the following options on the Notes and Handouts tab:

- Select Date and time if you want the notes/handouts to list the date/time.
-
If Date and time is selected, choose Update automatically and select Date last saved or Date created.
- Format: Select a format option for the date and time.
-
Choose Fixed if you want to manually enter a fixed date and time to display in the image header.
-
Select Header if you want a header to display at the top of the image. You can either enter fixed text to add or select As is to maintain the existing header.
-
Select Footer if you want a footer to display at the bottom of the image.
-
If Footer is selected, you can enter static text that you want printed at the bottom of the image.
- If Footer is selected, select a Page Number option to define whether or not a page number should show on the image. The options are: As is, Show, Do not show.
- Click OK to exit the Advanced PowerPoint Options dialog box.
- Click OK to exit the Options for Processing dialog box.
-
Set the filtering options. You can create filtering rules using either the Flex Processor Rules Manager dialog, or the New Rule wizard. For more information, see Create Rules By Using the Flex Processor Rules Manager Dialog Box or Create Rules By Using the Flex Processor Rules Manager Wizard.
-
When you are finished setting job options, click OK.


Related Topics