Create a Discovery Job
The following procedure describes how to create a Discovery Job (DJ) in eCapture.
|
|
Note: If the optional NIST database is loaded, eCapture will always perform NIST matches upon discovery. |
All data discovered is indexed (by default) and hashed, so one or more processing jobs can run on the same set of data without re-discovering the data set repeatedly. Search and process as many times as required.
You may choose not to index the Discovery Job at creation time but instead index it post creation. For more information about this process, see Modify a Completed Discovery Job.
In addition, the NOISE.DAT and/or DEFAULT.ABC files may be used when indexing, as described in Index Discovery Jobs with Custom NOISE.DAT and/or DEFAULT.ABC.
To create a Discovery Job, perform the following steps:
-
Right-click Discovery Jobs underneath the proper Custodian.
-
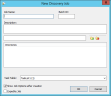
Select New Discovery Job. The New Discovery Job dialog box appears.
-
Enter a Discovery Job Name.
-
Enter a Batch ID. A maximum of 20 characters are permitted. You can select this field for export load files, endorsements, and custom placeholders.
-
Enter a Description.
-
Click
 to open the
Browse for Folder dialog box.
to open the
Browse for Folder dialog box. -
Select the directory to discover. Use the UNC path to ensure consistent drive mappings for your site configuration. The selected directory displays in the Directories list. If you selected the incorrect directory, simply select it, and click
 . The directory is removed from the Directories list.
 -
Repeat steps 6 and 7 to select additional directories.
-
Select a task table from the drop-down list. The task table that displays in the field is based on the last task table selected for the Custodian.
-
(Optional) Clear Show Job Options after creation if you do not want the Job Options to display.
-
(Optional) Click Expedite Job if you want the job moved to the front of the queue. Otherwise, it displays at the end of the queue.
-
Click OK. The Discovery Job Options dialog box appears.
-
On the Discovery Options tab, set Discovery options and, when finished, click OK. For information about all of the Discovery Job Options, see Select Discovery Report Options .
 Discovery Options
On the Discovery Options tab, there are three sub-tabs you can work with to define Discovery Job options at the Case (Project) level, as well as to define Password Handling options for the case.
Discovery: General Options
On the General tab, set Discovery options.
-
Calculate Page Count - Select this check box to calculate an initial page count of the selected files, before processing. When you run reports, you can choose to include the page count.
- If you choose not to process unknown files, those files will display on the summary report, but their page count will be zero.
- You cannot use this setting to count the number of pages in emails.

Note: This is a preliminary count. It does not reflect the number of pages that will be used by metadata, place holders for unknown or exception files, or blank pages (if you choose to drop blank pages).
-
Enhanced Password Detection - When this option is selected, specific file types are checked for password protection at Discovery time. A password-protected document is defined as a document in which a prompt asks for a password on attempting to open the document in its native application. Otherwise, if the document can be opened and viewed in its native application, the document is not considered password protected. To see the documents with password protection, run the Detailed Error Report. Any password protection errors that occurred during Discovery can be corrected before running Processing Jobs and/or Data Extract Jobs on the data set to save time during QC.
-
Node Handling - PDF Portfolio files allow email boxes to be stored/converted within a folder structure. This folder structure information will be extracted and available for export in the existing ‘MailFolder’ metadata field.
-
Treat Archives as Directories: This option check box is selected by default. When the check box is selected, the files in the archived folder are treated as parent and child docs when running a Discovery Job. In addition, WINMAIL.DAT attachments are treated the same as archives and will be processed the same as ZIP files. The following are treated as archive files:
- FI_ZIP = 1802
- FI_ZIPEXE = 1803
- FI_ARC = 1804
- FI_TAR = 1807
- FI_STUFFIT = 1812
- FI_LZH = 1813
- FI_LZH_SFX = 1814
- FI_GZIP = 1815
- Ipro_FI_RAR = 13000
- FI_TNEF = 1197
-
Treat PDF Portfolios/Packages as containers: This option check box is selected by default.
- When the check box is selected, the PDF Portfolio file is treated as a directory and its contents extracted and treated as loose files (except children of the contained PDFs). The PDF Portfolio is not treated as an item, only as a container in the Nodes table. Documents inside the PDF package are treated as parent files.
- When the check box is cleared, the PDF Portfolio file is treated as a file parent and its contents extracted and treated as attachments in the Items table. The PDF Portfolio is treated as an item and can be processed, filtered, or exported.
-
-
Mailstores - There are several IBM-specific settings that can be set for a Discovery job.
-
Use legacy Lotus Notes Handling - Legacy Lotus Notes handling uses the IBM (formerly Lotus) UI for Discovery and is considerably slower than current IBM (formerly Lotus) Mail discovery.

Important: This option is required for hash compatibility to deduplicate across older jobs discovered with the legacy versions 5.0 and earlier.
- Create working
copy of Outlook mail stores - By default, this option check box is cleared
for both new and existing Cases (Projects).
- When this option check box is cleared, the discovery of PSTs is made directly from the PST; no copies are made.
- When this option check box is selected, if any PSTs are encountered in a Discovery Job, a copy of the PST is made to a working directory located under the Discovery Job and Discovery is performed on that copy. Once the Job completes, all working copies of PSTs in the Job are deleted. If a node-level error on the PST is requeued after the Discovery Job is complete, the source PST is copied again. The working copy is made again in this instance only if the option is selected.
-
-
Email Deduplication - The method of gathering and creating the MD5 hash value for newly created Projects. Hashing of emails uses the UTC time to ensure proper deduplication across time zones.
In most cases, MD5 hash values are calculated on the file itself. For more reliable deduplication of emails though, it is required that deduplication occur on the information contained within it and not the file itself. There are many reasons for this; the simplest is that when an email is saved out of its container (PST, NSF, etc.) the file created contains information that would change the hash value of the same email each time that the email was saved out.
When an email is discovered within eCapture, it is assigned a hash value based on fields chosen by the user. The values of these fields are concatenated and the text is hashed. To generate a hash value, the user selects from the following email fields:
-
Subject
-
From/Author
-
Attachment Count
-
Body - When this option check box is selected, the default setting is to include the body whitespace. Whitespace in the email body could cause slight differences between the same emails, which could result in different hashes being generated. If you do not want to include the whitespace, select Remove from the Body Whitespace drop-down menu to remove all whitespace between lines of text in the email body before hashing.
-
E-mail Date: The following message types use the specified date values: Outlook: Sent Date, IBM (formerly Lotus) Notes: Posted Date, RFC822: Date, and GroupWise: Delivered Date. From the Alternate Email Date drop-down menu, select either Creation Date or Last Modification Date. The selected value will be used when calculating the MD5 hash if the normal E-mail Date value is not present. This commonly occurs for Draft messages that have not been sent.
-
Attachment Names
-
Recipients
-
CC
-
BCC
Start Time is always used if it exists.
By default, Subject, From/Author, Email Date, and an Alternate Email Date Creation Date are used for email hash generation.
-
-
File Extraction - Treat email inline images as attachments
- When this check box is selected, inline images in email messages (e.g., signature files) are re extracted as attachments and treated as child documents. Apple Mail Message (EMLX) files are supported. The attachments for EMLX files are extracted from the emails and it recognizes and handles the inline images. When EMLX files are processed or data extracted, they are treated as emails. The output resembles an email displayed in Outlook Express or Outlook.
-
When this check box is cleared, inline images are not extracted as children. The images are not treated as separate documents, and therefore will not be OCRed, language-identified, or indexed. The images are rendered inline as they would look in the native file.
Note: Black Ice™ does not return text for any images that are printed. So extracted text for the (parent) document will not include text from the inline image. The images will be OCRed only if the image it is printed on does not have any text, and OCR Pages Missing Text is enabled under the Processing Job, General Options tab.
-
Embedded File Extraction - eCapture can control which embedded object types are extracted from most Microsoft Office and Rich Text documents.
Click
here for more information about embedded files.An embedded file is an object that has been inserted into a document and, if extracted, can act as a standalone document. Multiple methods for embedding object and files are available for Microsoft Office documents through the Microsoft Office Object dialog box.
The following embedded file types each refer to a specific method of embedding documents in Microsoft Office file types. Clearing an embedded file type option prevents its extraction from supported document types.
- Excel Documents - When selected, the system extracts OLE embedded objects associated with the Microsoft Excel application.
- Word Documents - When selected, the system extracts OLE embedded objects associated with the Microsoft Word application.
- PowerPoint Documents - When selected, the system extracts OLE embedded objects associated with the Microsoft PowerPoint application.
- E-mail File Attachments (Outlook.FileAttach) - When selected, the system extracts Outlook message objects from other Microsoft Office document formats that were embedded through the Outlook.FileAttach method.
- Visio Drawings - When selected, the system extracts OLE embedded objects associated with the Microsoft Visio application.
- Package-Embedded Documents - When selected, the system extracts files that were added to a Word document or an Excel spreadsheet. The actual documents being extracted are those documents embedded through the packager. The packager is a Microsoft Windows OS utility that allows the packages to be created for future integration into the file.
- Acrobat Documents - When selected, the system extracts objects embedded with the AcroExch object type.
- E-mail Message Attachments (MailMsgAtt) - When selected, the system extracts Outlook message objects from other Microsoft Office document formats that were embedded through the MailMsgAtt method.
- E-mail File Attachments (MailFileAtt) - When selected, the system extracts Outlook message objects from other Microsoft Office document formats that were embedded through the MailFileAtt method.
-
Images - This option was added to disable (check box cleared) or enable (check box selected) extraction of embedded image items for Microsoft Office embedded files (Excel, Word, PowerPoint, etc.).
Note: To maintain backward compatibility of existing jobs, the Images option check box will be selected if the option is not found in the SETTINGS.INI file.
Discovery: Indexing Options
Click the Indexing Options tab to set the indexing options for Discovery Jobs.
-
If you want to create an index during initial discovery, select the Create Search Index check box.
IMPORTANT: THIS OPTION MUST REMAIN SELECTED FOR MULTI-LANGUAGE DOCUMENT DETECTION.
-
Under Search Indexing, set the Search Indexing options. eCapture uses dtSearch to provide full text searching of files before processing. This feature provides advanced search functions including fuzzy searching, synonym searching, and more. Search options are available in the Flex Processor Rules Manager.
To facilitate the searching that will take place during an electronic data discovery (EDD) session, establish the method for searching unsupported files and the treatment of hyphens during searches.
- Index Numbers - Select this option if you want to be able to search for numbers.
- Recognize Dates, e-mail address, and credit card numbers - Select this option to search for dates (in any format), email addresses (or parts of email addresses), and credit card numbers.
- Auto Break CJK Words - Select this option when indexing documents containing CJK (Chinese, Japanese, Korean) languages. It breaks up the CJK words as if each character is a CJK word.
- Use filtering to index corrupt or encrypted documents - When selected, this option applies the filtering algorithm to attempt to recover text from corrupt or encrypted documents. If this option is not selected, corrupt or encrypted documents will be considered indexing failures.
- Index Discovery Path - When selected, the Discovery path will be searched. Otherwise, if not selected, searching the Discovery path would create false-positive hits.
-
Set the options that control how eCapture processes Binary files. For more information about dtSearch and the files it recognizes, click
here.dtSearch recognizes and supports many types of files, including word processor, email, and PDF files (see http://support.dtsearch.com/faq/dts0103.htm for a list of file types that dtSearch recognizes and supports). Non-text files that are in formats that dtSearch does not support are indexed and searched as binary files. Examples of binary files are executables, fragments of documents that were recovered from an undelete process, or blocks of data recovered forensically. Because an individual file can include plain text, Unicode text, and fragments from, for example, DOC or XLS files, much of the content would be missed if the files were indexed and searched as if they were simple text files.
- Filter Binary Unicode - Use a text selection algorithm to filter text from binary files. The algorithm scans for sequences of single-byte, UTF8, or Unicode in the file. This option is recommended for forensic searches, especially when files may contain text in languages other than English.
- Filter Binary - Extract plain text items from the binary files.
- Index Binary - Index all of the contents of binary files as single-byte text.
- Skip Binary - Do not index binary files.
-
Set the options that control how hyphens are treated during an EDD search.
- Hyphens as spaces - Treats hyphens found in the files as spaces. For example, a search for “first-class” will match incidences of “first class” in the files being searched.
- Hyphens as searchable - Searches hyphens. For example, a search for “first-class” will match only incidences of “first-class” in the files being searched.
- Ignore Hyphens - Ignores hyphens entered in the search criteria. For example, a search for “first-class” will match incidences of “firstclass” in the files being searched.
-
Index all three ways - Indexes terms containing hyphens using all three hyphen options (i.e. "First-class " will be indexed as "First-Class" "FirstClass", and "First Class").
For more information on hyphens and how they are treated during an EDD search, see the dtSearch documentation here.
-
Set the Parent/child text handling options. These options are used to specify how text of parent and child documents should be handled during indexing and are specific to emails (IBM [formerly Lotus] Notes and Outlook) and any edocs (non-emails) that contain embedded documents.
- Index child text with parent text - Merges and indexes the text of a child document with that of its parent.
- Separate child and parent text - Indexes the text of a child document separately from its parent. The following string is added as an include filter: *.MSG *.MSG>*.body *.EML *.EML>*.body. This occurs while indexing. Two documents are produced in the index for .EML and .MSG files: one is for the body and the other is for the email (headers...). Any attachments are not included in that index.
-
Set the OCR settings. There are some important considerations about how OCR takes place. Click
here for more information.
Note: If you are setting Case (Project) Level options, OCR and Time Zone Handling options are defined on the Common Options tab because Discovery and Data Extract jobs use the same OCR and Time Zone Handling options. For more information about setting options at the Case (Project) level, see Create a New Case (Project).
- Data sets are OCRed only once during indexing or data extraction and the OCR output is stored in a common folder location at the Project level. This ensures that results during search and review remain the same. By not repeating OCR work on the same data sets, speed is improved and time is saved.
- All OCR options are cleared by default for new Projects.
- By setting OCR options at the Project level, it is not necessary to set them individually for each Job type because they are now located on the Common Options tab.
- The OCR options apply to all Job types except for a specific OCR option, OCR Pages Missing Text, which applies to Processing Jobs only.
- For Data Extract, an item uses the existing OCR output as its own output when the following conditions are met:
-
OCR is enabled
-
The PDF page character threshold and Minimum OCR Confidence Level are the same as when the OCR was first performed.
If the PDF page character threshold or the Minimum OCR Confidence options are higher than when the OCR was first performed, the document will be re-OCRed to allow more characters in the embedded text of the PDF or to produce a higher quality of OCR, respectively.
The OCR Settings available for Discovery Jobs are outlined in the following table.
Option
Description
OCR images as necessary
Images will be OCRed for indexing/language identification if necessary. The OCR text obtained from the image is then passed on to dtSearch for indexing. The OCR will be indexed and available to be searched on in the Flex Processor.
OCR PDF documents
PDFs with no embedded text: perform OCR before indexing or language identification. PDF pages with embedded text (text-behind) will have text extracted. Comments on a PDF file are also extracted.
-
The OCR text is added to any extracted text from the PDF.
-
The text obtained through OCR, along with the extracted text from the PDF, is passed to dtSearch for indexing.
-
The OCR is then indexed and available to be searched in the Flex Processor.
Note: If selected, this will impact the time for the Discovery process. OCR Text obtained through OCR could contain duplicate words as appended to the extracted text file. Search hits could be inflated by these results.
OCR PowerPoint Documents
Perform OCR on Microsoft PowerPoint files during indexing to get text from embedded content in the slides. This results in slower indexing speeds for PowerPoint files, but more accurate search results.
PDF page character threshold
Optional: Select PDF page character threshold and indicate a value. The default value is 25 characters. The maximum value is 10000. If the value is less than 25, eCapture sends the page to be OCRed; otherwise, the text is just indexed. If necessary, enter a different value.
Minimum average OCR confidence [1-100]
The level range settings are from 1 to 100. The default is 50. The confidence level is the average percentage of confidence for each document for all pages within a document on which OCR was performed. Success or failure of a document for indexing preparation is based on the average confidence level of the document. If the average confidence level is below the selected threshold, the page is considered as an indexing error and is available for re-queueing. The Discovery Job Status Information Panel displays OCR Applied[Errors], where Applied shows the number of documents that required OCR (not OCRed) and where [Errors] shows the number of those documents that did not meet the specified average confidence level.
Note: For calculating average document confidence, pages in PDF docs with text behind them are considered 100%. OCR failures are considered 0%.
Use OCR Workers
Optional: Select to enable the OCR Worker Task Table drop-down list and select a task table. If a custom task table is selected, Enterprise OCR tasks are sent to those Workers assigned to the selected task table. See Assign Task Tables to Workers and Assign IPRO (Cloud) Workers for additional information.
OCR Languages
eCapture includes multi-language OCR capability. The QC document will contain the original OCR languages that were selected for the Discovery Job. A valid multi-language OCR license must be available in order to modify the original selected languages, if necessary.
To reserve a portion of the multi-language OCR licenses for QC and to keep the Worker from consuming all available licenses, use the Multi-Language OCR License slider located in the Controller System Options dialog box.
Click OCR Languages to display the Language OCR dialog box.
After selecting the languages, click OK to close the dialog box. The selected languages display in the OCR Languages field. Place the mouse pointer on the OCR Languages field to display a tool tip that lists all the selected languages that were not visible in the OCR Languages field. The OCR Languages field is a read-only field.
Click
here to view a list of supported languages.-
English
-
Arabic
-
Chinese Simplified
-
Chinese Traditional
-
Japanese
-
Korean
-
Afrikaans
-
Albanian
-
Basque
-
Belarusian
-
Bulgarian
-
Catalan
-
Croatian
-
Czech
-
Danish
-
Dutch
-
Estonian
-
Faorese
-
Finnish
-
French
-
Galician
-
German
-
Greek
-
Hungarian
-
Icelandic
-
Indonesian
-
Italian
-
Latvian
-
Lithuanian
-
Macedonian
-
Norwegian
-
Polish
-
Portuguese
-
Portuguese Brazil
-
Romanian
-
Russian
-
Serbian
-
Serbian Cyrillic
-
Slovak
-
Slovenian
-
Spanish
-
Swedish
-
Turkish
-
Ukrainian
Click here to view some
caveats to OCR Language handling.English is the only language that is selected by default. The more languages that are selected; the lower the confidence level will be for correctly identifying the languages in a document.
-
If English is selected, Arabic will not be available for selection.
-
If Arabic is selected, all other languages will not be available for selection.
-
If one of the CJK (Chinese, Japanese, Korean) languages are selected, then all remaining CJK languages will not be available for selection. Other languages (excluding Arabic) may be selected.
-
If Chinese Simplified is selected, Chinese Traditional, Japanese, and Korean will not be available for selection.
-
If Chinese Traditional is selected, Chinese Simplified, Japanese, and Korean will not be available for selection.
-
If Japanese is selected, Chinese Simplified, Chinese Traditional, and Korean will not be available for selection.
-
If Korean is selected, Chinese Simplified, Chinese Traditional, and Japanese will not be available for selection.
-
If you selected Create Search Index and want to select an index location other than the default, click
 , next to the Index Location field. The User-Specified Index Path Information dialog box displays and contains additional
information about user-specified index paths. This option is useful
if you want to place the load of indexing on an alternate file server
that is not handling other eCapture activities.
, next to the Index Location field. The User-Specified Index Path Information dialog box displays and contains additional
information about user-specified index paths. This option is useful
if you want to place the load of indexing on an alternate file server
that is not handling other eCapture activities. - Click OK to close the User-Specified Index Path Information dialog box. The Directory Browser dialog box appears.
- Navigate to the index location and click OK.
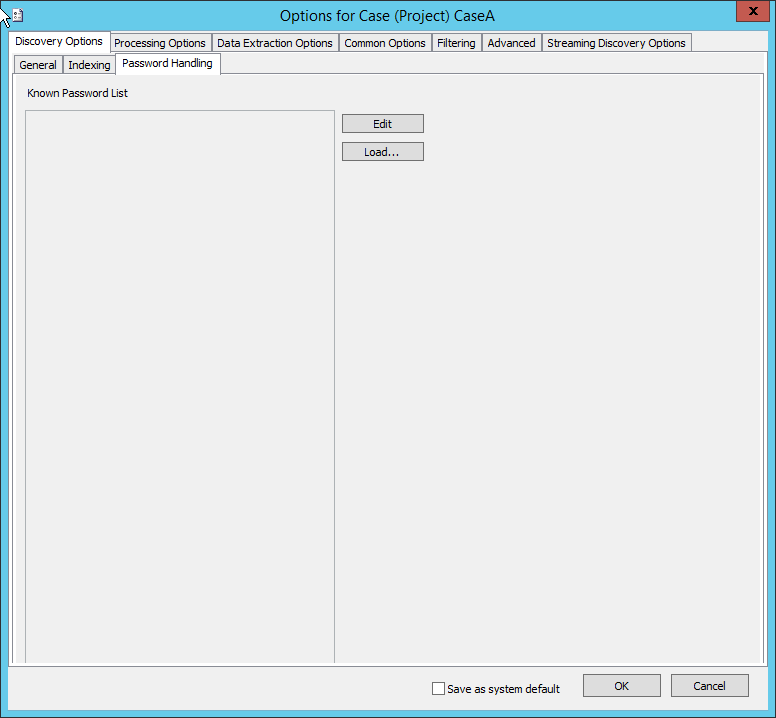
Password Handling
Click the Password Handling Options tab to set Password handling options for the case. This tab allows you to add a list of passwords to the case, to unlock password-protected documents encountered while processing jobs, or reviewing documents in the QC application. A password-protected document is defined as a document in which a prompt asks for a password on attempting to open the document in its native application. Otherwise, if the document can be opened and viewed in its native application, the document is not considered password protected. The "Password Applied" flag, found in QC, is checked when the correct password is applied to a protected document.
To add individual passwords:
-
Click Edit.
-
Enter a password (one password on each line - do not include delimiters) and press Enter to go to the next line. Repeat this step for each password that must be added to the list.
-
When finished, click Done.
To load a pre-defined list of passwords:
-
Click Load. The Open dialog box appears.
-
Navigate to the password list.
-
Click Open. The password lists loads.
-

|
|
Note: You may still create traditional eCapture Discovery Jobs within the same Custodian as an Enterprise Streaming Discovery Job. However, these Jobs do not interact with each other; for eaxample, you cannot de-duplicate against these Jobs or do cross de-duplication. They are independent of each other. |
Related Topics