|
|
Important: You are reviewing the Ipro for desktop 3.0 Help. To view the latest release of Ipro for desktop Help, click here. |

Workflow: Review a Case
Applies To: Ipro for desktop
In this Article
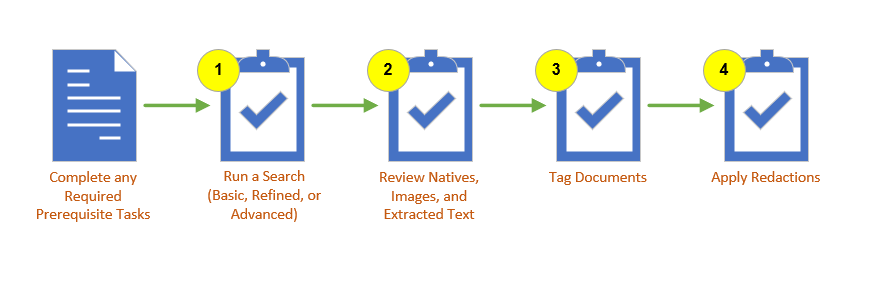
2. Review Natives/Images/Extracted Text
In the Review module, reviewers analyze the documents that belong to the case. Reviewing a case is an iterative process and the review tasks and the order that the review tasks are completed depends of the needs of your business. The procedures described in this article explain only some of the many tasks you can complete in Review, and offer a possible workflow for completing these tasks.
Review the Prerequisites
The following table shows the prerequisites that must be in place before you start:
|
Task |
Notes |
|---|---|
|
Assign Privileges |
Make sure all users have the proper privileges assigned to them before reviewing a case. Privileges determine what activities users are allowed to undertake in Review. |
|
Native Files |
If the Quick View display of a native file does not meet your needs, you may be able to open the native file in the native application. This requires that you have the needed privilege and also the native application installed on your machine. |
|
Tags and Coding Forms |
To tag documents and make use of coding forms, both need to already have been defined in your case. You can create new tags and coding forms when you create a case in the Case Management module, or you can add them to an existing case in Administration. |
 1. Run a Search
There are three types of searches you can run in Review: a basic search, a refined search, and an advanced search. Below are instructions for completing each procedure. For more information on running searches, see Overview: Search.
Run a Basic Search
A basic search is conducted from the main search bar. To run a basic search for case records and/or transcripts:
-
On the Dashboard, click the Review module.

-
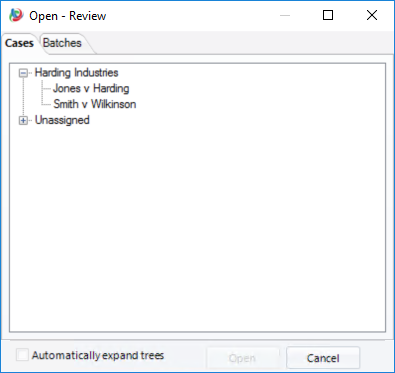
Select a Client and Case and click Open.
-
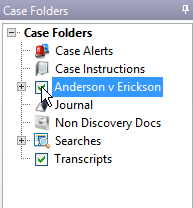
To search case data (documents), ensure that the case option is selected in the Case Folders tab.

-
To include transcript content in the search, make sure transcripts are selected in the Case Folders tab.
-
In the Search bar, enter your search expression using applicable syntax. Notes:
-
For a simple full-text search, enter a word or phrase of interest.
-
For transcript searches, wildcards and options such as stemming or fuzzy searches can be included.
This type of “quick” search will search for the word(s) in all database fields, extracted text, and/or transcripts.
-
-
Press Enter or click
 . Depending on case size and search complexity,
a progress indicator may display. When the search is complete, results
appear in a new Search Results
tab in the documents pane.
. Depending on case size and search complexity,
a progress indicator may display. When the search is complete, results
appear in a new Search Results
tab in the documents pane. -
Evaluate search results. Note:
-
Each search of case documents creates a new Search Results tab.
-
Search matches ("hits") are highlighted as explained in Where Search Results Appear.
-
-
Optional: for case document searches, refine search results as explained in the next procedure.

TIP: If a search takes more time than you expect and needs to be stopped, click the Cancel button on the progress bar. Review will stop the search.
Refine Tab Contents
To refine the contents of a Search Results tab (or a Private or Smart Folder tab), complete the following steps:
-
On the Dashboard, click the Review module.
-
Select a Client and Case and click Open.
-
Run a basic search using the main search bar, as explained in Run a Basic Search.
- Click the Search Results (or folder) tab you want to search.
-
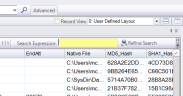
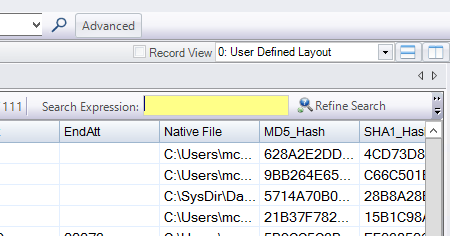
In the Search Expressions field in the tab, enter your search expression using the syntax listed in Full-text Search Options.
-
Click the Refine Search button. Results display in a new Search Results tab.
Run an Advanced Search
The Advanced Search feature lets you use the Advanced Search dialog box to construct a search:
-
On the Dashboard, click the Review module.
-
Select a Client and Case and click Open.
-
To search case documents, ensure that the case option is selected in the Case Folders tab.
-
On the main search bar, click Advanced.
-
In the Advanced Search dialog box, select the needed search from the Type of Search list. See Use Advanced Search for more information on the various components of the dialog box.
-
Complete the options area specific to the type of search selected. For details on the options available for each type of search, see Advanced Search Options.
-
If you do not need to include additional search criteria, ensure that the Search Connector field is blank and skip to step 9. Otherwise, continue with the next step.
-
Search Connectors: Select the connector (AND, OR, or NOT) that will connect the currently defined search statement with the next one. For the final search statement to be added, select the blank line. See Full-text Search Options for more information on using search connectors to narrow down your search.
-
Press the Enter key or click Add Search Criteria.
-
Repeat the previous steps to add all search statements to be included in the search expression.
-
If desired, select the Include Entire Family option. This option includes documents related to those matching your search criteria in the search results.
-
When finished, review the Query Builder field. If needed, make changes as explained in Change an Advanced Search.
-
Save or execute the search:
-
To save the search, click Save and complete the Save Search dialog box.
-
To execute the search, click Search. Depending on case size and search complexity, a progress indicator may display. When the search is complete, results appear in a new Search Results tab in the Case Folders pane. Expand the Search Results tab by selecting the plus icon
 .
. -
If a search takes more time than you expected and needs to be stopped, click the Cancel button on the progress bar. Review will stop the search.
-
-
View results in the Search Results, Image, Quick View, or Extracted Text tabs, the Transcript Viewer, and/or the Record View. For details, see Where Search Results Appear.
2. Review Natives/Images/Extracted Text
In the Document Details Pane you can review native documents, annotate images, and work with extracted text. Below are instructions for completing various procedures related to these tasks.
Review Natives in Quick View
View a File in Quick View
To view the contents of the Quick View tab:
-
On the Dashboard, click the Review module.
-
Select a Client and Case and click Open.
-
For a selected record, click the Quick View tab. By default, if a native file exists, it will display.
-
To view native files:
-
Use the scroll bars to view all content.
-
Double-click in the native file.
-
If the Quick View display of the native file does not meet your needs, you may be able to open the native file in the native application. This requires that you have the needed privilege and also the native application.
-
Create Image File (TIFF on the Fly)
If you have the privileges to do so and an image file for the record does not already exist (unless through a previous TIFF on the Fly action), create the file as follows:
-
On the Dashboard, click the Review module.
-
Select a Client and Case and click Open.
- For a selected record, click the Quick View tab.
-
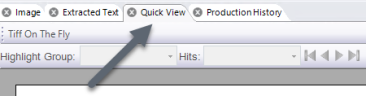
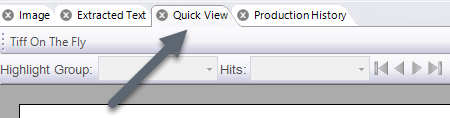
In the Quick View tab toolbar, click Tiff On The Fly. (This button will be active only if an image file is not already defined for the record.)

-
If you are re-TIFFing the image, ensure the correct record has been selected and click Yes in response to the confirmation message.
-
In the Tiff On The Fly dialog box, select one of the following options:
-
Convert to Black/White for a black and white TIFF image.
-
Convert to Color for a color PNG image.
-
-
Click the Image tab to view the newly created image.

After the file is created, image files are created and placed in a subdirectory in the Images folder in the case data directory. The image file is named to match the name of the native file. If the file has multiple pages, pages 2+ include a suffix, as in -0002, -0003, etc.
Email a Native File
To email a native file:
-
On the Dashboard, click the Review module.
-
Select a Client and Case and click Open.
-
For a selected record, click the Quick View tab.
- On the Quick View toolbar,
click
 and complete the Email Native File dialog
box as described in the following steps.
and complete the Email Native File dialog
box as described in the following steps. -
Email Service: Choose one of the following methods for sending the email:
-
Outlook: Choose this option if you use Microsoft Outlook for your email.
-
SMTPServer: Choose this option to send the email using another mail service. Enter the complete SMTP Server name.

NOTE: To use the SMTP option, an SMTP email server must be installed and configured. If you have questions about using this option, contact your IT department.
-
-
Email Body: Complete these fields as necessary:
-
To: Enter the recipient’s email address. Separate multiple addresses with a semicolon and space, as in: jsmith@yourco.com;
-
From: If sending by Outlook, this field automatically contains your default Outlook account (can be changed in this step if needed). If sending by SMTP, enter the needed email address.
-
Subject: By default, the subject contains basic details about what is being sent. Change the subject if desired.
-
Body: By default, the body will include client, case, and document details. Change the body if desired.

TIPS: To efficiently compose a long email:
-
If sending by Outlook, compose the body in the Outlook message.
-
If sending by SMTP, compose the email in a text editor and then paste it in the Body field.
-
Use common navigation keys to move throughout the text (arrow keys, etc.).
-
Line breaks are not recognized in emails sent by SMTP.
-
-
-
When selections and entries are complete, click Send. Note:
-
If sending by SMTP, the email will automatically be sent.
-
If sending by Outlook, go to the next step.
-
-
Outlook only: after clicking Send in Review, an Outlook message will be created. Review/revise the message if needed; when it is ready, click Send.
Review an Image
Add a Line or Shape (Mark-up)
If you have the privileges to do so, add a line or shape to an image as follows:
-
On the Dashboard, click the Review module.
-
Select a Client and Case and click Open.
-
For a selected record, in the Image tab, locate the area where you want to draw a line.
-
If desired, choose a line color and width. To do so, on the Image tab toolbar, click the down arrow next to the Mark-up button,
 ,
then:
,
then:-
Choose a color from the available options.
-
Click the Line Width button to open the Line Width list and select a desired width.
-
-
If you skipped step 2, click
.
In the image area, the mouse pointer changes to  .
. -
In the image area, left click with the mouse and drag in the needed direction to create a line or draw a shape (such as a circle). When finished, release the mouse button.
-
Repeat this procedure to draw other lines.
-
When finished, click the Pointer,
 , or another button
to stop the mark-up activity.
, or another button
to stop the mark-up activity.
Add Highlight
If you have the privileges to do so, add highlighting to an image as follows:
-
On the Dashboard, click the Review module.
-
Select a Client and Case and click Open.
-
For a selected record, in the Image tab, locate the text or other content to be highlighted.
-
If desired, choose highlight color. To do so, on the Image tab toolbar, click the down arrow next to the Highlight button,
 ,
then choose one of the available
colors.
,
then choose one of the available
colors. -
If you skipped step 2, click
.
In the image area, the mouse pointer changes to  .
. -
In the image area, click and drag across the content to be highlighted. When finished, release the mouse button.
-
Repeat this procedure to highlight other content.
-
When finished, click the Pointer,
,
or another button, to stop the highlight activity.
If needed, modify the highlighting as explained in Add or Edit Annotations on the Image Tab.
Add Embedded text
If you have the privileges to do so, add visible text to an image as follows:
-
For a selected record, in the Image tab, locate the area where you want to add the text.
-
In the Image tab toolbar, click
 . The mouse pointer changes to
.
. The mouse pointer changes to
. -
In the image area, click and drag in the area where you want the text to reside. Drag to the desired width and height.
-
In the Embedded Text dialog box, enter the needed message. You may enter a maximum of approximately 500 characters (including spaces).
-
As needed, modify the text characteristics:
-
Click the Font button to select a different font and font characteristics, including font size, style, effect, and script (language category), then click OK in the Font dialog box.
-
Click the Color button to select a different font color, then click OK in the Color dialog box.
-
-
Click OK.
-
Repeat this procedure to add other text notes.
-
When finished, click the Pointer,
, or another button to stop
adding embedded text.
|
|
NOTE: The text box may expand vertically to accommodate the text you entered. If it does not expand sufficiently, an ellipsis (...) will indicate that more text exists. This text can be viewed by double-clicking the text. (Or, you can change the size of the text box.) |
If needed, modify embedded text as explained in Add or Edit Annotations on the Image Tab.
Add a Sticky Note
If you have the privileges to do so, add a sticky note to an image as follows:
-
For a selected record, in the Image tab, locate the area where you want to add the sticky note.
-
In the Image tab toolbar, click
 . The mouse pointer changes to
 .
. -
In the image area, click and drag in the area where you want the text to reside. Create a small rectangle (size is not important), then release the mouse button.
-
Click in the Sticky Note dialog box and enter the needed message. You may enter a maximum of approximately 500 characters (including spaces). The note must include text (an "empty" sticky note is not allowed).
-
Click OK.
-
Repeat this procedure to add other sticky notes.
-
When finished, click the Pointer,
,
or another button to stop adding sticky notes.
If needed, modify sticky notes as explained in Add or Edit Annotations on the Image Tab.
Review Extracted Text
View Extracted Text
To view extracted text:
-
On the Dashboard, click the Review module.
-
Select a Client and Case and click Open.
- On the Case View tab, for a selected record, click the Extracted Text tab.
-
Examine the tab contents. As needed, scroll to view all content on the tab.
-
If you need to see more than the block size allows, either click Load All Text to see all content for the selected record, or change the block size as described in the following procedure.
Define Block Size
To change the block size for the Extracted Text tab:
-
On the Dashboard, click the Review module.
-
Select a Client and Case and click Open.
- On the Case View tab, for a selected record, click the Extracted Text tab.
-
Click
 on the far-right side of the tab toolbar.
 -
In the resulting dialog box, enter the needed block size in bytes, up to 500 MB (500000000 bytes). For example, enter 10000000 for a 10-MB block size. Or, to display all text (regardless of size), enter 0 (zero).
-
Click OK. This is a user-specific setting for the case.
Copy Extracted Text
If you have the privilege to view extracted text, you can copy it from the Extracted Text tab. To do so:
-
On the Dashboard, click the Review module.
-
Select a Client and Case and click Open.
- On the Case View tab, for a selected record, click the Extracted Text tab.
-
Select the content to be copied. To select part of it, click and drag across the content you want to copy. When the content is selected, release the mouse button.
-
Press CTRL+C.
-
Open a file that is appropriate to accept text (for example, a Microsoft® Notepad or Word file).
-
Paste the copied text into the file (for example, by pressing CTRL+V).
|
|
TIP: To select content, you can also double-click a word, triple-click or press CTRL+A to select all content, or click at the beginning of a portion of the text, then Shift+click at the end. |
Print Extracted Text
To print one or more pages of extracted text:
-
On the Dashboard, click the Review module.
-
Select a Client and Case and click Open.
- On the Case View tab, for a selected record, click the Extracted Text tab.
-
Optional: Right-click in the extracted text and select View > Preview to see individual pages and identify the page or page range to be printed. Page numbers display in the top-right corner of the window as you scroll.

-
Right-click and select Print.
-
In the Print dialog box, click Options to define various options as needed, such as the default font for the text body and header details. Click More for additional options.
-
In the Print dialog box, click Setup to select the printer and define printer-specific options and properties. Options will vary depending on the selected printer.
-
Complete the base Print dialog box by selecting the page range, print quality, and number of copies.
-
When all selections are complete, click OK to print extracted text file.

When finished, click OK in the Print Options dialog box.
When finished, click OK in the Print Setup dialog box.
3. Tag Documents
|
|
TIPS: When applying tags, note the following:
|
If you have the privileges needed to do so, use the following procedure for simple document or page tagging:
-
On the Dashboard, click the Review module.
-
Select a Client and Case and click Open.
-
Make sure the correct coding form is selected in the documents pane toolbar.
-
Review documents according to your case instructions.
-
Select the needed tag palette, Doc Tags or Page Tags.
-
In the Case View or related tab, click the record of the document to be tagged (or have a tag removed). For document tags, use Shift+click or CTRL+click to select a contiguous or noncontiguous set of records, respectively.
-
To apply a tag to one of the document’s pages, select the needed page in the Image tab page list.
-
Continue with one of the following steps:
-
Shortcut keys: to use keyboard shortcuts to apply tags, go to step 9.
-
Tag palettes: to use the Doc Tags or Page Tags tabs, go to step 10.
-
Override: to override how related documents will be tagged, skip to step 11.
-
-
To apply tags by using keyboard shortcuts that your administrator has configured, complete these steps:
-
Press the key combination defined by your administrator to apply (or remove) the needed tag. Key combinations include the CTRL or ALT key plus a letter or number; they are shown on the Doc and Page Tags tabs.
NOTE: If the tag has not been applied, it will be. If it was previously applied, it will be removed. All rules defined for the tag group will be enforced.
-
Continue with step 10 and/or 11.
-
-
To apply tags by using the tag palette, complete these steps:
-
In the Doc Tags or Page Tags tab, click the check box,
 , for a tag to be applied
(or click
, for a tag to be applied
(or click  to remove an applied tag). All
rules defined for the tag group will be enforced.
to remove an applied tag). All
rules defined for the tag group will be enforced. -
Go to step 11.
-
-
To override a tag group’s Tag Entire Family rule configuration, complete the following steps. See Tags and Related Documentsif needed.
-
Right-click a tag in the tag group of interest and select the needed command:
-
Tag > Apply to Current Document > Override Relationship Rules
-
Tag > Remove from Current Document > Override Relationship Rules
-
-
In the resulting dialog box, select or clear the Tag Family option as needed and click OK.
-
-
If multiple documents are selected and/or the Tag Family rule is in effect, a message may appear, similar to the following:
-
If you apply a tag that conflicts with a rule set for the tag group, a “tag conflict” message may appear. If it does, see Resolve Tag Conflicts.
-
Repeat this procedure for all documents or pages that you need to review and tag.
|
|
NOTE: Coding form rules for tagging may be defined. If a coding form rule is violated, a message will display; refer to case instructions or contact your administrator if needed. |
Make sure document(s) are selected after the needed tag palette has been selected.
NOTE: Single-page documents can be tagged differently at the document and page level. Make sure you apply tags as intended, particularly for single-page documents.
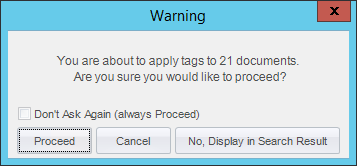
See Set Tagging Options for details on this message and selecting a response.
4. Apply Redactions
If you have the privileges to do so, redact information in an image as follows:
-
On the Dashboard, click the Review module.
-
Select a Client and Case and click Open.
-
In the Image tab, locate the information to be redacted.
-
By default, redactions are solid. If a cross-hatch or outline redaction style is needed, click the down arrow next to the Redaction button,
 , and select the needed style. This style applies
to all redactions applied (on all pages) and it can be changed after
redactions have been applied.
, and select the needed style. This style applies
to all redactions applied (on all pages) and it can be changed after
redactions have been applied. -
On the Image tab toolbar, click the Redaction button.
-
Drag across the text or image area that is to be redacted. The selected area is highlighted with a dotted line, as shown in the following figure.
-
When the selection is complete, release the mouse button. Note that redaction labels resize to fit the size of the redaction.
-
In the Select Redaction Category dialog box, select the type of redaction to be applied from the list. If you have any question about the categories, refer to your case instructions or contact your administrator.
-
Click OK. A solid redaction is added along with the category label selected.
-
Repeat these steps to apply other redactions.
-
When finished, click the Pointer,
, or another button to stop
the redaction activity.

Version: 2019.3.0
Last Modified: December 2, 2019