|
|
Important: You are reviewing the Ipro for desktop 3.0 Help. To view the latest release of Ipro for desktop Help, click here. |

Workflow: Scan Documents into a Case
Applies to: Ipro for desktop
In this article
1. Define and Run a New Scan Session
3. Initial Quality Check and Image Correction
4: Perform Statistical Quality Check
5. Complete the Scanning Session
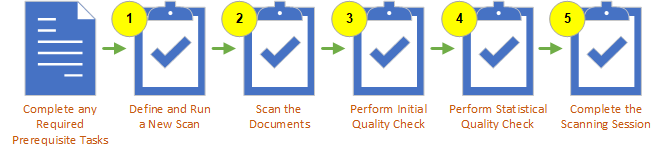
This topic provides an overview of the basic procedures for scanning items into a case. The following illustration shows the basic workflow for scanning documents into a case. The numbers correspond to the procedures later in this topic. You can click on the numbered steps in the image to jump to a specific task in the workflow.
 Review the Prerequisites
Before you begin, ensure that you are prepared by completing the prerequisite tasks before completing the tasks outlined in this process.
|
Task |
Notes |
Links |
|---|---|---|
|
Check Privileges |
Ensure that you user profile has all necessary case administrator privileges to access various Administration tasks |
|
|
Prepare to Scan |
Before scanning any documents, complete preparation referenced in the overview topic. |
|
|
Create a Case |
The case should be created and assigned to the appropriate Client. |
|
|
Check for Scanner (Optional) |
If you need to scan images into the case, make sure that the Processing module can properly access your scanner. |
|
|
Locate Load Files and Document Folders |
Make sure that all necessary documents, case data, and load files are properly formatted and easy to locate. |
1. Define and Run a New Scan Session
To define a scan session, complete the following steps:
-
On the Dashboard, click the Processing module:

-
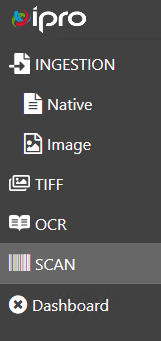
In the left navigation panel, click the Scan tab.
-
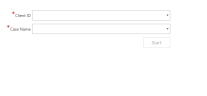
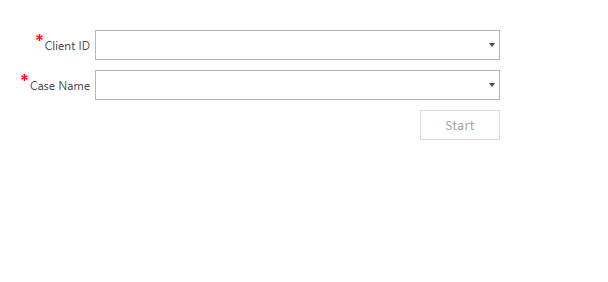
The Scan page displays. Select a Client ID and Case Name from the drop-down menus.
-
Click the Start button. This opens the Scan Session dialog box, where all scanning functionality occurs.
-
In the Open Scan Session dialog box, select an existing scan session and click Open. Alternatively, you can create a new session by clicking New on the bottom left corner of the dialog box. Enter the session description (name) or accept the default name, which includes the Ipro for desktop user name with the current date and time. Click Create.
-
Define the scan session as explained in Basic Scanning Options .
-
Continue on with 2. Scan the Documents.

2. Scan the Documents
After the scanning options are set, continue with the following steps in the Ipro for desktop Processing module:
-
Load the document set (including prep sheets if they are being used) into the scanner.
-
Next Key: Note the Next Key value in the toolbar at the top of the window. By default, this is the number following the last image key (BEGDOC) in the case.
-
If the number is acceptable, go to step 3.
-
To change the starting image key for the current scan session, click in the Next Key field and enter the needed number.
-
-
Boundary: If you are using prep sheets, skip to step 4. If not using prep sheets, select the boundary for the very first page of the document set:
-
Parent: The first page in the document set will be treated as a parent (new document). This is the typical setting.
-
Child: The first document will be treated as an attachment to the last document in the case (or to the preceding document in the case, based on the Next Key selected).
-
Page: The first page in the document set will be considered to be a new page for the last document in the case (or to the preceding document in the case, based on the Next Key selected).
-
-
Use Doc/Page format for next generated key: Select this option to add a suffix to the current image key for the next image key, such as “ABC-00039.002” (instead of using a new image key such as “ABC-00040”).
-
Review all settings; when satisfied, click the Scan button,
 . Pages are scanned
into a folder in the Ipro for desktop system directory and listed in the
Scanning module.
. Pages are scanned
into a folder in the Ipro for desktop system directory and listed in the
Scanning module. -
If you are scanning multiple document sets, repeat these steps for all documents to be scanned during this session.
-
When finished, continue on with 3. Initial Quality Check and Image Correction

|
NOTE:
Do not click the Refresh
button, |
 , until after documents have been scanned
and added to your case. Otherwise, the Next Key will change back to reflect
the current case number.
, until after documents have been scanned
and added to your case. Otherwise, the Next Key will change back to reflect
the current case number. 3. Initial Quality Check and Image Correction
After all pages have been scanned, it is highly recommended
that you compare the scanned images to the originals and make corrections
as described in the following steps. These steps are performed in the
list of scanned images and in Image
and OCR tabs of the Scanning module,
shown in the ![]() this
figure.
this
figure.
The order of the following procedures is one possible sequence of actions; you may prefer to do things in a different order.
|
|
NOTE: Once documents have been scanned, you can exit the scan session and return to it later. The scanned documents and any work you have performed will be saved under the name given to the session in 1. Define and Run a New Scan Session. |
-
To exit the scan session, click Exit in the scanning window’s left pane, Save/Close Scan Session section.
-
To return to the session, navigate back to the standalone Scanning module as explained in Navigate to the Scanning Dialog.
-
In the Open Scan Session dialog box, which displays automatically when you enter the Scanning module, select the needed scan session and click Open.
Quality check activities
Review the Scanned Documents List
-
Boundary changes
-
Missing OCR
-
Renumber images
-
Missing images
-
Repair corrupt scan database
Checking/Correcting Scanned Images
-
Examine images
-
Scanning errors
-
B/W image cleanup
-
Unneeded images
4: Perform Statistical Quality Check
“Statistical quality control” refers to the use of statistical methods to monitor and maintain the quality of a set of items. Ipro for desktop uses these methods to define a random set of images in your scan session to be checked.
NOTE: To perform a statistical quality check, you must have the “Commit Scanned Documents to Case” privilege.
To perform a statistical quality check:
-
On the Dashboard, click the Processing module:
-
In the left navigation panel, click the Scan tab.
-
In the Open Scan Session dialog box, select the needed scan session and click Open.
-
In the Save/Close Session section on the left pane in the scanning window, click Perform Statistical QC.
-
In the Statistical QC dialog box, select the number of images to be chosen for review as described in the following table. Each percentage is a confidence level, which represents how likely it is that the random sample returned will be representative of all of the images in the scan session. (If you would like to know more about statistical QC, random sampling, or confidence levels, a number of public resources exist. Please consult those resources.)
-
95%: 20 images will be randomly selected for review.
-
98%: 50 images will be randomly selected for review.
-
99%: 100 images will be randomly selected for review
-
Custom: Select this option and enter the number of images you want to review. They will be randomly selected from the scan session.
-
-
Click OK. The first sample image will be selected in the scanned documents list.
-
Review the image. When finished, go to the next image in the sample by clicking
 in the navigation bar. Use this toolbar to navigate the images in
the sample:
in the navigation bar. Use this toolbar to navigate the images in
the sample: -
When you are finished reviewing the sample images, click Exit Statistical QC in the left pane of the scanning window and continue with the following procedure.

|
|
NOTE: If problems are found in the sample images, determine a correction plan. It is recommended that you re-check the scan session after corrections are made. |
5. Complete the Scanning Session
After all needed documents have been scanned, checked, and corrected, add them to the case as follows.
NOTE: To add scanned documents to a case, you must have the “Commit Scanned Documents to Case” privilege.
-
In the Save/Close Session section on the left pane in the scanning window, click Save Scanned Items to Case. The Commit Batch dialog box appears.
-
Complete the
Commit
Batch dialog box to define how documents in the
scan session will be added to the case. Details are presented in the
paragraphs following this procedure:
-
Processing Options
-
Indexing Options for OCR
-
Review Options
-
-
When all options are selected, click Start. Wait as the documents are incorporated into your case.
-
When the process is completed, a success message asks whether you want to delete the scan session.
-
Click Yes to remove the session or No to keep it.
-
Inform users about the results of the scan session (documents added or updated) and provide needed instructions.
Processing Options
-
Create New Documents Only: Add new documents to the case (those whose image keys do not already exist in the case).
-
Update Existing Documents Only: Replace existing documents (as identified by image key) in the case with the documents in the scan session.
-
Create New and/or Update Existing Documents: Add all documents from the scan session to the case, regardless of whether they are new or are replacements for existing documents.
Documents in the scan session with image keys matching those already in the case are ignored.
NOTE: Each existing document and all of its pages will be deleted and replaced with the scanned document; the number of pages may be different.
Scanned documents with new image keys are ignored.
Indexing Options for OCR
Choose one of these options if you created OCR text as part of your scan session.
-
Dynamic Indexing: Index the text of each document as it is added to the case. This method takes longer, but does not impact Ipro for desktop users, and each document is available in the case (and searchable) as soon as it is committed.
-
Post-batch Indexing: Index the text of all scanned documents after they are all committed This option is faster than dynamic indexing and works well if you have a relatively new case (and the index is small), because it adds the documents efficiently, the index is then updated, and the documents are available and searchable in the case.
-
Skip Full Text Indexing: No indexing is performed during the commit process. This is the fastest method, but the scanned documents will not be searchable until you rebuild the case index.
Review Options
-
Auto-Create a Review Batch: Select this option to create a new review batch containing the scanned documents
-
Review Process: You must also select an existing Review Pass to which the batch should be added.
Version: 2019.3.0
Last Modified: December 2, 2019