|
|
Important: You are reviewing the Ipro for desktop 3.0 Help. To view the latest release of Ipro for desktop Help, click here. |

Change the Tag Palette
Tag groups, including tag group rules, can be added, changed, or deleted with the following exception. Once a Review user applies a tag, neither that tag nor the group to which it belongs can be deleted.
Users can refresh the tag palette in Review after changes are made in Case Management.
To change the tag palette for an existing case, complete the following procedures:
-
On the Dashboard, click the Administration module.

-
Click the Case Management drop down and then click Case Management.
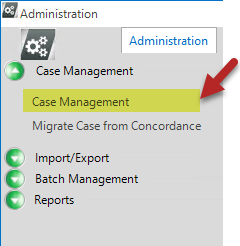
The Case Management area displays.
-
Select a Client and Case.
-
Click the Tag Palette tab. Review existing tags and tag details (tag groups, rules, options, and shortcut keys) and continue with the following steps as needed.
-
To create new tags:
-
Click the Modify Tag Palette button.
-
Click the Create Group button in the Modify Tag Palette dialog box.
-
In the Add Group dialog box, enter the name of each group to be created, one group name per line. Names must be unique.
-
When all group names are entered, click OK.
-
For each new tag group, click a group name, select the Tag Group Rules to be applied to the group. See: Group rules for more information.
-
Next, select a tag group and click the Create Tags button.
-
In the Add Child Tags dialog box, enter the name of each tag to be created, one tag name per line. Names must be unique within each group.
-
When all tag names are entered, click OK.
-
For each new tag, click a tag name, then select the Tag Options to be applied to the group. See Tag options for more information.
-
-
To create nested (child) tags:
-
If needed, review Nested (Parent/Child) Tags.
-
Click the Modify Tag Palette button if needed.
-
Click a tag that will serve as a parent tag, then click Create Tags.
-
Enter the name of each nested tag required, one name per line.
-
When all nested tags are entered, click OK.
-
Repeat steps c - e for any other tags requiring nested tags.
-
-
To modify tag groups or tags:
-
If needed, click the Modify Tag Palette button; review details in the Modify Tag Palette dialog box.
-
Click a tag group or tag to be changed and make the needed changes. This includes changing group or tag names, changing tag group rules, or changing tag options.
-
Repeat step b for all changes.
-
-
To delete unused tag groups or tags:
-
If needed, click the Modify Tag Palette button.
-
Click a tag group or tag to be deleted and click the appropriate Delete Group or Delete Tag button, as appropriate. Note that the selected item will be deleted immediately.
-
Repeat step b for all tag groups and tags to be deleted.
-
-
When finished, click OK in the Modify Tag Palette dialog box.
-
Notify users of tag changes and provide instructions as needed.


|
NOTE: If a tag is applied and subsequently renamed, the name that appears in document history is the name in effect when the tag was applied (or removed). |
Related Topics
Version: 2019.3.0
Last Modified: December 2, 2019