|
|
Important: You are reviewing the Ipro for desktop 3.0 Help. To view the latest release of Ipro for desktop Help, click here. |

Add, Edit, or Delete Case Instructions, Alerts, and Non-Discovery Documents
Administrators can add case instructions, case alerts, and non-discovery documents. This topic describes how to add, edit, delete these documents from a case. For an overview of these case folders and files, see Overview: Case Folders and Files.
Add Documents
To add communications for a case, complete the following instructions. To add communications for a review pass, see Create a Review Pass and Batches.
-
Create one or more files in an appropriate program (for example, Microsoft Word).
-
On the Dashboard, click the Administration module.

The Administration module displays.
-
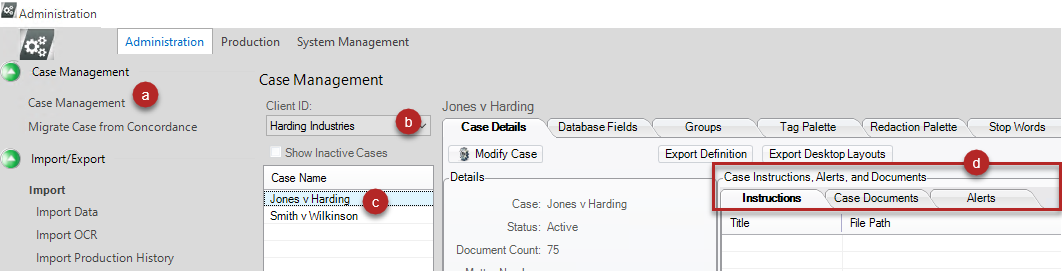
In Administration, click the Case Management tab.
-
In the Case Management workspace, select the needed client ID.
- Select the case from the lists on the left side of the window.
-
Click the Case Details tab and then click the tab for the type of file you are adding: Instructions, Alerts, or Case Documents.

-
-
On the applicable tab, click the Add Link button,
 .
. -
In the Select file dialog box and navigate to/select the needed file. Make sure that a UNC path is used.
-
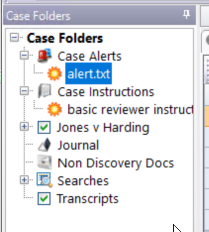
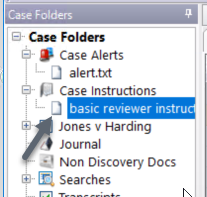
Click Open. Each selected file is added to the case as an instruction, alert, or case (non-discovery) document. It will be available to reviewers in the Case Folders pane of the Review module the next time they log in, as shown in the following figure.
-
Case Documents Only: To index case (non-discovery) documents, click
 . Indexing these documents enables them to be searched in Review .
|
|
NOTE: The program required to view the file must be installed on reviewers’ computers, and the file must be saved to a location accessible by reviewers. |


|
TIP: To select multiple files, click the first file in the set, then Shift+click or Ctrl+click other files as needed. |
|
|
Important! Re-index documents whenever documents are added. |
Changing case instructions, alerts, or documents
If case communications need to be changed, do so in the source program and save the file to its original location. Reviewers will see the changed instructions, alerts, or documents the next time they log in to Review and open the corresponding folder.
|
|
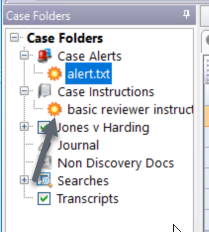
TIP: An alert icon is added next to all added/revised alerts and instructions to notify reviewers that information has changed and should be checked.
After a user opens a document, the corresponding icon is removed.
|
Delete instructions, alerts, or documents from a case
To delete instructions, alerts, or documents from a case:
-
Create one or more files in an appropriate program (for example, Microsoft Word).
-
On the Dashboard, click the Administration module.
The Administration module displays.
-
In Administration, click the Case Management tab.
-
In the Case Management workspace, select the needed client ID.
- Select the case from the lists on the left side of the window.
-
Click the Case Details tab and then click the tab for the type of file you are adding: Instructions, Alerts, or Case Documents.
-
-
Click item to be deleted, then click the Delete Link button,
 .
.
The case instruction, alert, or document will be removed from the case. The file, however, will still exist in your file system (unless you remove it). -
Case Documents Only: If you delete case (non-discovery) documents, re-index the documents by clicking
 on the Case Documents tab.
|
|
NOTE: The program required to view the file must be installed on reviewers’ computers, and the file must be saved to a location accessible by reviewers. |
If a user is working on the case in Review, the item will be listed until the reviewer refreshes or exits the application.
Related Topics
Version: 2019.3.0
Last Modified: December 2, 2019