Import Document Metadata
You can import useful metadata for the documents in your case via a CSV or TXT file. The Import Metadata button, available in the Documents Explorer, allows you to import additional or updated values for case items by means of a specially formatted load file. The instructions in this topic explain how to format your load file properly, as well as how to import the load file into TRIAL DIRECTOR.
Metadata fields that can be defined in the Documents Explorer, and therefore updated by means of a load file, include a document's:
- Description
- Common Name
- Trial Exhibit No
- Exhibit No
Create a Metadata Load File
The metadata file that you import must be saved as a CSV or TXT file. Furthermore, the import file must use one of the following text qualifier and delimiter combinations when separating values:
- Comma delimited with quote text qualifier (“,”)
- Comma delimited with carat text qualifier (^,^)
- Pipe delimited with carat text qualifier (^|^)
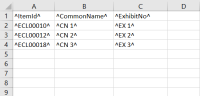
Each row in the load file must contain the Item ID for the document whose metadata values you're updating. On the same row, add the description, common name, exhibit number, or trial exhibit number for the document, with each value separated by one of the text qualifier and delimiter combinations shown above. Click the image below to see an example of a properly formatted TXT load file.

Note that the metadata values can be arranged in any order within a row. For instance, the Item ID may be the first value in the row, or it may be the third. Whatever order you choose when arranging values within a row must be the same for every other row in the file.
Additionally, you can choose to include a header row in your load file that contains the name of each metadata field being updated. Doing so allows you automatically map your values with the appropriate metadata fields in the Import Document Metadata dialog box, and may save you time. The image above provides an example of a TXT load file with a header row.
Adding Carats and Quotes to Excel Fields
When working with Excel files, you may need to add carats or quotes to either side of a cell’s contents in order to upload them properly to your database. This can easily be accomplished in Excel using custom formatting.
- Define your fields in Excel, ensuring that each row contains the Item ID for the document whose metadata you're updating. On the same row, add the description, common name, exhibit number, or trial exhibit number for the document, with each value in a separate cell.
- When your metadata information has been added to Excel, highlight all the cells that contain this information.
- Right-click into any of the highlighted cells, then select Format Cells from the context menu.
-
In the Format Cells dialog box, choose Custom from the Categories list.
- In the “Type” field, enter: ^@^
-
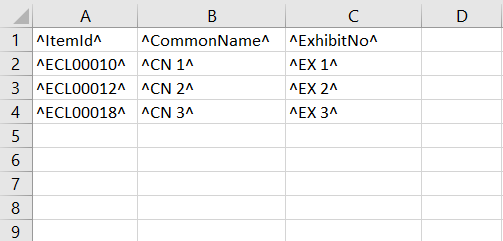
Click OK. The data entered into the highlighted cells is bookended by the carat sign, as shown in the following image.
The values are now properly formatted for import into TRIAL DIRECTOR.
- When finished, save your Excel spreadsheet as a CSV Comma Delimited File.

Import Metadata Load File
To import document metadata, follow the instructions below:
-
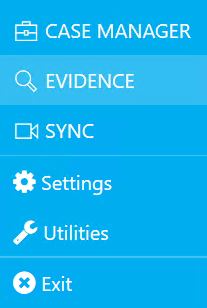
Click the EVIDENCE tab in the left navigation panel.

-
Open the needed case by double-clicking the case name in the Cases table. Alternatively, you can select the appropriate case name, then click the Open Case button in the ribbon bar above the table.

-
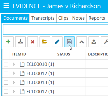
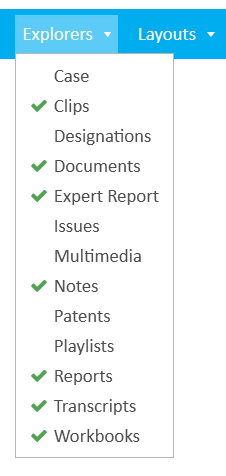
Open the Documents Explorer by selecting the Documents tab in the top-left corner of the page.

If the explorer is hidden, you can use the Explorers dropdown in the main menu to view it.

-
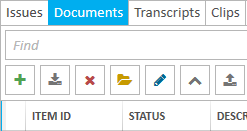
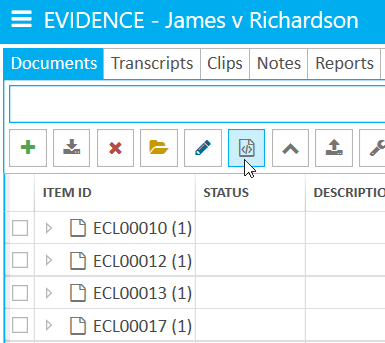
Click the Import Metadata button in the toolbar.
-
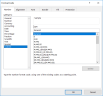
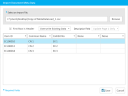
The Import Document Metadata dialog box displays. Select Browse and navigate to the load file in the pop up window that appears. Select the load file and click Open.
- The metadata values contained in the load file display in the dialog box. Proceed through the following steps as necessary to complete the dialog box and import the file.
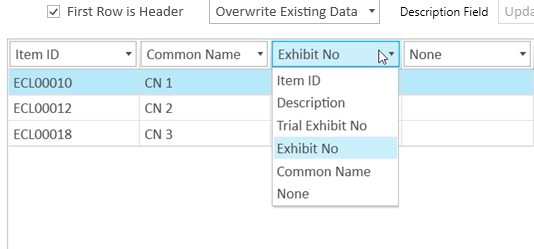
- If the load file contains a header row, ensure the First Row is Header check box is selected. If the load file does not contain a header row, make sure this check box is cleared.
-
If the load file contains metadata information that differs from values already defined in TRIAL DIRECTOR, you can choose to either replace the old values with the new ones contained in your load file, or to retain the old values.
- To overwrite existing values, ensure that the Overwrite Existing Data option is set.
- To keep old values the same, and only update empty metadata fields, choose the Retain Existing Data option from the dropdown.
-
If the load file contains a Description field, you can select whether those descriptions are copied to page 1 of the document, at the document level itself, or at both the document level and on page 1.
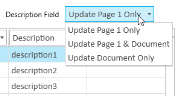

Note: This dropdown becomes disabled if the First Row is Header option is checked and no description column is present in the load file.
-
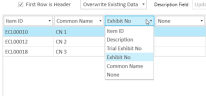
The dialog box displays a table of the metadata values being imported. Make sure that each column of values is lined up beneath the proper metadata field.
You can change the metadata field associated with a given column by clicking the field name and choosing the correct field from the drop-down menu.
Note: Double-check that the Item IDs are correct. If your load file contains an Item ID that does not exist in the database, the import will fail.
- When finished, click Save to begin the import.
- The Document Batch pane opens and the import process begins. If successful, the metadata fields update with the new values. If unsuccessful, ensure that the load file was properly formatted, as explained in Create a Metadata Load File. Also make sure that all Item IDs contained in the load file exist in the database. If attempting to import a file with a non-existent Item ID, the import will fail.


Related Topics
Version: 2023.8.12
Last Revision: 11/8/2023