
Edit LIVE EDA Case Settings
In OPEN DISCOVERY, you can make edits to previously created cases in the Case Settings.
Complete the steps outlined as follows to edit the case settings of an existing OPEN DISCOVERY LIVE EDA case.
-
Navigate to the OPEN DISCOVERY Home page and select Case Management.
-
In the Case Management overview, find the relevant LIVE EDA case tile. Click the corresponding hamburger icon
 .
.
-
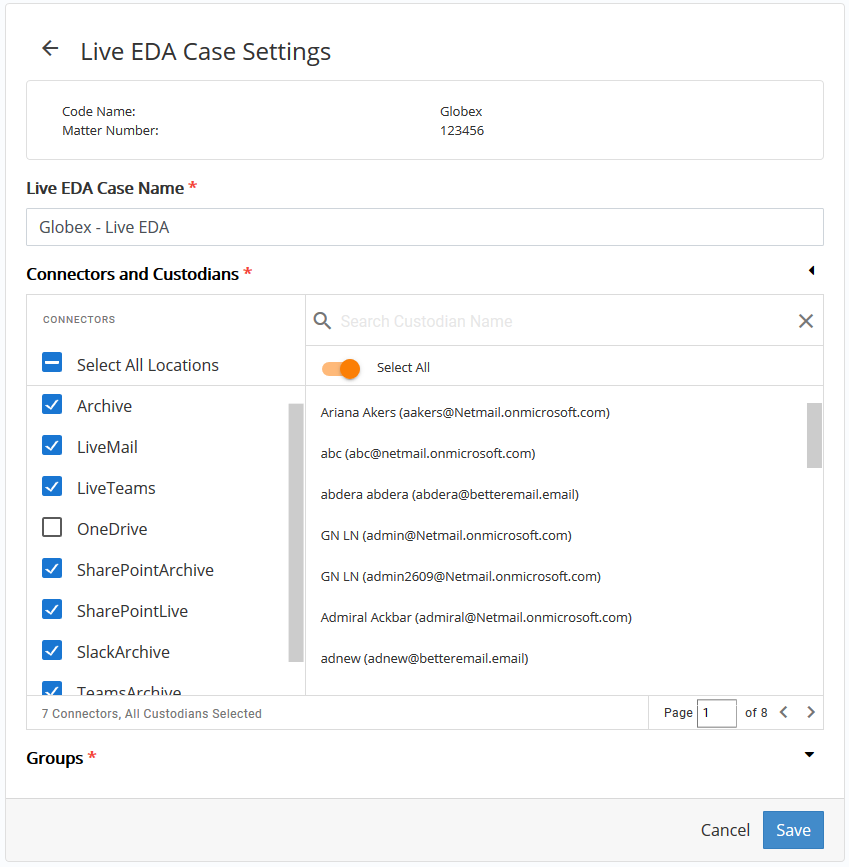
Select Case Settings to open LIVE EDA Case Settings.

-
To change the LIVE EDA case name, edit the LIVE EDA Case Name field.
- To include additional or exclude certain connectors, take any of the following actions in the left panel of the Connectors and Custodians field:
- To include all available locations, click Select All Locations.
- To add individual locations, manually select the relevant connectors in the available list by selecting the corresponding checkboxes.
- To exclude certain locations, manually clear the corresponding checkboxes associated with the relevant connectors.
- To include additional or exclude certain custodians, perform any of the following actions in the right panel of the Connectors and Custodians field:
To include all custodians, enable the Select All option.
To add individual custodians, manually select the relevant custodians in the available list by selecting the corresponding checkboxes.
To exclude certain custodians, disable the Select All option (if previously enabled) and manually exclude the relevant custodians from the available list by clearing the corresponding checkboxes. To search for a custodian, type the custodian name in the Search Custodian Name search bar and press enter.
-
Click Save.

Related Topics