Manage Filtering Settings
You can view and modify filtering settings for a Processing case in OPEN DISCOVERY. These settings, which are also found in eCapture, offer you the flexibility of customizing what files are ingested into your case, and what files are excluded from ingestion. Settings modified in OPEN DISCOVERY are updated in eCapture, and vice-versa.
Follow the instructions below to learn how to view and modify filtering settings in OPEN DISCOVERY, as well as to review detailed definitions for each setting.
|
|
Note: There are additional filtering settings available in eCapture. For further customization options, use the eCapture app. See Create a Streaming Discovery Job for more information. |

For a visual overview of Filtering settings, see the below video.
View and Modify Filtering Settings
To view and/or modify filtering settings:
-
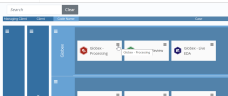
Open Case Management and locate the Processing case whose settings you would like to view or modify.
-
Click the hamburger icon corresponding to the needed case.
-
From the menu that appears, select Case Settings.
-
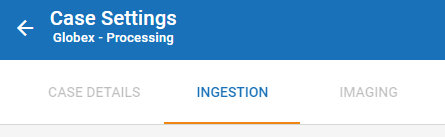
Click the Ingestion tab at the top of the Case Settings work area.

-
On this page you can view a selection of ingestion and filtering settings. To view and/or modify the full set of filtering settings available in OPEN DISCOVERY, click the Manage Filtering button.

Note: You can access this button by scrolling down to the bottom of the Filtering card, or by selecting the Filtering link on the right side of the Ingestion page.
-
Update settings as needed. See the table below for more information about these settings.
-
When finished, click the Save button in the top-right corner of the page. If you exit without saving, any changes you made will be lost.
Note: You can discard any changes you have made by clicking the Cancel button in the top-right corner of the page or by exiting the page.

Understand Filtering Settings
Review the table below to learn more about the various filtering settings you can update in OPEN DISCOVERY.
|
Option |
Description |
||||
|---|---|---|---|---|---|
|
Deduplication |
Determine if duplicate documents should be identified and removed from the data set (document families will be maintained). The selected scope determines whether duplicates are identified across the entire case or within each custodian separately. To use deduplication, ensure the slider at the top is set to Deduplication is on.
From the de-duplication drop-down menu, select one of the following:
|
||||
|
NIST matches |
During the filtering phase, document hashes are compared to the hashes in the NIST database. If the document hash is found, it is marked as a NIST match and is not promoted to Review. NIST removal matching applies only to the parent document or loose documents. It does not apply to child documents. If a parent document is a NIST match, the entire family is then removed including its children. NIST match removal is applied to documents that were slated to be promoted after applying the date, file type, and extension filters. For information about installing and using the optional NIST databases and the IPRO NIST Loader, see Use the NIST Loader Utility. For more information about using hash lists and configuring eCapture to use NIST, see Load Custom Hash Lists and Establish a Connection with the SQL Server and Set the System Options. |
||||
|
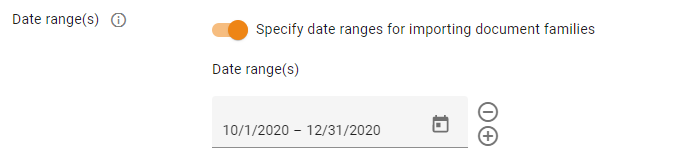
Date range(s) |
Configure restrictive date ranges to determine what documents get pushed to Review. Sent Date is used for email file types whereas Last Mod Date (file system) is used for non-emails. Filtering is applied at the parent level and families are maintained. By default, all document families are promoted to Review unless the option Specify date ranges for importing document families is chosen.
|
||||
|
File types |
Define the list of file types that will be promoted to Review. This filter is applied to all levels of a family and will maintain those families in Review. In other words, if at least one file in a document family is being included, then the entire family gets promoted. File types are separated into categories. By selecting the checkbox beside the category name, every file type within that category is also selected and thereby able to get promoted to Review.
You can expand categories to view the file types contained within by selecting the To block specific files from ingestion, expand the needed categories and ensure that the checkbox beside their name is not selected. In the example below, the Microsoft Word 2000, 2002, and 2003 file types have been deselected, meaning that these files, when encountered, will not be pushed to Review.
You can use the search bar to locate specific file types. Type in the name of the file to narrow down the list. You can also clear the search by clicking the X button on the right side of the search bar. If you would like to permit all file types to be promoted to Review, click the Select all button. When all file types are selected, you have the ability to click a Deselect all button to clear the list. To revert selections back to the default settings, click the Load defaults button. |
||||
|
File extensions |
You can specify specific extensions of files you want to promote. Click the Specify file extensions for discovery slider to turn this option on. In the Enter new file extension field, type in the specific file extension you would like promoted to Review. Click the plus icon to add it. The file extension you submitted appears in the File extensions box. To import a list of file extensions from a CSV file, click Load from file. Select the CSV file and click Open. The specified files appear in the File extensions box. The CSV file may contain extensions with or without a "." (period). If you want to remove a specific extension from the list, hover your mouse over the extension in the File extensions box and select the X button. Clear all removes all the extensions from the list. |
 button. Each time the button is clicked, another date range appears.
 button.

Related Topics