Access Stored Configuration Database Connection Settings
After existing configuration database connection settings are saved, they can be accessed, viewed, deleted, and edited from the eCapture Monitor.
-
To access the Properties dialog where the connection settings are entered and saved, select one of the following:
-
From the Controller menu bar, click View > System Options to open the System Options dialog.
-
From the Limited Controller menu bar, click View > System Options to open the System Options dialog.
-
From the QC menu bar, click Tools > System Options to open the System Options dialog.
-
From the Worker, in the System Tray, right-click the Worker icon. Click Configure to open the eCapture Worker Configuration dialog.
-
From the Queue Manager, in the System Tray, right-click the Queue Manager icon. Click Configure to open the Queue Manager Configuration dialog.
-
-
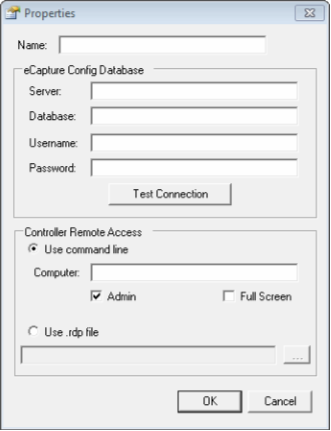
Click Select Existing. The Properties dialog displays.


Note: This dialog appears the first time connection settings are entered and saved. After one or more connection settings are entered and saved, the eCapture Monitor dialog appears when Select Existing is clicked.
There are three methods for saving the configuration database connection settings:
-
Configuration Database credentials
-
Command line method - MSTSC / path
-
Saved .RDP file (remote database protocol)
-
-
Enter a meaningful name to describe the name of the configuration database.
-
Select one of the methods:
-
Populate the Server, Database, User Name, and Password fields.
-
Enter the command line and select Admin or Full Screen.
-
Select RDP file and browse out to the file.
-
-
Click OK. The eCapture Monitor appears.
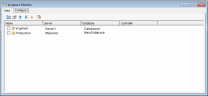
Use the eCapture Monitor
The eCapture Monitor is used to add/configure additional databases, edit an existing configuration, order the configurations in the list, delete configurations, and set/change passwords.
- Click the View tab. Existing database details are available for view that include the name, server/database, active jobs, inactive jobs, workers, and time last updated. Use the View tab to monitor the activity for the different databases.
-
Click the Configure tab.
- To enter and save a new configuration, click
 . The
Properties dialog appears.
. The
Properties dialog appears. - To edit an existing configuration, select the configuration (highlight
it in the list) and click
 . The Properties dialog appears.
Make the necessary changes. Click OK.
. The Properties dialog appears.
Make the necessary changes. Click OK. - To delete an existing configuration, select the configuration (highlight
it in the list) and click
 . A Confirm Deletion dialog
appears. Click Yes.
. A Confirm Deletion dialog
appears. Click Yes. - To set/change the password for an existing configuration, click
 . The Enter New Password dialog
appears. Enter the new password and click OK.
. The Enter New Password dialog
appears. Enter the new password and click OK. - To change the order of a configuration in the list, select the configuration
(highlight it in the list) and use
 or
or  to move it to a different position.
The new order also appears in the View tab.
to move it to a different position.
The new order also appears in the View tab. - To view the details about a configuration, select its check box. The selected configuration appears in the View tab.
- To enter and save a new configuration, click
Related Topics