Create a New Case (Project)
|
|
Note: When creating a new eCapture project, the system will automatically display the Project Options (by default) so that you may select these options before proceeding with data extract jobs, discovery jobs, or processing jobs for the new project. In addition, when creating data extract jobs, discovery jobs, or processing jobs individually, the system will automatically display the options for the relevant job. |
When creating a new enterprise code name or case (project), the dialog displays an Enterprise Details section. This section allows for the creation of the enterprise code name and the case (project).
Either
of these may be created from within eCapture using information sourced
from IPRO
(Cloud) Services (via a drop-down menu), or a fresh enterprise code
name may be created directly in eCapture using the add button  and a new case (project) may be entered directly. The newly created enterprise
code name or case (project), from within eCapture, is directly created
automatically in IPRO (Cloud) Services for use across the Enterprise platform.
and a new case (project) may be entered directly. The newly created enterprise
code name or case (project), from within eCapture, is directly created
automatically in IPRO (Cloud) Services for use across the Enterprise platform.
In addition, a Matter Number may be entered for the case (project).
-
After the Client is created, select it in the Client Management treeview, then right-click on it to display the context menu.
-
Choose New Case (Project). The New Case (Project) dialog appears.
-
To create both a new enterprise code name and a new case (project) at the same time, do the following:
-
Click
to change the
enterprise Code Name drop-down menu to a text box. The changes to  . (Note:
Click to change the text box back to a drop-down
menu.)
. (Note:
Click to change the text box back to a drop-down
menu.) -
Enter a new enterprise code name. A maximum of 256 Unicode characters are permitted. IPRO (Cloud) Services validates the uniqueness of the name, and if it is not unique, a prompt appears indicating to change the name. Once the enterprise code name is created, it is available for selection from this point forward by clicking the drop-down menu.
-
In the Case (Project) Name field (changed to a text box by default), enter a new case (project) name. A maximum of 256 characters are permitted. However, the following characters are not allowed * . " / \ [ ] ; : | = ' ? > <
When creating a new enterprise code name and a new case (project) at the same time, the Case (Project) Name drop-down box is not available as there are no existing clients for a brand new enterprise code name.
-
From the Enterprise Details section, enter an optional Matter Number. A maximum of 128 Unicode characters are permitted. There are no restrictions on content. An existing matter number (ID) can be modified through the Case's (Project's) Status and Summary Panel. Click the Client Management tab and select the Case (Project) to display the Information Panel. Double-click the existing Matter ID to display the Edit dialog. Change the matter ID and click OK.

Note: This field may already be populated if a matter number was assigned previously for the case (project). The matter number is stored in IPRO (Cloud) Services once the case (project) is created from eCapture.
-
-
To create a new case (project) and associate it with an existing enterprise code name, do the following:
-
Click the Enterprise Code Name drop-down menu and select an existing enterprise code name to associate with the new case (project) name. By default, the Case (Project) Name field auto populates with the same name as the selected enterprise code name. If desired, replace the case (project) name with a new Case (Project) name.
-
From the Enterprise Details section, enter an optional Matter Number. A maximum of 128 Unicode characters are permitted. There are no restrictions on content. An existing matter number (ID) can be modified through the Case's (Project's) Status and Summary Panel. Click the Client Management tab and select the Case (Project) to display the Information Panel. Double-click the existing Matter ID to display the Edit dialog. Change the matter ID and click OK.
Note: This field may already be populated if a matter number was assigned previously for the case (project). The matter number is stored in IPRO (Cloud) Services once the case (project) is created from eCapture.
-
-
From the eCapture Details section, do the following:
- Enter a Description
- Select a task table from the drop-down list.
-
(Optional) Clear Show Case (Project) Options after Creation if you do not want the Case (Project) Options to display.
-
Click OK. The enterprise code name is created in IPRO (Cloud) Services. The Case (Project) Options dialog appears. All Case (Project) options are accessed from this tabbed dialog. Options can be set for Discovery (General, Indexing, and Password Handling), Processing (General, Excel, Word, PowerPoint), Data Extraction, Common Options (OCR and Time Zone), Filtering (Flex Processor Rules Manager), and Advanced (alternative system directories).
-
Set the Job Options, as appropriate. Click on the sections below to learn more about job options for Discovery, Processing, and Data Extract jobs.
 Discovery Options
On the Discovery Options tab, there are three sub-tabs you can work with to define Discovery Job options at the Case (Project) level, as well as to define Password Handling options for the case.
Discovery: General Options
On the General tab, set Discovery options.
-
Calculate Page Count - Select this check box to calculate an initial page count of the selected files, before processing. When you run reports, you can choose to include the page count.
- If you choose not to process unknown files, those files will display on the summary report, but their page count will be zero.
- You cannot use this setting to count the number of pages in emails.
Note: This is a preliminary count. It does not reflect the number of pages that will be used by metadata, place holders for unknown or exception files, or blank pages (if you choose to drop blank pages).
-
Enhanced Password Detection - When this option is selected, specific file types are checked for password protection at Discovery time. A password-protected document is defined as a document in which a prompt asks for a password on attempting to open the document in its native application. Otherwise, if the document can be opened and viewed in its native application, the document is not considered password protected. To see the documents with password protection, run the Detailed Error Report. Any password protection errors that occurred during Discovery can be corrected before running Processing Jobs and/or Data Extract Jobs on the data set to save time during QC.
-
Node Handling - PDF Portfolio files allow email boxes to be stored/converted within a folder structure. This folder structure information will be extracted and available for export in the existing ‘MailFolder’ metadata field.
-
Treat Archives as Directories: This option check box is selected by default. When the check box is selected, the files in the archived folder are treated as parent and child docs when running a Discovery Job. In addition, WINMAIL.DAT attachments are treated the same as archives and will be processed the same as ZIP files. The following are treated as archive files:
- FI_ZIP = 1802
- FI_ZIPEXE = 1803
- FI_ARC = 1804
- FI_TAR = 1807
- FI_STUFFIT = 1812
- FI_LZH = 1813
- FI_LZH_SFX = 1814
- FI_GZIP = 1815
- Ipro_FI_RAR = 13000
- FI_TNEF = 1197
-
Treat PDF Portfolios/Packages as containers: This option check box is selected by default.
- When the check box is selected, the PDF Portfolio file is treated as a directory and its contents extracted and treated as loose files (except children of the contained PDFs). The PDF Portfolio is not treated as an item, only as a container in the Nodes table. Documents inside the PDF package are treated as parent files.
- When the check box is cleared, the PDF Portfolio file is treated as a file parent and its contents extracted and treated as attachments in the Items table. The PDF Portfolio is treated as an item and can be processed, filtered, or exported.
-
-
Mailstores - There are several IBM-specific settings that can be set for a Discovery job.
-
Use legacy Lotus Notes Handling - Legacy Lotus Notes handling uses the IBM (formerly Lotus) UI for Discovery and is considerably slower than current IBM (formerly Lotus) Mail discovery.

Important: This option is required for hash compatibility to deduplicate across older jobs discovered with the legacy versions 5.0 and earlier.
- Create working
copy of Outlook mail stores - By default, this option check box is cleared
for both new and existing Cases (Projects).
- When this option check box is cleared, the discovery of PSTs is made directly from the PST; no copies are made.
- When this option check box is selected, if any PSTs are encountered in a Discovery Job, a copy of the PST is made to a working directory located under the Discovery Job and Discovery is performed on that copy. Once the Job completes, all working copies of PSTs in the Job are deleted. If a node-level error on the PST is requeued after the Discovery Job is complete, the source PST is copied again. The working copy is made again in this instance only if the option is selected.
-
-
Email Deduplication - The method of gathering and creating the MD5 hash value for newly created Projects. Hashing of emails uses the UTC time to ensure proper deduplication across time zones.
In most cases, MD5 hash values are calculated on the file itself. For more reliable deduplication of emails though, it is required that deduplication occur on the information contained within it and not the file itself. There are many reasons for this; the simplest is that when an email is saved out of its container (PST, NSF, etc.) the file created contains information that would change the hash value of the same email each time that the email was saved out.
When an email is discovered within eCapture, it is assigned a hash value based on fields chosen by the user. The values of these fields are concatenated and the text is hashed. To generate a hash value, the user selects from the following email fields:
-
Subject
-
From/Author
-
Attachment Count
-
Body - When this option check box is selected, the default setting is to include the body whitespace. Whitespace in the email body could cause slight differences between the same emails, which could result in different hashes being generated. If you do not want to include the whitespace, select Remove from the Body Whitespace drop-down menu to remove all whitespace between lines of text in the email body before hashing.
-
E-mail Date: The following message types use the specified date values: Outlook: Sent Date, IBM (formerly Lotus) Notes: Posted Date, RFC822: Date, and GroupWise: Delivered Date. From the Alternate Email Date drop-down menu, select either Creation Date or Last Modification Date. The selected value will be used when calculating the MD5 hash if the normal E-mail Date value is not present. This commonly occurs for Draft messages that have not been sent.
-
Attachment Names
-
Recipients
-
CC
-
BCC
Start Time is always used if it exists.
By default, Subject, From/Author, Email Date, and an Alternate Email Date Creation Date are used for email hash generation.
-
-
File Extraction - Treat email inline images as attachments
- When this check box is selected, inline images in email messages (e.g., signature files) are re extracted as attachments and treated as child documents. Apple Mail Message (EMLX) files are supported. The attachments for EMLX files are extracted from the emails and it recognizes and handles the inline images. When EMLX files are processed or data extracted, they are treated as emails. The output resembles an email displayed in Outlook Express or Outlook.
-
When this check box is cleared, inline images are not extracted as children. The images are not treated as separate documents, and therefore will not be OCRed, language-identified, or indexed. The images are rendered inline as they would look in the native file.
Note: Black Ice™ does not return text for any images that are printed. So extracted text for the (parent) document will not include text from the inline image. The images will be OCRed only if the image it is printed on does not have any text, and OCR Pages Missing Text is enabled under the Processing Job, General Options tab.
-
Embedded File Extraction - eCapture can control which embedded object types are extracted from most Microsoft Office and Rich Text documents.
Click
here for more information about embedded files.An embedded file is an object that has been inserted into a document and, if extracted, can act as a standalone document. Multiple methods for embedding object and files are available for Microsoft Office documents through the Microsoft Office Object dialog box.
The following embedded file types each refer to a specific method of embedding documents in Microsoft Office file types. Clearing an embedded file type option prevents its extraction from supported document types.
- Excel Documents - When selected, the system extracts OLE embedded objects associated with the Microsoft Excel application.
- Word Documents - When selected, the system extracts OLE embedded objects associated with the Microsoft Word application.
- PowerPoint Documents - When selected, the system extracts OLE embedded objects associated with the Microsoft PowerPoint application.
- E-mail File Attachments (Outlook.FileAttach) - When selected, the system extracts Outlook message objects from other Microsoft Office document formats that were embedded through the Outlook.FileAttach method.
- Visio Drawings - When selected, the system extracts OLE embedded objects associated with the Microsoft Visio application.
- Package-Embedded Documents - When selected, the system extracts files that were added to a Word document or an Excel spreadsheet. The actual documents being extracted are those documents embedded through the packager. The packager is a Microsoft Windows OS utility that allows the packages to be created for future integration into the file.
- Acrobat Documents - When selected, the system extracts objects embedded with the AcroExch object type.
- E-mail Message Attachments (MailMsgAtt) - When selected, the system extracts Outlook message objects from other Microsoft Office document formats that were embedded through the MailMsgAtt method.
- E-mail File Attachments (MailFileAtt) - When selected, the system extracts Outlook message objects from other Microsoft Office document formats that were embedded through the MailFileAtt method.
-
Images - This option was added to disable (check box cleared) or enable (check box selected) extraction of embedded image items for Microsoft Office embedded files (Excel, Word, PowerPoint, etc.).
Note: To maintain backward compatibility of existing jobs, the Images option check box will be selected if the option is not found in the SETTINGS.INI file.
Discovery: Indexing Options
Click the Indexing Options tab to set the indexing options for Discovery Jobs.
-
If you want to create an index during initial discovery, select the Create Search Index check box.
IMPORTANT: THIS OPTION MUST REMAIN SELECTED FOR MULTI-LANGUAGE DOCUMENT DETECTION.
-
Under Search Indexing, set the Search Indexing options. eCapture uses dtSearch to provide full text searching of files before processing. This feature provides advanced search functions including fuzzy searching, synonym searching, and more. Search options are available in the Flex Processor Rules Manager.
To facilitate the searching that will take place during an electronic data discovery (EDD) session, establish the method for searching unsupported files and the treatment of hyphens during searches.
- Index Numbers - Select this option if you want to be able to search for numbers.
- Recognize Dates, e-mail address, and credit card numbers - Select this option to search for dates (in any format), email addresses (or parts of email addresses), and credit card numbers.
- Auto Break CJK Words - Select this option when indexing documents containing CJK (Chinese, Japanese, Korean) languages. It breaks up the CJK words as if each character is a CJK word.
- Use filtering to index corrupt or encrypted documents - When selected, this option applies the filtering algorithm to attempt to recover text from corrupt or encrypted documents. If this option is not selected, corrupt or encrypted documents will be considered indexing failures.
- Index Discovery Path - When selected, the Discovery path will be searched. Otherwise, if not selected, searching the Discovery path would create false-positive hits.
-
Set the options that control how eCapture processes Binary files. For more information about dtSearch and the files it recognizes, click
here.dtSearch recognizes and supports many types of files, including word processor, email, and PDF files (see http://support.dtsearch.com/faq/dts0103.htm for a list of file types that dtSearch recognizes and supports). Non-text files that are in formats that dtSearch does not support are indexed and searched as binary files. Examples of binary files are executables, fragments of documents that were recovered from an undelete process, or blocks of data recovered forensically. Because an individual file can include plain text, Unicode text, and fragments from, for example, DOC or XLS files, much of the content would be missed if the files were indexed and searched as if they were simple text files.
- Filter Binary Unicode - Use a text selection algorithm to filter text from binary files. The algorithm scans for sequences of single-byte, UTF8, or Unicode in the file. This option is recommended for forensic searches, especially when files may contain text in languages other than English.
- Filter Binary - Extract plain text items from the binary files.
- Index Binary - Index all of the contents of binary files as single-byte text.
- Skip Binary - Do not index binary files.
-
Set the options that control how hyphens are treated during an EDD search.
- Hyphens as spaces - Treats hyphens found in the files as spaces. For example, a search for “first-class” will match incidences of “first class” in the files being searched.
- Hyphens as searchable - Searches hyphens. For example, a search for “first-class” will match only incidences of “first-class” in the files being searched.
- Ignore Hyphens - Ignores hyphens entered in the search criteria. For example, a search for “first-class” will match incidences of “firstclass” in the files being searched.
-
Index all three ways - Indexes terms containing hyphens using all three hyphen options (i.e. "First-class " will be indexed as "First-Class" "FirstClass", and "First Class").
For more information on hyphens and how they are treated during an EDD search, see the dtSearch documentation here.
-
Set the Parent/child text handling options. These options are used to specify how text of parent and child documents should be handled during indexing and are specific to emails (IBM [formerly Lotus] Notes and Outlook) and any edocs (non-emails) that contain embedded documents.
- Index child text with parent text - Merges and indexes the text of a child document with that of its parent.
- Separate child and parent text - Indexes the text of a child document separately from its parent. The following string is added as an include filter: *.MSG *.MSG>*.body *.EML *.EML>*.body. This occurs while indexing. Two documents are produced in the index for .EML and .MSG files: one is for the body and the other is for the email (headers...). Any attachments are not included in that index.
-
Set the OCR settings. There are some important considerations about how OCR takes place. Click
here for more information.
Note: If you are setting Case (Project) Level options, OCR and Time Zone Handling options are defined on the Common Options tab because Discovery and Data Extract jobs use the same OCR and Time Zone Handling options. For more information about setting options at the Case (Project) level, see Create a New Case (Project).
- Data sets are OCRed only once during indexing or data extraction and the OCR output is stored in a common folder location at the Project level. This ensures that results during search and review remain the same. By not repeating OCR work on the same data sets, speed is improved and time is saved.
- All OCR options are cleared by default for new Projects.
- By setting OCR options at the Project level, it is not necessary to set them individually for each Job type because they are now located on the Common Options tab.
- The OCR options apply to all Job types except for a specific OCR option, OCR Pages Missing Text, which applies to Processing Jobs only.
- For Data Extract, an item uses the existing OCR output as its own output when the following conditions are met:
-
OCR is enabled
-
The PDF page character threshold and Minimum OCR Confidence Level are the same as when the OCR was first performed.
If the PDF page character threshold or the Minimum OCR Confidence options are higher than when the OCR was first performed, the document will be re-OCRed to allow more characters in the embedded text of the PDF or to produce a higher quality of OCR, respectively.
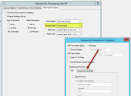
The OCR Settings available for Discovery Jobs are outlined in the following table.
Option
Description
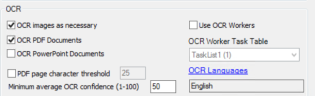
OCR images as necessary
Images will be OCRed for indexing/language identification if necessary. The OCR text obtained from the image is then passed on to dtSearch for indexing. The OCR will be indexed and available to be searched on in the Flex Processor.
OCR PDF documents
PDFs with no embedded text: perform OCR before indexing or language identification. PDF pages with embedded text (text-behind) will have text extracted. Comments on a PDF file are also extracted.
-
The OCR text is added to any extracted text from the PDF.
-
The text obtained through OCR, along with the extracted text from the PDF, is passed to dtSearch for indexing.
-
The OCR is then indexed and available to be searched in the Flex Processor.
Note: If selected, this will impact the time for the Discovery process. OCR Text obtained through OCR could contain duplicate words as appended to the extracted text file. Search hits could be inflated by these results.
OCR PowerPoint Documents
Perform OCR on Microsoft PowerPoint files during indexing to get text from embedded content in the slides. This results in slower indexing speeds for PowerPoint files, but more accurate search results.
PDF page character threshold
Optional: Select PDF page character threshold and indicate a value. The default value is 25 characters. The maximum value is 10000. If the value is less than 25, eCapture sends the page to be OCRed; otherwise, the text is just indexed. If necessary, enter a different value.
Minimum average OCR confidence [1-100]
The level range settings are from 1 to 100. The default is 50. The confidence level is the average percentage of confidence for each document for all pages within a document on which OCR was performed. Success or failure of a document for indexing preparation is based on the average confidence level of the document. If the average confidence level is below the selected threshold, the page is considered as an indexing error and is available for re-queueing. The Discovery Job Status Information Panel displays OCR Applied[Errors], where Applied shows the number of documents that required OCR (not OCRed) and where [Errors] shows the number of those documents that did not meet the specified average confidence level.
Note: For calculating average document confidence, pages in PDF docs with text behind them are considered 100%. OCR failures are considered 0%.
Use OCR Workers
Optional: Select to enable the OCR Worker Task Table drop-down list and select a task table. If a custom task table is selected, Enterprise OCR tasks are sent to those Workers assigned to the selected task table. See Assign Task Tables to Workers and Assign IPRO (Cloud) Workers for additional information.
OCR Languages
eCapture includes multi-language OCR capability. The QC document will contain the original OCR languages that were selected for the Discovery Job. A valid multi-language OCR license must be available in order to modify the original selected languages, if necessary.
To reserve a portion of the multi-language OCR licenses for QC and to keep the Worker from consuming all available licenses, use the Multi-Language OCR License slider located in the Controller System Options dialog box.
Click OCR Languages to display the Language OCR dialog box.
After selecting the languages, click OK to close the dialog box. The selected languages display in the OCR Languages field. Place the mouse pointer on the OCR Languages field to display a tool tip that lists all the selected languages that were not visible in the OCR Languages field. The OCR Languages field is a read-only field.
Click
here to view a list of supported languages.-
English
-
Arabic
-
Chinese Simplified
-
Chinese Traditional
-
Japanese
-
Korean
-
Afrikaans
-
Albanian
-
Basque
-
Belarusian
-
Bulgarian
-
Catalan
-
Croatian
-
Czech
-
Danish
-
Dutch
-
Estonian
-
Faorese
-
Finnish
-
French
-
Galician
-
German
-
Greek
-
Hungarian
-
Icelandic
-
Indonesian
-
Italian
-
Latvian
-
Lithuanian
-
Macedonian
-
Norwegian
-
Polish
-
Portuguese
-
Portuguese Brazil
-
Romanian
-
Russian
-
Serbian
-
Serbian Cyrillic
-
Slovak
-
Slovenian
-
Spanish
-
Swedish
-
Turkish
-
Ukrainian
Click here to view some
caveats to OCR Language handling.English is the only language that is selected by default. The more languages that are selected; the lower the confidence level will be for correctly identifying the languages in a document.
-
If English is selected, Arabic will not be available for selection.
-
If Arabic is selected, all other languages will not be available for selection.
-
If one of the CJK (Chinese, Japanese, Korean) languages are selected, then all remaining CJK languages will not be available for selection. Other languages (excluding Arabic) may be selected.
-
If Chinese Simplified is selected, Chinese Traditional, Japanese, and Korean will not be available for selection.
-
If Chinese Traditional is selected, Chinese Simplified, Japanese, and Korean will not be available for selection.
-
If Japanese is selected, Chinese Simplified, Chinese Traditional, and Korean will not be available for selection.
-
If Korean is selected, Chinese Simplified, Chinese Traditional, and Japanese will not be available for selection.
-
If you selected Create Search Index and want to select an index location other than the default, click
 , next to the Index Location field. The User-Specified Index Path Information dialog box displays and contains additional
information about user-specified index paths. This option is useful
if you want to place the load of indexing on an alternate file server
that is not handling other eCapture activities.
, next to the Index Location field. The User-Specified Index Path Information dialog box displays and contains additional
information about user-specified index paths. This option is useful
if you want to place the load of indexing on an alternate file server
that is not handling other eCapture activities. - Click OK to close the User-Specified Index Path Information dialog box. The Directory Browser dialog box appears.
- Navigate to the index location and click OK.
Password Handling
Click the Password Handling Options tab to set Password handling options for the case. This tab allows you to add a list of passwords to the case, to unlock password-protected documents encountered while processing jobs, or reviewing documents in the QC application. A password-protected document is defined as a document in which a prompt asks for a password on attempting to open the document in its native application. Otherwise, if the document can be opened and viewed in its native application, the document is not considered password protected. The "Password Applied" flag, found in QC, is checked when the correct password is applied to a protected document.
To add individual passwords:
-
Click Edit.
-
Enter a password (one password on each line - do not include delimiters) and press Enter to go to the next line. Repeat this step for each password that must be added to the list.
-
When finished, click Done.
To load a pre-defined list of passwords:
-
Click Load. The Open dialog box appears.
-
Navigate to the password list.
-
Click Open. The password lists loads.
Processing Job Options
The following sections describe how to set Processing Job options at the Case (Project) level and for individual Processing Jobs.
Processing: General Options
- Click the General Options tab.
-
Set the OCR options. For more information, see the table below.
Option
Description
OCR pages missing text
Select OCR Pages missing text to OCR pages within documents that are missing text. Optionally, select PDF page character threshold and indicate a value. The default value is 25 characters. The maximum value is 10000. If the value is less than 25, eCapture will send the page to be OCRed. If necessary, enter a different value.
PDF Page Character Threshold
Optional: Select PDF page character threshold and indicate a value. The default value is 25 characters. The maximum value is 10000. If the value is less than 25, eCapture will send the page to be OCRed; otherwise, the text will just be indexed. If necessary, enter a different value.
Minimum average OCR confidence [1-100]
The level range settings are from 1 up to 100. The default is 50. The OCR Confidence Level is the average percentage of confidence for each document for all pages within a document on which OCR was performed. Success or failure of a document for indexing preparation is based on the average confidence level of the document. If the average confidence level is below the selected threshold, the page will be considered as an indexing error and is available for re-queueing. The Discovery Job Status Information Panel displays OCR Applied[Errors], where Applied shows the number of documents that required OCR (not OCRed) and where [Errors] shows the number of those documents that did not meet the specified average confidence level.
Note: For calculating average document confidence, pages in PDF docs with text behind them are considered 100%. OCR failures are considered 0%.
Use OCR Workers
Optional: Select to enable the OCR Worker Task Table drop-down list and select a task table. If a custom task table is selected, Enterprise OCR tasks are sent to those Workers assigned to the selected task table. See Assign Task Tables to Workers and Assign IPRO (Cloud) Workers for additional information.
OCR Languages
eCapture includes multi-language OCR capability. The QC document will contain the original OCR languages that were selected for the Data Extract job. A valid multi-language OCR license must be available in order to modify the original selected languages, if necessary.
To reserve a portion of the multi-language OCR licenses for QC and to keep the Worker from consuming all available licenses, use the Multi-Language OCR License slider located in the Controller System Options dialog box.
Click OCR Languages to display the Language OCR dialog box.
After selecting the languages, click OK to close the dialog box. The selected languages appear in the OCR Languages field. Place the mouse pointer on the OCR Languages field to display a tool tip that lists all the selected languages that were not visible in the OCR Languages field. The OCR Languages field is a read-only field.
Click
here to view a list of supported languages.-
English
-
Arabic
-
Chinese Simplified
-
Chinese Traditional
-
Japanese
-
Korean
-
Afrikaans
-
Albanian
-
Basque
-
Belarusian
-
Bulgarian
-
Catalan
-
Croatian
-
Czech
-
Danish
-
Dutch
-
Estonian
-
Faorese
-
Finnish
-
French
-
Galician
-
German
-
Greek
-
Hungarian
-
Icelandic
-
Indonesian
-
Italian
-
Latvian
-
Lithuanian
-
Macedonian
-
Norwegian
-
Polish
-
Portuguese
-
Portuguese Brazil
-
Romanian
-
Russian
-
Serbian
-
Serbian Cyrillic
-
Slovak
-
Slovenian
-
Spanish
-
Swedish
-
Turkish
-
Ukrainian
Click here to view some
caveats to OCR Language handling.English is the only language that is selected by default. The more languages that are selected, the lower the confidence level will be for correctly identifying the languages in a document.
-
If English is selected, Arabic will not be available for selection.
-
If Arabic is selected, all other languages will not be available for selection.
-
If one of the CJK (Chinese, Japanese, Korean) languages are selected, then all remaining CJK languages will not be available for selection. Other languages (excluding Arabic) may be selected.
-
If Chinese Simplified is selected, Chinese Traditional, Japanese, and Korean will not be available for selection.
-
If Chinese Traditional is selected, Chinese Simplified, Japanese, and Korean will not be available for selection.
-
If Japanese is selected, Chinese Simplified, Chinese Traditional, and Korean will not be available for selection.
-
If Korean is selected, Chinese Simplified, Chinese Traditional, and Japanese will not be available for selection.
-
- Set the Color Depth, Paper Size, and other basic options.
General Color Depth - Applies to everything else outside of the five types (Word, Excel, PowerPoint, PDf, and Native TIFF) that eCapture does not process through Oracle (formerly Stellent). There are three exceptions to this rule: Lotus Notes, Internet Explorer, and Outlook Express, which also fall under the General type. All other email, except for Lotus Notes and Outlook Express at this time, are always Group 4 TIFF because it is rendered from text.
Single Page Output Type
General Color Depth Options
Rendered as
Black&White (1-bit)
Group 4 TIFF
Grayscale (8-bit)
LZW TIFF
256 Color (8-bit)
LZW TIFF
True Color (24-bit)
JPEG
Multi-Page TIFF Output Type
General Color Depth Options
Rendered as
Black&White (1-bit)
Group 4 TIFF
Grayscale (8-bit)
LZW TIFF
256 Color (8-bit)
LZW TIFF
True Color (24-bit)
JTIFF - (JPEG compressed TIFF)
Image Color Depth - Applies to: BMP, TIFF, PCX, GIF, WPG, WINDOWSICON, WINDOWSCURSOR, MACPAINT, CGM, DCX, SUNRASTER, KODAKPCD, PNG, DGN, PBM, and ADOBE PHOTOSHOP. However, if Lead fails to open a file, it then goes to Oracle (formerly Stellent) and uses the General Color Depth options.
Image Color Depth Options
Rendered as
As Is
If Original is Black&White, then Group 4 TIFF; otherwise, it will be a JPG matching bit depth.
Black&White (1-bit)
Group 4 TIFF
Grayscale (8-bit)
LZW TIFF
True Color (24-bit)
JPG
PDF Color Depth - Select a PDF Color Depth. A PDF always uses the selected color depth setting in the PDF area. There are two possible outcomes:
Successful Use of the Adobe Library
PDF Color Depth Options
Rendered as
As Is
If Original is Black&White, then Group 4 TIFF; otherwise, it will be a JPG matching bit depth.
Black&White (1-bit)
Group 4 TIFF
Grayscale (8-bit)
JPG (8-bit)
True Color (24-bit)
JPG
Unsuccessful Extraction of the Adobe Library
PDF Color Depth Options
Rendered as
As Is
Always 24-bit JPG
Black&White (1-bit)
Group 4 TIFF
Grayscale (8-bit)
JPG (8-bit)
True Color (24-bit)
JPG
- PDF Paper Size - Select an output paper size for PDFs. When the As Is option is selected, the internal PDF document size is used to draw the image.
Paper Size - Click the drop-down menu and select an output paper size for documents during processing.
-
Set the Appropriate Option for Time Zone Handling.

- Convert all times to UTC
- Specify Time Zone
For more information about Time Zone Handling, see Date Handling (Time Zones) in eCapture.
-
Click the Advanced Options button to set more complex General Options rules. The Advanced Imaging dialog box appears.

- Remove blank pages - Select this option and then set the Blank Page Threshold (1 to 2000) to a value that eliminates the speckles without eliminating any punctuation marks from the pages. eCapture will remove any images that have fewer "dots" than this threshold. If this setting is too high, you may lose images with a few short words. As a starting point, we suggest a setting of 50.
- Process CSV files with Microsoft Excel - Select this option to process .CSV files with Microsoft Excel instead of Oracle (formerly Stellent).
- Process HTML files with Internet Explorer - Select this option to process HTML files with Internet Explorer instead of Oracle (formerly Stellent).
- Enable Internet links in emails - This option controls whether inline images are downloaded from the internet. Clearing this option can improve performance on environments without internet access.
-
Set Lotus Notes options, as appropriate:
- High Speed (Optimized for speed)
- Medium Speed (Balance of speed and quality)
- Low Speed (Optimized for highest quality output)
-
Click the Outlook/EML link, Select Handling/Order. The Outlook/EML Text Cutoff Handling dialog box appears. Select an option and click either the
 or
or  to move it to a specific order location. Repeat for additional options. Options include:
-
Attempt in Landscape w Shrink to Fit
-
Attempt in Portrait w Shrink to Fit
-
Attempt in RTF
-
Attempt in Text
-
Assign Text Cutoff Flag and Manage in QC - This is the default setting. It cannot be repositioned.
-
-
Click the Lotus Notes link, Select Handling/Order. The Lotus Notes Text Cutoff Handling dialog box appears. Select an option and click either the
or to move it to a specific order location. Repeat for additional options. Options include:-
Attempt in Landscape
-
Attempt in Text
-
Assign Text Cutoff Flag and Manage in QC - This is the default setting. It cannot be repositioned.
-
- Click OK to exit the Advanced General Options dialog box.
Processing: Excel Options
-
Click the Excel tab to set the processing options for Excel files.
-
Process with Outside-In (Stellent) - Select this option to:
- Allow for faster and more consistent generation of images on the first pass
- Reduce the amount of time spent manually QCing these document types
When selected, only Outside-In (Stellent) is used to process images; the Microsoft related options are grayed out by default. Full metadata is extracted and time zone imaged output reflects the time-zone handling options configured for the Processing Job. All files processed by Outside-In (Stellent) receive the Stellent Processed flag in QC.
The processing output differs when using Outside-In (Stellent) to view and image documents. However, the QC applied flags, metadata, and optional summary reports are similar if processing was done without Outside-In (Stellent). Other processing options, including Flex Processor processing options, are respected when using Outside-In (Stellent).
- Comments - Set where you want comments displayed. Select from None, At end of sheet, or As displayed on sheet.
-
Color Depth - Set the Color Depth options. Color processing for Excel files is handled separately from color processing of other types of files. This setting is independent of the General Color Depth.
Single Page Output Type
General Color Depth Options
Rendered as
Black&White (1-bit)
Group 4 TIFF
Grayscale (8-bit)
LZW TIFF
256 Color (8-bit)
LZW TIFF
True Color (24-bit)
JPEG
Multi-Page TIFF Output Type
General Color Depth Options
Rendered as
Black&White (1-bit)
Group 4 TIFF
Grayscale (8-bit)
LZW TIFF
256 Color (8-bit)
LZW TIFF
True Color (24-bit)
JTIFF - (JPEG compressed TIFF)
-
Paper Size - Click the drop-down menu and select an output paper size for documents during processing.
Note: For Excel Only - For Custom[8.5x11.0in], the Custom Paper Size dialog box appears.
The Custom Paper size defaults to 8.5x11 inches. The range values are shown for both inches and millimeters. Maximum size in inches is 50.00x70.00; for millimeters, it's 1270.00x1778.00. When this option is selected, the document will be processed through the PDF driver (Text-Based PDF creation) regardless of the Flex Processor option selected. OCRing is not applicable in this instance. Export settings will be limited to Text-Based PDF Output only, even if image format is selected. Non-Excel documents will export as usual.
-
Center on Page - Determines where to center the image on the page.
-
Horizontally
-
Vertically
-
-
Page Order - Determines the page order to be used for imaging.
-
As is
-
Down, and then over
-
Over, and then down
-
-
Orientation - Determines the orientation of the page at the time of printing.
-
As is
-
Portrait
-
Landscape
-
-
Scaling - Specifies whether the image should be scaled and how. If scaling is used, the options are adjusted to a percent of the current size or fit to page.
-
As is
-
Adjust to % normal size
-
Fit to page
-
-
If you want to set more granular processing options for Excel files, click the Advanced Options button and the Advanced Excel Imaging dialog box appears.
-
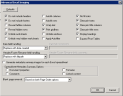
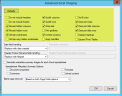
At the top of the dialog box, set the options for how to handle headers, footers, and other content in the Excel workbook. Click the Defaults button to revert to the default settings for these options, as shown in the following image:
If you have trouble locating the referenced options in Excel, click
here to view information about how to navigate in Excel to the option.-
Do not include headers - View > Header and Footer: Header/Footer Tab, Header drop-down list, None.
-
Do not include footers - View > Header and Footer: Header/Footer Tab, Footer drop-down list, None.
-
Reveal hidden columns - Format > Column > Unhide
-
Reveal hidden rows - Format > Row > Unhide
-
Unhide worksheets - Format > Sheet > Unhide
-
Unhide very hidden worksheets - Unhides worksheets that were hidden by a Microsoft Visual Basic for Applications program that assigned the property xlSheetVeryHidden. (From the Microsoft Excel Help File: If sheets are hidden by a Microsoft Visual Basic for Applications program that assigns the property xlSheetVeryHidden, you cannot use the Unhide command to display the sheets. If you are using a workbook with Visual Basic macros and have problems with hidden sheets, contact the owner of the workbook for more information.)
-
Autofit columns - Double click the right boundary of the column heading for that row.
-
Autofit rows - Double click the boundary below that row heading.
- Wrap text - Format > Cells: Alignment Tab, Wrap Text Option.
-
Print gridlines - File > Page Setup: Sheet Tab, Under Print, select Gridlines checkbox.
-
Unhide windows - Window > Unhide.
-
Apply Autofilter - Data > Filter > AutoFilter
- No fill color (for cells) - Format > Cells: Patterns Tab, Under Color, click No Color.
-
Clear print area - File > Print Area > Clear Print Area.
-
Clear print title columns - File > Page Setup: Sheet Tab, under Print Titles select the columns to repeat range.
-
Clear print title rows - File > Page Setup: Sheet Tab, under Print Titles select the rows to repeat range.
-
Display headings - File > Page Setup: Sheet Tab, under Print, select the Row and column headings checkbox.
-
Expand Pivot Tables - Right click Pivot Table to display context menu. Choose Expand/Collapse > Expand.
-
-
Set the remaining settings in the Advanced Excel Imaging dialog box.
The table below provides a list of the available options.
Setting
Options
Date field handling:
-
Replace with date created - will replace with creation date.
-
Replace with date last saved - will replace current date with last saved dated.
-
Replace with comments - displays the Date Field Comments field where you can enter the text that should replace the contents of the date field.
-
Replace with field code
-
Do not replace - will not replace the date (e.g., Macros)
Header/Footer Filename field handling
If path or filename options are found in an Excel header or footer, you can select from the following options to handle these occurrences.
-
Replace with filename (no path) - inserts the unqualified filename
-
Replace with filepath - inserts the fully-qualified path of the original file
-
Replace with comments - displays the Header/Footer Filename field comments field where you can enter your own comments
-
Replace with field code - replaces outputs &[Path] and/or &[File]
-
Remove - removes the codes entirely
Generate metadata
Select Generate a metadata summary images for each Excel spreadsheet, and then under Spreadsheet Metadata Summary Options select the individual types of metadata to capture.
-
Document Properties
-
Comments
-
Formulas
-
Linked Content - The data collected will include hyperlinks and OLE linked files. If any linked content exists in a document, a QC flag will be added. A separate page entitled Document Properties is generated and is placed at the end of each Microsoft Excel document.
For more information about metadata, click
here.Who creates the metadata? The native program (such as Microsoft Excel or Outlook) creates the metadata and maintains it with the native file (the letter or email).
What does eCapture do with this data? When a document is processed, the metadata is collected from the document and stored in the database.
How is metadata useful? It gives you valuable information as to “Who knew what, and when.” It can tell you who wrote a document and who edited it last. It also shows you a file’s revision number, the character count, and many other pieces of information about a file summary image for each Excel spreadsheet.
Blank page removal
This option is available if the Remove Blank Pages option is selected under the General Options tab. Select from the following two options to remove blank pages:
-
Based on selected Page Order: Down, then over or Over, then down.
-
If Down, then over is selected, all vertical page columns that are blank will be removed.
-
If Over, then down is selected, all horizontal page rows where all pages in a horizontal run are blank will be removed.
-
-
Based on both Page Order options: This bases the removal of blank pages on both horizontal page-rows and vertical page-columns.
Example of Page Removal
The following example pertains to using a spreadsheet with 12 pages that will be rendered.

-
If the sheet's page order is Over, then down, eCapture removes all horizontal page rows where all pages in a horizontal run are blank. In order to do that, eCapture steps through all HPageBreaks and makes sure the range from the first column to the last column is blank.
-
If eCapture determines that 1-3 is blank, then they will be hidden. If eCapture determines that 4-6 is blank, then they will be hidden, and so on.
-
If the sheet's page order is Down, then over, eCapture will remove all vertical page columns that are blank.
-
If eCapture determines that 1-A is blank, then they will be hidden. If eCapture determines that 2-B is blank, then they will be hidden, and so on.
By using this algorithm, all blank pages will not be eliminated, though many of them will be.
Note: All page-hiding is done by setting horizontal regions' RowHeight properties and vertical regions’ ColumnWidth properties to 0.
-
- Click OK to exit the Advanced Excel Imaging dialog box.
Processing: Word Options
-
Process with Outside-In (Stellent) - Selecting this option:
- Allows for faster and more consistent generation of images on the first pass
- Reduces the amount of time spent manually QCing these document types
When selected, only Outside-In (Stellent) is used to process images; the Microsoft related options are grayed out by default. Full metadata is extracted and time zone imaged output reflects the time-zone handling options configured for the Processing Job. All files processed by Outside-In (Stellent) receive the Stellent Processed flag in QC.
The processing output differs when using Outside-In (Stellent) to view and image documents. However, the QC applied flags, metadata, and optional summary reports are similar if processing was done without Outside-In (Stellent). Other processing options, including Flex Processor processing options, are respected when using Outside-In (Stellent).
-
Select the option Show Hidden Text to see hidden text, if any, contained in Word documents.
-
Select the appropriate revision option. The option you select determines how the system handles revisions within Word documents.
-
As is - Print the document as it is according to the Office Settings on the machine.
-
Detail Revisions - Print the document with revisions shown.
-
Final Copy (hide revisions) - Print the document with no revisions shown.
-
Both Copies - Documents are printed. If a document has revisions, it's printed again with the revisions shown. Documents with revisions will then have two sets of images, one right after the other.
-
-
Select the appropriate orientation option. The option you select determines how the system orients images of Word documents.
-
As is
-
Portrait
-
Landscape
-
-
Select the Scale to Page option to scale the contents of the page to fit in the printable area. This sets the PrintZoomPageWidth and PrintZoomPageHeight to the paper size of the printer when printing Word documents.
-
Color Depth - Color processing for Word documents is handled separately from color processing of other types of files. This setting is independent of the General Color Depth options located on the Processing Options: General Options tab.
Single Page Output Type
General Color Depth Options
Rendered as
Black&White (1-bit)
Group 4 TIFF
Grayscale (8-bit)
LZW TIFF
256 Color (8-bit)
LZW TIFF
True Color (24-bit)
JPEG
Multi-Page TIFF Output Type
General Color Depth Options
Rendered as
Black&White (1-bit)
Group 4 TIFF
Grayscale (8-bit)
LZW TIFF
256 Color (8-bit)
LZW TIFF
True Color (24-bit)
JTIFF - (JPEG compressed TIFF)
- Select the appropriate Paper Size for Word documents.
- If you want to set more granular options for handling of Word documents, click the Advanced Options button.
In the Field Handling section, select the Date Field Handling options:
Replace with date created - will replace with creation date.
Replace with date last saved - will replace current date with last saved dated.
Replace with comments - displays the Date Field Comments field where you can enter the text that should replace the contents of the date field.
Replace with field code
Do not replace - will not replace the date (e.g. Macros)
Remove - removes the codes entirely.
In the Field Handling section, select the Filename handling options:
Replace with filename (no path)
Replace with filepath
Replace with comments - displays the Filename Comments field where you can enter the text that should replace the filename.
Replace with field code
Do not replace
Set the metadata options for Word documents.
- Select Generate metadata. The native program, in this case Word, creates the metadata and maintains it with the native file. When a document is processed, the metadata is collected from the document and stored in the database. Metadata gives you valuable information as to “Who knew what, and when.” It can tell you who wrote a document and who edited it last. It also shows you a file’s revision number, the character count, and many other pieces of information about a file.
- Select the individual types of metadata to capture under Document Metadata Summary Options:
Document Properties
Revisions
Comments
Routing Slips
Linked Content - The data collected can include hyperlinks and OLE linked files. If any linked content exists in a document, a QC flag is added.
A separate page entitled Document Properties is generated and is placed at the end of each Microsoft Word document. For example, The Document Properties page may contain the following data:
Title
Author
Company
Attached Template
Page Count
Paragraph Count
Line Count
Word Count
Character Count (spaces excluded)
Character Count (spaces included)- When finished setting Advanced Options, click OK to exit the Advanced Word Imaging dialog box.
- When finished setting Word Options, click OK to exit the Options for Processing dialog box.
Processing: PowerPoint Options
-
Select Original Settings (As Is) to use Microsoft PowerPoint’s default settings.
-
Select the Page Orientation. The options are: As is, Portrait, and Landscape.
-
Select the Slide Orientation. The options are: As is, Portrait, and Landscape.
-
Select the Color Depth to be used for processing PowerPoint presentations. Color processing for PowerPoint presentations is handled separately from color processing of other types of files. This setting is independent of the General Color Depth and applies to everything else outside of the five types (Word, Excel, PowerPoint, PDF, and Native TIFF) that eCapture does not process through Oracle (formerly Stellent). There are three exceptions to this rule: Lotus Notes, Internet Explorer, and Outlook Express, which also fall under the General type. All other email, except for Lotus Notes and Outlook Express, are always Group 4 TIFF because it is rendered from text.
Color Depth options under the General Options tab in the Options for Processing Job dialog box are:
Single Page Output Type
General Color Depth Options
Rendered as
Black&White (1-bit)
Group 4 TIFF
Grayscale (8-bit)
LZW TIFF
256 Color (8-bit)
LZW TIFF
True Color (24-bit)
JPEG
Multi-Page TIFF Output Type
General Color Depth Options
Rendered as
Black&White (1-bit)
Group 4 TIFF
Grayscale (8-bit)
LZW TIFF
256 Color (8-bit)
LZW TIFF
True Color (24-bit)
JTIFF - (JPEG compressed TIFF)
-
Select the Output Type. The options are:
Slides
Outline
Notes Pages (notes and slide on one page)
Notes Pages Split (notes and slide on separate page)
Handouts
-
Select a Slide Size or As Is from the drop-down menu.
-
Select an output Paper Size or As Is from the drop-down menu.
-
To select more complex PowerPoint options, click Advanced Options.
- Print Hidden Slides - Select this option to print slides that are hidden from the slide show.
- Print Comments - Select this option to print comments for your slides.
- Frame Slides - Select this option to print a border around each slide.
- Scale to Fit Page - Select this option to ensure all available text displays on the slide that was imaged from eCapture,
-
Handouts - Select the desired handout options:
-
Slides per Page
-
Order (if generating 4 or more slides per page)
-
- Include Linked Content Summary - Select this option to ensure that the data collected will include hyperlinks and OLE linked files. If any linked content exists in a document, a QC flag will be added.
-
Headers and Footers - For Headers and Footers, you can set options for Slides or Notes and Handouts. The tabs that display are based on the Output Type selected on the basic PowerPoint Options tab. The options are:
- Slides
- Outline
- Notes Pages (notes and slide on one page)
- Notes Pages Split (notes and slide on separate page), or Handouts.
Slides: For the Output type of Slides, select from the following options from the Slide tab:

- Select Date and time if you want to display the Date last saved or the Date created at the top of the image.
-
If Date and time is selected, you can choose Update automatically. Select Date last saved or Date created.
-
Format: Select a format option for the date and time.
-
Choose Fixed if you want to manually enter a fixed date and time to display in the image header.
- Select Footer if you want a footer to display at the bottom of the image.
-
If Footer is selected, enter static text that you want printed at the bottom of the image or select As is to maintain the existing footer.
- If Footer is selected, define whether a slide number should show on the image by selecting an option in the Slide Number drop-down menu. The options are: As is, Show, Do not show.
-
If Footer is selected, define whether to show the footer on the title slide image by selecting an option in the Show on title slide drop-down menu. The options are: As is, Show, Do not show.
Other than Slides: If, on the basic PowerPoint imaging options tab you set the Output type to anything other than Slides, select from the following options on the Notes and Handouts tab:

- Select Date and time if you want the notes/handouts to list the date/time.
-
If Date and time is selected, choose Update automatically and select Date last saved or Date created.
- Format: Select a format option for the date and time.
-
Choose Fixed if you want to manually enter a fixed date and time to display in the image header.
-
Select Header if you want a header to display at the top of the image. You can either enter fixed text to add or select As is to maintain the existing header.
-
Select Footer if you want a footer to display at the bottom of the image.
-
If Footer is selected, you can enter static text that you want printed at the bottom of the image.
- If Footer is selected, select a Page Number option to define whether or not a page number should show on the image. The options are: As is, Show, Do not show.
- Click OK to exit the Advanced PowerPoint Options dialog box.
- Click OK to exit the Options for Processing dialog box.
Data Extract Options
The following steps describe how to set the options available for creating a Data Extract Job.
Set the General Options

Retry errors with Outside In (Stellent) - Used to image Microsoft Office (Excel, Word, and/or PowerPoint) documents. The Outside In (Stellent) option:
- Allows for faster and more consistent generation of images on the first pass
- Reduces the amount of time spent manually QCing these document types
When this check box is selected, only Outside In (Stellent) is used to process images; the Microsoft related options are grayed out by default. Full metadata is extracted and time zone imaged output reflects the time zone handling options configured for the Data Extract Job. All files processed by Outside In (Stellent) receive the Stellent Processed flag in QC.
The processing output differs when using Outside In (Stellent) to view and image documents. However, the QC applied flags, metadata, and optional summary reports will be similar if processing is done without Outside In (Stellent). Other processing options, including Flex Processor processing options, are respected when using Outside In (Stellent).
Replace tabs with spaces when extracting Excel text - When this check box is selected, the extracted Excel text will look similar to the following:
Column A Column B
Value1 Value2
The column data is separated by a space rather than a tab (which can be, for example, the equivalent of five spaces). Therefore, if the check box is cleared, then the column data of the extracted Excel text is separated by a tab (five spaces) and would look similar to the following:
Column A Column B
Value1 Value2
Expand Pivot Tables when extracting Excel text - By default, this check box is cleared. If pivot tables exist, then they will be expanded when this check box is selected. A flag is also set in QC to indicate that the Pivot table exists in the worksheet.
Set the OCR Options for a Specific Data Extract Job
Note: If you are setting Case (Project) Level options, OCR and Time Zone Handling options are defined on the Common Options tab because Discovery Jobs and Data Extract Jobs use the same OCR and Time Zone Handling options. For more information about setting options at the Case (Project) level, see Create a New Case (Project).
The OCR Settings available for Data Extract Jobs are outlined in the following table.
Option
Description
OCR images as necessary
Select this check box to OCR images. Images will be OCRed for indexing/language identification if necessary. The OCR text obtained from the image is then passed on to dtSearch for indexing. The OCR will be indexed and available to be searched on in the Flex Processor.
OCR PDF documents
PDFs with no embedded text: perform OCR before indexing or language identification. PDF pages with embedded text (text-behind) will have text extracted. Comments on a PDF file are also extracted.
-
The OCR text is added to any extracted text from the PDF.
-
The text obtained through OCR, along with the extracted text from the PDF, is passed to dtSearch for indexing.
-
The OCR is then indexed and available to be searched in the Flex Processor.
OCR PowerPoint Documents
Select this check box to perform OCR on Microsoft PowerPoint files during Data Extract to get text from embedded content in the slides. This results in slower speeds for PowerPoint files, but more accurate text extraction.
PDF page character threshold
Select a PDF page character threshold and indicate a value. The default value is 25 characters. If the value is less than 25, eCapture sends the page to be OCRed. If necessary, enter a different value.
Minimum average OCR confidence [1-100]
The level range settings are from 1 to 100. The default is 50. The OCR Confidence Level is the average percentage of confidence for each document, for all pages within a document on which OCR was performed. Success or failure of a document for flagging is based on the average confidence level of the document. If the average confidence level is below the selected threshold, the document is flagged in QC with the OCR Low Confidence Flag.
Note: For calculating average document confidence, pages in PDF docs with text behind them are considered 100%. OCR failures are considered 0%.
OCR Languages
eCapture includes multi-language OCR capability. The QC document will contain the original OCR languages that were selected for the Data Extract Job. A valid multi-language OCR license must be available in order to modify the original selected languages, if necessary.
To reserve a portion of the multi-language OCR licenses for QC and to keep the Worker from consuming all available licenses, use the Multi-Language OCR License slider located in the Controller System Options dialog box.
Click OCR Languages to display the Language OCR dialog box.
After selecting the languages, click OK to close the dialog box. The selected languages display in the OCR Languages field. Place the mouse pointer on the OCR Languages field to display a tool tip that lists all the selected languages that were not visible in the OCR Languages field. The OCR Languages field is a read-only field.
Click
here to view a list of supported languages.-
English
-
Arabic
-
Chinese Simplified
-
Chinese Traditional
-
Japanese
-
Korean
-
Afrikaans
-
Albanian
-
Basque
-
Belarusian
-
Bulgarian
-
Catalan
-
Croatian
-
Czech
-
Danish
-
Dutch
-
Estonian
-
Faorese
-
Finnish
-
French
-
Galician
-
German
-
Greek
-
Hungarian
-
Icelandic
-
Indonesian
-
Italian
-
Latvian
-
Lithuanian
-
Macedonian
-
Norwegian
-
Polish
-
Portuguese
-
Portuguese Brazil
-
Romanian
-
Russian
-
Serbian
-
Serbian Cyrillic
-
Slovak
-
Slovenian
-
Spanish
-
Swedish
-
Turkish
-
Ukrainian
Click here to view some
caveats to OCR Language handling.English is the only language that is selected by default. The more languages that are selected, the lower the confidence level will be for correctly identifying the languages in a document.
-
If English is selected, Arabic will not be available for selection.
-
If Arabic is selected, all other languages will not be available for selection.
-
If one of the CJK (Chinese, Japanese, Korean) languages are selected, then all remaining CJK languages will not be available for selection. Other languages (excluding Arabic) may be selected.
-
If Chinese Simplified is selected, Chinese Traditional, Japanese, and Korean will not be available for selection.
-
If Chinese Traditional is selected, Chinese Simplified, Japanese, and Korean will not be available for selection.
-
If Japanese is selected, Chinese Simplified, Chinese Traditional, and Korean will not be available for selection.
-
If Korean is selected, Chinese Simplified, Chinese Traditional, and Japanese will not be available for selection.
Set the Appropriate Option for Lotus Notes

- High Speed (Optimized for speed)
- Medium Speed (Balance of speed and quality)
- Low Speed (Optimized for highest quality output)
Set the Appropriate Option for Time Zone Handling
- Convert all times to UTC
- Specify Time Zone
For more information about Time Zone Handling, see How eCapture Handles Dates and Time Zones.
Note: If you are setting Case (Project) Level options, OCR and Time Zone Handling options are defined on the Common Options tab because Processing and Data Extract Jobs use the same OCR and Time Zone Handling options. For more information about setting options at the Case (Project) level, see Create a New Case (Project).
Common Options
If you are setting Case (Project) Level options, OCR and Time Zone Handling options are defined on the Common Options tab because Processing and Data Extract jobs use the same OCR and Time Zone Handling options. However, if you are setting job options for a specific Processing or Data Extract job they are set on the General and Data Extraction options tabs, respectively. For more information, see:
- Set the OCR options.
- OCR pages missing text - Select OCR Pages missing text to OCR pages within documents that are missing text. Optionally, select PDF page character threshold and indicate a value. The default value is 25 characters. The maximum value is 10000. If the value is less than 25, eCapture will send the page to be OCRed. If necessary, enter a different value.
- PDF page character threshold - Select a PDF page character threshold and indicate a value. The default value is 25 characters. If the value is less than 25, eCapture will send the page to be OCRed. If necessary, enter a different value.
- Minimum average OCR confidence - The level range settings are from 1 up to 100. The default is 50. The OCR Confidence Level is the average of confidence per document, for all pages within a document on which OCR was performed. Success or failure of a document for flagging is based on the average confidence level of the document. If the average confidence level is below the selected threshold, the document will be flagged in QC with the OCR Low Confidence Flag.
OCR languages - eCapture includes multi-language OCR capability. The QC document will contain the original OCR languages that were selected for the Data Extract job. A valid multi-language OCR license must be available in order to modify the original selected languages, if necessary.
To reserve a portion of the multi-language OCR licenses for QC and to keep the Worker from consuming all available licenses, use the Multi-Language OCR License slider located in the Controller System Options dialog.
Click OCR Languages to display the Language OCR dialog.
After selecting the languages, click OK to close the dialog. The selected languages appear in the OCR Languages field. Place the mouse pointer on the OCR Languages field to display a tooltip that lists all the selected languages that were not visible in the OCR Languages field. The OCR Languages field is a read-only field.
Click here to view some
caveats to OCR Language handling.English is the only language that is selected by default. The more languages that are selected; the lower the confidence level will be for correctly identifying the languages in a document.
If English is selected, Arabic will not be available for selection.
If Arabic is selected, all other languages will not be available for selection.
If one of the CKJ (Chinese, Korean, Japanese) languages are selected, then all remaining CKJ languages will not be available for selection. Other languages (excluding Arabic) may be selected.
If Chinese Simplified is selected, Chinese Traditional, Korean, and Japanese will not be available for selection.
If Chinese Traditional is selected, Chinese Simplified, Korean, and Japanese will not be available for selection.
If Korean is selected, Chinese Simplified, Chinese Traditional, and Japanese will not be available for selection.
If Japanese is selected, Chinese Simplified, Chinese Traditional, and Korean will not be available for selection.
-
Set the Time Zone Handling options, as appropriate. The options are:
- Convert all times to UTC
- Specify Time Zone
For more information on Time Zone Handling, see How eCapture Handles Dates and Time Zones.
Note: If you are configuring job options for a specific Processing or Data Extract job, you set these options on the Data Extract Job Options dialog for Data Extract Jobs and on the Processing Job Options > General Options tab, for Processing Jobs.
Filtering Options
The following sections describe how to define a Flex Processor Rule on the Filtering Tab by clicking on the Manage Flex Processor Rules button. The Flex Processor dialog displays. On the Filtering tab, you can also create a rule using the New Rule Wizard, for more information, see Create Rules By Using the Flex Processor Rules Manager Wizard.
Define the Basic Action and Scope of a Flex Processor Rule
-
On the Filtering tab, in the Case (Project), Processing Job, or Data Extract Job Options dialog, click on the
 button located at the bottom of the dialog.
The Flex Processor Rules Manager dialog displays.
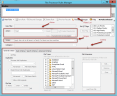
The dialog is split into several sections:
- Rules List: Provides a list of all of the rules defined for the Case (Project) or Job you are currently configuring.
- Action: The action to be taken on the documents that meet the criteria. Only one Action is allowed per rule.
- Criteria: Determines which files this action applies to.
-
Scope: Specifies how the rule is applied to the files that meet the specified criteria.
-
To create a new rule, click
 . This button activates
the new rule for criteria selection. If the drop-down arrow is clicked to the right
of the New Rule button, two options appear: New Rule and New Search-In-Results
Rule. For more information about the differences between and New Rule and New Search-in-Results Rule, click here.
. This button activates
the new rule for criteria selection. If the drop-down arrow is clicked to the right
of the New Rule button, two options appear: New Rule and New Search-In-Results
Rule. For more information about the differences between and New Rule and New Search-in-Results Rule, click here.Search-In-Results Rule is used to create a new rule that is dependent on one or more selected rules. Search-In-Results rules allow refined filtering scenarios. For example, Rule1 will select all documents with the responsive term “criminal”, and then SubRule1 will search within Rule1 to placeholder Excel documents with the responsive term “money.” Essentially, Excel documents with the words “criminal” and “money” will be placeholdered.
The Search-In-Results Rule Options are:
-
Applies to Results of All Previous Rules - The “catch-all” rule for all documents selected by upper rules. Example: placeholder unknown file types.
-
Applies to Results of Selected Rule - Refined criteria/action for only documents fitting criteria of selected “parent” rule. Example: keyword search on documents in a date range. Note: This option is not available if the selected rule is a De-duplication rule. In addition, de-duplication options will not be available when creating a rule that is one of these child rules.
Caveats for Search-in-Results Rule Options are:
- Any rule with an action to remove documents will not be allowed to have any child rules. However, a rule with an action to remove documents can be set as a child rule.
- Rules will only move within their level when reordering rules in the list.
- Tree hierarchy will be used to display the level of dependent rules. For example, Level 0 represents a parent rule. Level 1 would represent the child rule for Level 0. Level 2 would represent the child rule for Level 1. The following hierarchy of rule examples levels are shown here:
-
Image - Search 1
- Image - Search 2
- Placeholder - XLS
- Image - Privilege Search
- Image- PPT Max 20
- Image - Search 2
- Image - Search 3
Rule ID: Action - Rule Title
-
-
Enter a title for the rule. You must define a (unique) Rule Title to reflect the Action and Criteria. If you choose a Placeholder Action, the Rule Title will display on the created placeholders. A Rule Title can be a full page or narrative. A maximum of 750 characters is permitted.
-
Define an Action for the rule. The Actions available to be taken on the data in the collection vary depending on whether you are creating a rule at the Case (Project) level, or for a Processing Job or Data Extract Job. For more information about actions available for Cases (Projects), Processing Jobs, and Data Extract Jobs, click
here.Case (Project) Specific Actions
-
Action: The action to be taken for items that meet the rule criteria at the Case (Project) level.
- Produce
- Placeholder
- Remove
When creating rules at the Case (Project) level, a Max Pages Threshold Limit may be set for the Produce action. When the Max Pages Threshold Limit is set, the number of pages imaged for certain documents is limited to the limit value. For example, if the limit is set to 3, during imaging, and a document has more than 3 pages, the imaging will only take place for the first 3 pages of the document. When a max pages threshold limit is specified, one of two text handling options may be selected:
- Truncate Text to Max Pages
-
Retain all Text for Document
Note: The max pages threshold limit is ignored for Data Extract Jobs that are created under the same Case (Project).
By default, the option Create Placeholder is selected and may be cleared if required for the rule.
Processing Job-Specific Actions
-
Action :The action to be taken for items that meet the rule criteria at the Processing Job level for the selected case (project).
- Image - Converts the files to image format.
- Convert to PDF - Converts documents to text-based PDF files that are PDF/A compliant. Uses dynamically created PDF print drivers (PDFCreator). Documents will be converted via PDF-XChange drivers and single page PDFs become the intermediate output. This option differs from Image which uses Black Ice™ drivers and produces images as the intermediate format. Exceptions are native files which are already in an image format. These files will continue to use Lead Tools for processing. For information about PDF/A compliant files, visit http://www.pdfa.org/doku.php.
- Placeholder - This is useful for media files such as .WAV files. To customize the placeholder, click Select metadata fields. This opens the Custom Placeholder Configuration dialog.
- Placeholder with Document Text - Creates image placeholders but includes the original document text. To customize the placeholder, click Select metadata fields. This opens the Custom Placeholder Configuration dialog. For more information, seeCreate Custom Placeholders for Processing Jobs and Cases (Projects).
- Remove - Removes the document from the results
-
For Image and Convert to PDF Action Types
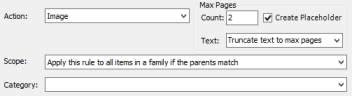
- Max Page Count: Used to set a threshold for the total amount of pages to be produced for any one document related to the rule. Blank page removal is applied prior to considering the page as part of a document when Remove Blank Pages is selected in the General Processing Options screen. For example, a 12 page document that has 5 blank pages removed will not be flagged as Threshold Exceeded if Max Pages is set to 10.
- Text drop-down menu: Select one of two options
- Truncate text to max pages - text is truncated to match the output of pages that fall under the threshold (existing behavior).
Retain all text for document - document text is associated to the number of pages below the set threshold value and all subsequent pages are blank.
- Create Placeholder: This option is enabled by default. It determines if the slipsheet is printed when any Max Pages limit is exceeded. For example, if the Max Pages value is set to 100, then eCapture will generate placeholders for all the documents that have more than 100 pages.
During Export, pages with no text are handled the same as a regular Export Job. Placeholders may be created for these pages if desired. Searchable PDFs, including hit highlighting, are not affected by the two Text options.
Data-Extract Job-Specific Actions
Action: The action to be taken for items that meet the rule criteria at the Data Extract Job level for the selected case (project).
-
Data Extract - Performs text and metadata extraction on the files.
-
Text Placeholder - Creates an extracted text placeholder text file to replace any text that would be extracted but still includes a link to the native file.
-
Remove - Removes the document from the results.
Category: Select an existing category or enter a category. The category is applied to the effective rule. Once the category is entered, it is available from the pick list for newly defined rules.
Set QC Flags: Use QC flags to organize data and create Export Sets in QC. The QC flag is set when the rule action is applied. Click
 to open the
New Flag dialog. Type the new flag and click OK. Newly created flags will
display in the QC job and allow filtering on the flag. Specify whether
you want the affected files to be assigned a QC flag during processing. You cannot set QC
Flags for the Remove type of Action.
to open the
New Flag dialog. Type the new flag and click OK. Newly created flags will
display in the QC job and allow filtering on the flag. Specify whether
you want the affected files to be assigned a QC flag during processing. You cannot set QC
Flags for the Remove type of Action. -
-
Define a scope for the rule. The Scope is the level on which the document and its relationships must match the rule in order for the rule to apply.
- If the Process Job Duplicates and/or the Data Extract Job Duplicates options are not selected under the General Criteria tab, then one of four different scope criteria can be selected:
-
Apply this rule to all items in a family if the parents match: The action will be performed on a file if the criteria match that file's parent. To look at it from the other direction, if a parent file matches a rule's criteria, the action of that rule will be applied to that parent document and all of its children. This may be used in a de-duplication Rule.
-
Apply this rule to all items in a family if at least one item matches: The action will be performed on a file if the criteria match any item in that file's family. In other words, if a file matches a rule's criteria, the action of that rule will be applied to all files in the family (parents and siblings). This may NOT be used in de-duplication Rules.
-
Apply this rule to all items in a family if ALL items match: The action will be performed on a file if the criteria match ALL items in that file's family. This may NOT be used in de-duplication Rules. This option is useful for keyword filtering.
-
Treat items in a family separately: The action will be performed only on files where the Rule criteria match that particular file. Other members of that file’s family are not considered. This may be used in a de-duplication Rule.
- If the Process Job Duplicates and/or the Data Extract Job Duplicates options are selected under the General Criteria tab, the Scope options change to:
- Maintain family structure
-
Treat documents individually
For more information about these two options, click
here.- Maintain Family Structure: The action will be performed on a file if the criteria
match the file or the file's parent. To look at it from the other direction,
if a parent file matches a Rule's criteria, the action of that Rule will
be applied to that parent document and all of its children. Only
an entire family of documents are considered duplicates. If a parent
document is not identified as a duplicate, but its child document is,
no documents would be identified as a duplicate and hence no documents
removed.
Allow Child Originals: If the Process Job Duplicates or Data Extract Duplicates option is checked and the Scope is set to Maintain Family Structure, you have the option to check the Allow Child Originals check box. This option controls how child documents are compared during de-duplication. This allows documents, including loose files, to de-duplicate against child documents predicated on the order they are processed. For example, if two Word documents exist with the same MD5Hash value, one as a child attachment to an Email parent, the other as a loose Parent, the loose Parent (Word document) is removed. However, if the loose Parent (Word document) is encountered before the Email (parent) and its Word (child attachment) the Word (child attachment) is not removed. Leave this option unchecked to force duplicate checks at the parent level only.
Note: A system-level default can be set by updating the DedupAllowChildOriginals column in the ConfigurationProperties table in the configuration database to either true or false. However, the setting in the Flex Processor rule takes precedence.
If the Maintain Family Structure option is checked:
Child items still inherit the status of the parent. If the parent is de-duplicated, the child is also de-duplicated.
Loose (independent) files can still be filtered if they match the rule criteria or are not selected by rule criteria (no Effective Rule). With de-duplication enabled, loose files will always be checked against parent documents, but have the potential to be checked against child documents ONLY if the parent/child combination are marked as "originals". If the loose file is marked as an original the parent document will still be checked against the loose file, but the child document will not because it inherits its parent's status due to the selected Family Scope.
For example:
EM1 (e-mail) as 3 attachments, Doc1_Att, Tiff1_Att, & Excel1_Att. Two independent files, Tiff1 & Excel1, are duplicates of Tiff1_Att and Excel1_Att. The documents are selected in this order:
EM1
Doc1_Att
Tiff1_Att
Excel1_Att
Tiff1
Excel1
Assuming the parent is not a duplicate, it is then considered an original, as are all of its children. When the loose documents are checked, they are checked against all files, including the children. Because they are duplicates of two of the attachments, they are removed.
If the documents are selected in this order:
Tiff1
Excel1
EM1
Doc1_Att
Tiff1_Att
Excel1_Att
the loose files are now considered originals. The parent is checked against these two files; it is not a duplicate, so it is not removed. The attachments, though duplicates of the loose files, inherit the status of the parent, and are also not removed.
-
Treat Documents Individually: The file is evaluated independent of its family. Any document can be considered a duplicate regardless if it is a parent document or a child document.
EM1 (e-mail) selected for processing
EM1 is selected to process.
Doc1 is selected to process as child of EM1 unless a duplicate, not selected if a duplicate.
Tiff1 is processed as child of EM1 unless a duplicate, not selected if a duplicate.
Excel1 is processed as child of EM1 unless a duplicate, not selected if a duplicate.
EM1 not selected (filtered, not a search result, or a duplicate)
EM1 not selected to process.
Doc1 is selected to process as normal document unless a duplicate, not selected if a duplicate.
Tiff1 is selected to process as normal document unless a duplicate, not selected if a duplicate.
Excel1 is selected to process as normal document unless a duplicate, not selected if a duplicate.
- Maintain Family Structure: The action will be performed on a file if the criteria
match the file or the file's parent. To look at it from the other direction,
if a parent file matches a Rule's criteria, the action of that Rule will
be applied to that parent document and all of its children. Only
an entire family of documents are considered duplicates. If a parent
document is not identified as a duplicate, but its child document is,
no documents would be identified as a duplicate and hence no documents
removed.
-
Specify the criteria for the rule. For rule criteria, you can define General, Date, Search, and Advanced Criteria. See the related sections below for more information on defining this criteria.
-
Click
 to preview the results of the rule without applying the specified Action. For more information about Preview Results, click here.
Initially the option displays a rule application status bar on top of the Flex Processor dialog’s title bar. For large rule sets, the rule application status bar will remain for several seconds to show the status of rules applied. If necessary, click Cancel to return to the Flex Processor dialog and to cancel the rule application.
The Flex Processor Preview dialog appears after the rule application status bar closes and applies each rule to the data collection. The Flex Processor Preview displays an Item level report for the rules as well as the number of Records. Use this Preview to verify the accuracy of the rules and their desired results. The following image shows the Preview fields.

These results can be saved to a .CSV file for distribution.
-
Click
 to save the rule.
Note: If you want to discard changes that you made to a rule, click
 .
. - Click the
 button to open the Rule Set Management Wizard. For more information, see Manage Rules Sets Using the Rule Set
Management Wizard.
button to open the Rule Set Management Wizard. For more information, see Manage Rules Sets Using the Rule Set
Management Wizard. -
Click the
 button to view
a dialog that gives an example for setting a rule.
button to view
a dialog that gives an example for setting a rule.
Note: Throughout the Flex Processor Rules Manager, you will see a blue icon question mark
 icon appear as you mouse over
(or near) different options. Click to display
a pop up with information about the options..
icon appear as you mouse over
(or near) different options. Click to display
a pop up with information about the options.. - If you want to delete one of the rules in the Rules List, at the top of the dialog, select the rule you want to delete and click the
 button. A confirmation dialog appears asking if you want to remove the selected
rule. Click Yes.
button. A confirmation dialog appears asking if you want to remove the selected
rule. Click Yes. - Click the
 button to exit the Flex Processor Rules Manager dialog and return to the Filtering tab.
Define the General Criteria for a Flex
Processor Rule
When you first create a Flex Processor Rule, you set basic rule information and then, if necessary, add general criteria for the rule.
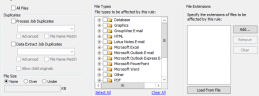
To define General Criteria for a Flex Processor Rule:
-
Check the All Files option if you want to apply the rule to all of the files in the Processing or Data Extract Job. This option is typically used for the first Rule in a Rule set so you can start with everything and then remove or placeholder certain files based on more specific criteria. From the Action drop-down list select Image (if a Processing Job) or Data Extract (if a Data Extract Job).
The All Files option is an exclusive criterion (it cannot be combined with other criteria).
-
(Optional) Select Process Job Duplicates and/or Data Extract Job Duplicates and then select the level from their respective drop-down lists. (Selecting one or both of these options enables de-duplication.) The options are:
-
Current: documents which are duplicates of the current document only will be removed
-
Custodian: documents which are duplicates of any document within the custodian will be removed
-
Case (Project): documents which are duplicates of any document within the case (project) will be removed
-
Client: documents which are duplicates of any document within the client will be removed
Duplicates are determined by matching the MD5 hashes of files.
- If Advanced Duplicate Checking is enabled, then MD5 hash matches are verified with bit-by-bit comparison before being flagged as a match.
-
File Name Match requires that the filenames of the two files (loose files only, not e-mails) must be the same. Bit-by-bit comparison and file name comparison do not occur for e-mail types.
Note: If de-duplication is selected all other criteria is not available.
- A file is checked for duplication when a job starts. At this time, the SelectionIDs are assigned to the documents. These SelectionIDs are closely tied with the order that the documents were discovered. Documents are distributed to workers and it is at this time that the document is checked against all previously "processed" documents (the originals) in line with the selected scope and duplication options.
- Ensure the appropriate Action is selected. If necessary, determine whether or not a de-duplication flag should be set.
-
-
If you selected Process Job Duplicates and/or Data Extract Job Duplicates, set the Scope options:
- Maintain Family Structure: The action will be performed on a file if the criteria
match the file or the file's parent. To look at it from the other direction,
if a parent file matches a Rule's criteria, the action of that Rule will
be applied to that parent document and all of its children. Only
an entire family of documents are considered duplicates. If a parent
document is not identified as a duplicate, but its child document is,
no documents would be identified as a duplicate and hence no documents
removed.
Allow Child Originals: If the Process Job Duplicates or Data Extract Duplicates option is checked and the Scope is set to Maintain Family Structure, you have the option to check the Allow Child Originals check box. This option controls how child documents are compared during de-duplication. This allows documents, including loose files, to de-duplicate against child documents predicated on the order they are processed. For example, if two Word documents exist with the same MD5Hash value, one as a child attachment to an Email parent, the other as a loose Parent, the loose Parent (Word document) is removed. However, if the loose Parent (Word document) is encountered before the Email (parent) and its Word (child attachment) the Word (child attachment) is not removed. Leave this option unchecked to force duplicate checks at the parent level only.
Note: A system-level default can be set by updating the DedupAllowChildOriginals column in the ConfigurationProperties table in the configuration database to either true or false. However, the setting in the Flex Processor rule takes precedence.
If the Maintain Family Structure option is checked:
Child items still inherit the status of the parent. If the parent is de-duplicated, the child is also de-duplicated.
Loose (independent) files can still be filtered if they match the rule criteria or are not selected by rule criteria (no Effective Rule). With de-duplication enabled, loose files will always be checked against parent documents, but have the potential to be checked against child documents ONLY if the parent/child combination are marked as "originals". If the loose file is marked as an original the parent document will still be checked against the loose file, but the child document will not because it inherits its parent's status due to the selected Family Scope.
For example:
EM1 (e-mail) as 3 attachments, Doc1_Att, Tiff1_Att, & Excel1_Att. Two independent files, Tiff1 & Excel1, are duplicates of Tiff1_Att and Excel1_Att. The documents are selected in this order:
EM1
Doc1_Att
Tiff1_Att
Excel1_Att
Tiff1
Excel1
Assuming the parent is not a duplicate, it is then considered an original, as are all of its children. When the loose documents are checked, they are checked against all files, including the children. Because they are duplicates of two of the attachments, they are removed.
If the documents are selected in this order:
Tiff1
Excel1
EM1
Doc1_Att
Tiff1_Att
Excel1_Att
the loose files are now considered originals. The parent is checked against these two files; it is not a duplicate, so it is not removed. The attachments, though duplicates of the loose files, inherit the status of the parent, and are also not removed.
-
Treat Documents Individually: The file is evaluated independent of its family. Any document can be considered a duplicate regardless if it is a parent document or a child document.
EM1 (e-mail) selected for processing
EM1 is selected to process.
Doc1 is selected to process as child of EM1 unless a duplicate, not selected if a duplicate.
Tiff1 is processed as child of EM1 unless a duplicate, not selected if a duplicate.
Excel1 is processed as child of EM1 unless a duplicate, not selected if a duplicate.
EM1 not selected (filtered, not a search result, or a duplicate)
EM1 not selected to process.
Doc1 is selected to process as normal document unless a duplicate, not selected if a duplicate.
Tiff1 is selected to process as normal document unless a duplicate, not selected if a duplicate.
Excel1 is selected to process as normal document unless a duplicate, not selected if a duplicate.
- Maintain Family Structure: The action will be performed on a file if the criteria
match the file or the file's parent. To look at it from the other direction,
if a parent file matches a Rule's criteria, the action of that Rule will
be applied to that parent document and all of its children. Only
an entire family of documents are considered duplicates. If a parent
document is not identified as a duplicate, but its child document is,
no documents would be identified as a duplicate and hence no documents
removed.
- (Optional) Check Allow Child Originals. Allows documents, including loose files, to de-duplicate against child documents. If unchecked, forces duplicate checks at the parent level only. This option is disabled for the Scope: Treat documents individually
-
(Optional) Check File Size. When File Size is selected for a rule, it applies to the files in the Processing or Data Extract Job which have sizes on disk either greater than or equal to, or less than or equal to, the size specified. The size is expressed in KB. For example, a 1 MB file will be entered as 1024 KB.
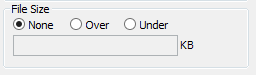
-
(Optional) Check File Types. In the File Types section you can check the file types affected by the rule. eCapture recognizes documents by their actual content and not the file extension. Keep this in mind as you exclude/include file types for a Processing or Data Extract Job. You can filter (exclude) a myriad of file types by simply selecting the file type check box. When the Processing or Data Extract Job runs, it will process only those file types that you want and exclude all others that you selected in the Filters dialog box.
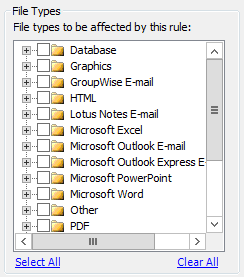
For example, you discovered a directory containing 15 different types of files. Some of these files were word processing documents. You want to run a Processing Job that includes only Microsoft Word documents.
There is a separate category for Microsoft Word documents (and subcategories of all the versions of Microsoft Word under the Microsoft Word category) as well as a separate generic Word Processing category which contains subcategories of all other word processing file types such as Lotus Word Pro, WordStar, .RTF, etc. If you check only the box next to Microsoft Word, you would automatically exclude any other type of word processing files that exist in the Discovery Job that you selected. The Processing Job will process those documents that it recognizes as Microsoft Word documents based on their actual content.
These file types are based on the Oracle® Outside In Technology (formerly Stellent) identification criteria.
Click Select All to select every file type.
Click Clear All to clear all the selected file types.
-
(Optional) You can also specify specific extensions of files you want to be affected by a given rule. Click the
 button to add the extension to the list. Repeat for each extension.
 -
(Optional) To import a list of file extensions from a .CSV file, click the
 button. Select the .CSV file
and click Open.
button. Select the .CSV file
and click Open. An Import From File progress bar appears. If any errors were encountered during the import, such as duplicates, an Information dialog box appear with the errors.
- The .CSV file may contain extensions with or without . (period).
- Make sure that the .CSV file contains only one column of file extensions with each extension occupying its own row, e.g. Range A1 through A50 or Range E1 through E50.
- The file extensions are alphabetized upon import into the Flex Processor.
-
If you want to remove a specific extension from the list, select the extension and click the
 button.
 - Click the
 button to remove all extensions from the list.
-
Check the All Files option if you want to apply the rule to all of the files in the Processing or Data Extract Job. This option is typically used for the first Rule in a Rule set so you can start with everything and then remove or placeholder certain files based on more specific criteria. From the Action drop-down list select Image (if a Processing Job) or Data Extract (if a Data Extract Job).
The All Files option is an exclusive criterion (it cannot be combined with other criteria).
-
(Optional) Select Process Job Duplicates and/or Data Extract Job Duplicates and then select the level from their respective drop-down lists. (Selecting one or both of these options enables de-duplication.) The options are:
-
Current: documents which are duplicates of the current document only will be removed
-
Custodian: documents which are duplicates of any document within the custodian will be removed
-
Case (Project): documents which are duplicates of any document within the case (project) will be removed
-
Client: documents which are duplicates of any document within the client will be removed
Duplicates are determined by matching the MD5 hashes of files.
- If Advanced Duplicate Checking is enabled, then MD5 hash matches are verified with bit-by-bit comparison before being flagged as a match.
-
File Name Match requires that the filenames of the two files (loose files only, not e-mails) must be the same. Bit-by-bit comparison and file name comparison do not occur for e-mail types.
Note: If de-duplication is selected all other criteria is not available.
- A file is checked for duplication when a job starts. At this time, the SelectionIDs are assigned to the documents. These SelectionIDs are closely tied with the order that the documents were discovered. Documents are distributed to workers and it is at this time that the document is checked against all previously "processed" documents (the originals) in line with the selected scope and duplication options.
- Ensure the appropriate Action is selected. If necessary, determine whether or not a de-duplication flag should be set.
-
-
If you selected Process Job Duplicates and/or Data Extract Job Duplicates, set the Scope options:
- Maintain Family Structure: The action will be performed on a file if the criteria
match the file or the file's parent. To look at it from the other direction,
if a parent file matches a Rule's criteria, the action of that Rule will
be applied to that parent document and all of its children. Only
an entire family of documents are considered duplicates. If a parent
document is not identified as a duplicate, but its child document is,
no documents would be identified as a duplicate and hence no documents
removed.
Allow Child Originals: If the Process Job Duplicates or Data Extract Duplicates option is checked and the Scope is set to Maintain Family Structure, you have the option to check the Allow Child Originals check box. This option controls how child documents are compared during de-duplication. This allows documents, including loose files, to de-duplicate against child documents predicated on the order they are processed. For example, if two Word documents exist with the same MD5Hash value, one as a child attachment to an Email parent, the other as a loose Parent, the loose Parent (Word document) is removed. However, if the loose Parent (Word document) is encountered before the Email (parent) and its Word (child attachment) the Word (child attachment) is not removed. Leave this option unchecked to force duplicate checks at the parent level only.
Note: A system-level default can be set by updating the DedupAllowChildOriginals column in the ConfigurationProperties table in the configuration database to either true or false. However, the setting in the Flex Processor rule takes precedence.
If the Maintain Family Structure option is checked:
Child items still inherit the status of the parent. If the parent is de-duplicated, the child is also de-duplicated.
Loose (independent) files can still be filtered if they match the rule criteria or are not selected by rule criteria (no Effective Rule). With de-duplication enabled, loose files will always be checked against parent documents, but have the potential to be checked against child documents ONLY if the parent/child combination are marked as "originals". If the loose file is marked as an original the parent document will still be checked against the loose file, but the child document will not because it inherits its parent's status due to the selected Family Scope.
For example:
EM1 (e-mail) as 3 attachments, Doc1_Att, Tiff1_Att, & Excel1_Att. Two independent files, Tiff1 & Excel1, are duplicates of Tiff1_Att and Excel1_Att. The documents are selected in this order:
EM1
Doc1_Att
Tiff1_Att
Excel1_Att
Tiff1
Excel1
Assuming the parent is not a duplicate, it is then considered an original, as are all of its children. When the loose documents are checked, they are checked against all files, including the children. Because they are duplicates of two of the attachments, they are removed.
If the documents are selected in this order:
Tiff1
Excel1
EM1
Doc1_Att
Tiff1_Att
Excel1_Att
the loose files are now considered originals. The parent is checked against these two files; it is not a duplicate, so it is not removed. The attachments, though duplicates of the loose files, inherit the status of the parent, and are also not removed.
-
Treat Documents Individually: The file is evaluated independent of its family. Any document can be considered a duplicate regardless if it is a parent document or a child document.
EM1 (e-mail) selected for processing
EM1 is selected to process.
Doc1 is selected to process as child of EM1 unless a duplicate, not selected if a duplicate.
Tiff1 is processed as child of EM1 unless a duplicate, not selected if a duplicate.
Excel1 is processed as child of EM1 unless a duplicate, not selected if a duplicate.
EM1 not selected (filtered, not a search result, or a duplicate)
EM1 not selected to process.
Doc1 is selected to process as normal document unless a duplicate, not selected if a duplicate.
Tiff1 is selected to process as normal document unless a duplicate, not selected if a duplicate.
Excel1 is selected to process as normal document unless a duplicate, not selected if a duplicate.
- Maintain Family Structure: The action will be performed on a file if the criteria
match the file or the file's parent. To look at it from the other direction,
if a parent file matches a Rule's criteria, the action of that Rule will
be applied to that parent document and all of its children. Only
an entire family of documents are considered duplicates. If a parent
document is not identified as a duplicate, but its child document is,
no documents would be identified as a duplicate and hence no documents
removed.
- (Optional) Check Allow Child Originals. Allows documents, including loose files, to de-duplicate against child documents. If unchecked, forces duplicate checks at the parent level only. This option is disabled for the Scope: Treat documents individually
-
(Optional) Check File Size. When File Size is selected for a rule, it applies to the files in the Processing or Data Extract Job which have sizes on disk either greater than or equal to, or less than or equal to, the size specified. The size is expressed in KB. For example, a 1 MB file will be entered as 1024 KB.
-
(Optional) Check File Types. In the File Types section you can check the file types affected by the rule. eCapture recognizes documents by their actual content and not the file extension. Keep this in mind as you exclude/include file types for a Processing or Data Extract Job. You can filter (exclude) a myriad of file types by simply selecting the file type check box. When the Processing or Data Extract Job runs, it will process only those file types that you want and exclude all others that you selected in the Filters dialog box.
For example, you discovered a directory containing 15 different types of files. Some of these files were word processing documents. You want to run a Processing Job that includes only Microsoft Word documents.
There is a separate category for Microsoft Word documents (and subcategories of all the versions of Microsoft Word under the Microsoft Word category) as well as a separate generic Word Processing category which contains subcategories of all other word processing file types such as Lotus Word Pro, WordStar, .RTF, etc. If you check only the box next to Microsoft Word, you would automatically exclude any other type of word processing files that exist in the Discovery Job that you selected. The Processing Job will process those documents that it recognizes as Microsoft Word documents based on their actual content.
These file types are based on the Oracle® Outside In Technology (formerly Stellent) identification criteria.
Click Select All to select every file type.
Click Clear All to clear all the selected file types.
-
(Optional) You can also specify specific extensions of files you want to be affected by a given rule. Click the
button to add the extension to the list. Repeat for each extension. -
(Optional) To import a list of file extensions from a .CSV file, click the
button. Select the .CSV file
and click Open. An Import From File progress bar appears. If any errors were encountered during the import, such as duplicates, an Information dialog box appear with the errors.
- The .CSV file may contain extensions with or without . (period).
- Make sure that the .CSV file contains only one column of file extensions with each extension occupying its own row, e.g. Range A1 through A50 or Range E1 through E50.
- The file extensions are alphabetized upon import into the Flex Processor.
-
If you want to remove a specific extension from the list, select the extension and click the
button. - Click the button to remove all extensions from the list.
Define the Date Criteria for a Flex Processor
Rule
You can set date criteria on a rule, which will narrow the discovery to files based on a specific date range.
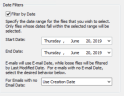
Note: E-mails will use E-mail Date, while loose files will be filtered by Last Modified Date. For e-mails with no E-mail Date, you may select a behavior from the drop down list as described in step 3 below.
To define Date Filters:
- Select the Filter by Date option.
-
Specify the date range (Start Date and End Date) for files that you want to select. Only files whose dates fall within the selected range will be selected during discovery sessions. Note: If the work is ongoing, use an end date as far into the future as possible so you may re-use the Rule, if necessary. The filter starts/ends at midnight on the selected date. If the Start Date is 2/12/2004, this includes files created on or after 2/12/2004. Similarly, if the End Date is 2/20/2004 this includes files created on or before 2/20/2004.
-
(Optional) For e-mails with no E-mail Date, select from one of the following behaviors:
-
Use Creation Date
-
Use Last Modification Date
-
Always Include
-
Never Include
-
Define the Search Criteria for a Flex
Processor Rule
You can define Search Criteria to be used when a Flex Processor Rule is executed. If you do not run a search, then every item from the Discovery Job will be selected. Otherwise, you can run a search and specify the search criteria when creating Data Extraction Jobs or Processing Jobs.
The search filters the Data Extraction and Processing Job results according to text contained within the files.
Important: If the option, Create dtSearch index during initial discovery, was cleared for a new Discovery Job, then searching is not available for a new Processing or Data Extract Job that includes that non-indexed Discovery Job.
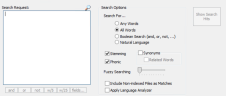
To define the Search Criteria for a Flex Processor Rule:
- In the Search Request box, enter the search phrase or the search words. During a word search, parents are automatically selected when a child meets a search requirement. The family settings determine this behavior.
-
Click
 located in the upper right portion of the Search Request box to display
the Search Request dialog box. This dialog box shows a
list of previously run searches conducted for a Case's (Project’s) Processing
and/or Data Extract Jobs and the search strings for each of the Processing
and/or Data Extract Jobs. The Search Request dialog
box can be dragged around the desktop and resized if necessary.
located in the upper right portion of the Search Request box to display
the Search Request dialog box. This dialog box shows a
list of previously run searches conducted for a Case's (Project’s) Processing
and/or Data Extract Jobs and the search strings for each of the Processing
and/or Data Extract Jobs. The Search Request dialog
box can be dragged around the desktop and resized if necessary.This feature allows you to use the same search options and search string for a new Processing and/or Data Extract Job rather than manually selecting the search options again and retyping in the same search string.
Note: If you cancel out of this dialog box, then the search terms remain unchanged.
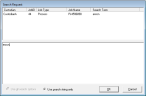
-
Select the search item in the listview screen. When you select it, you will see its search string displayed in the text box below.
Note: Clicking a search item in the listview will replace whatever is in the textbox with the search string of the selected search.
-
Select one of the following options:
-
Use all search options - to use the search options that were selected for that search item.
-
Use search string only - to change only the search string.
-
-
Click OK to replace the search form’s search string with the current contents of the search request textbox. When you click OK, the Search Criteria tab displays again. You can modify the search options, if necessary.
- Continue selecting additional options in the Flex Processor Rules Manager. The search will be added to the listview in the Search Request dialog box. You may then select that search item for a future search.
-
Set the Search For option. For more information, click
here.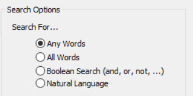
There are 4 options under Search for: Any Words, All Words, Boolean-Search (and, or, not, ...), and Natural Language. Only one can be selected at a time.
-
Any Words: This search request is for unstructured natural language or "plain English" queries. The Boolean operators AND & OR are disregarded. Examples follow:
-
Quotation Marks: You may use "quotation marks" around phrases.
For example, "personal computer". Quotes are used when the search requires that the words are contiguous and in the order they are indicated.
-
Plus + and Minus - Signs: Add + in front of any word or phrase to require it. Add - in front of any word or phrase or to exclude it.
Example: "personal computer" -monitor +"flash drive"
-
- All Words: This search request is similar to Any Words (previous bullet item), with the exception that all of the words in the search request must be present for a document.
-
Boolean Search: Activates and, or, not, w/5, w/25, and fields under the Search Request box. Use these as you compose your search request. The following table describes Boolean examples/interpretations and additional search options.
Examples of Boolean Search Terms
Boolean Usage Example
Interpretation
computer and monitor
both words must be present
computer or monitor
either word can be present
computer w/5 monitor
computer must occur within 5 words of monitor
computer not w/5 monitor
computer must occur, but not within 5 words of monitor
computer not monitor
only computer must be present
[fieldname] contains smith
the field name must contain smith
computer w/5 xfirstword
computer must occur in the first five words
computer w/5 xlastword
computer must occur in the last five words
-
-
Use Special Characters, if necessary.
Use ? to match any single character. For example, appl? matches apple or apply
Use * to match any characters. For example, m*g matches mustang, morning, mug, etc.
~~ matches a numeric range. For example, 14~~18 looks for 14, 15, 16, 17, or 18
-
Click
 to display the Search Fields dialog box.
-
Select the metadata field from the list and click OK. For example, if you selected Filename, the Search Request box would contain the following:

From the Search Request box: (Filename contains ( ))
The cursor automatically appears between ( )) ready for an entry. Enter the filename. The finished result would look like this:

From the Search Request box: (Filename contains (ProfessionalReport.doc))
- To select an additional metadata field, click and repeat
the above instructions.
-
To search for dates, email addresses, or credit card numbers:
Ensure that the option, Recognize Dates, Email Addresses, and Credit Card Numbers, is selected under Search Indexing in the Discovery Options dialog box for the relevant Discovery Job(s). See Modify a Completed Discovery Job for more information.
To search for dates (in various formats), email addresses (complete or partial addresses), or credit card numbers, enter:
-
date() e.g. date(jan 15 2006) or date(15 Jan 06) or any of these other formats:
date(2006/01/15)
date(1/15/06)
date(1-15-06)
date(The fifteenth of January, two thousand six)
-
mail() - e.g. mail(sales@iprotech.com) or mail(s*@iprotech.com)
-
creditcard() - e.g. creditcard(5555 6666 9999 3333) or any of these other formats:
creditcard(5555666699993333)
creditcard(5555-6666-9999-3333)
-
-
Check the Natural Language option if you want to enter natural language text. This option automatically weights the words in an "Any Words" search to disregard words such as AND and OR and focus on the more relevant, less frequently found words. For example, enter the terms Find the memo on ski-induced paralysis to weight "ski-induced" and "paralysis" very high in the search results, helping to weed out hits for "memo".
-
Check Stemming to extend a search to cover grammatical variations. Use ~ at the end of the word to search for stemming variations. For example, enter the terms fish~ swamp applied~ to find fish, fishing, swamp, as well as applying, applies, and apply.
Stemming rules are designed to work with the English language. They are stored in the stemming.dat file in the dtSearch folder. The default path starts with the directory you indicated during the eCapture installation followed by \Shared\dtSearch.
-
Check Phonic to look for words that sound like the word you entered in the search request. For example, enter #Smith to find Smith, Smithe, and Smythe.
For best results, use a # in front of individual words to be searched phonically. If you simply select Phonic searching under Search Features, the search will apply phonic rules to all words and can return too many inappropriate results.
- Check Synonyms to find synonyms established by eCapture’s dtSearch function or user-defined. Use & at the end of the word to search for its synonyms. For example, enter watchful& monitor to search for the word watchful or its synonyms and/or the word monitor (without synonyms).
- Check the Related Words option to support synonym searches. Standard synonyms and related words are supplied by WordNet (supplied with dtSearch and built into eCapture).
- Check Fuzzy Searching to find words even if they are misspelled. A search for alphabet with a fuzziness of 1 would also find alphaqet. With a fuzziness of 3, the same search would find both alphaqet and alpkaqet. It is useful for text that may contain typographical errors or that has been scanned and OCRed. Use the slide meter to adjust the fuzzy search level.
- Check Include Non-indexed Files as Matches to pull all Non-Indexed files that dtSearch could not Index and whose hits could not be applied. This is a useful option because it can create and apply a flag, such as NON-Indexed File, and then export out only this data collection for review in order to verify that no Privileged or Hot documents were missed. File examples include: PDFs, Graphics, JPEGs, TIFFs, etc.
- Click Apply Language Analyzer and create a new rule if you have a job that requires multi-language capability handling. For example, CJK (Chinese, Japanese, Korean) text appears as lines of characters with no spaces between the words. The Language Analyzer provides a way to add customized word breaking and morphological analysis (components, morphemes, which comprise words) to the dtSearch engine. The ApplyLanguageAnalyzer field (FilterManager) carries over to rules for importing, exporting, and Master Rules operations. This option is disabled by default.
-
Click
 to display the Search Status dialog. The Rule ID is displayed in the Title
Bar. Immediately after the search progress completes, the Search Hits
Preview dialog appears. (Note: Not available if the Discovery Job is not
completed.) The Search Hits Preview dialog displays the following search
results in a grid format for each file that meets the criteria:
to display the Search Status dialog. The Rule ID is displayed in the Title
Bar. Immediately after the search progress completes, the Search Hits
Preview dialog appears. (Note: Not available if the Discovery Job is not
completed.) The Search Hits Preview dialog displays the following search
results in a grid format for each file that meets the criteria:-
ItemID
-
Name of the File
-
Score (Percentage Value)
-
Hits - total number of search terms that appear in a single document. For example, the number 7 may indicate that a single term appeared 7 times in the document or that 2 terms appeared a total of 7 times: one term 3 times and the other term 4 times.
-
Location (File’s path)
-
Size of the File
-
- Select an item and click
 to view the file in its
native application. The native application must be installed on the workstation.
If it is not, the Windows dialog box appears with a message stating that
"Windows cannot open this file:" and offers additional options
for opening the file.
to view the file in its
native application. The native application must be installed on the workstation.
If it is not, the Windows dialog box appears with a message stating that
"Windows cannot open this file:" and offers additional options
for opening the file. - To save the results to
a .CSV file, click
 to open
the Save As a .CSV File dialog. Navigate to the location to save the file.
Accept or change the default filename. Click Save.
to open
the Save As a .CSV File dialog. Navigate to the location to save the file.
Accept or change the default filename. Click Save.
- In the Search Request box, enter the search phrase or the search words. During a word search, parents are automatically selected when a child meets a search requirement. The family settings determine this behavior.
-
Click
located in the upper right portion of the Search Request box to display
the Search Request dialog box. This dialog box shows a
list of previously run searches conducted for a Case's (Project’s) Processing
and/or Data Extract Jobs and the search strings for each of the Processing
and/or Data Extract Jobs. The Search Request dialog
box can be dragged around the desktop and resized if necessary.This feature allows you to use the same search options and search string for a new Processing and/or Data Extract Job rather than manually selecting the search options again and retyping in the same search string.
Note: If you cancel out of this dialog box, then the search terms remain unchanged.
-
Select the search item in the listview screen. When you select it, you will see its search string displayed in the text box below.
Note: Clicking a search item in the listview will replace whatever is in the textbox with the search string of the selected search.
-
Select one of the following options:
-
Use all search options - to use the search options that were selected for that search item.
-
Use search string only - to change only the search string.
-
-
Click OK to replace the search form’s search string with the current contents of the search request textbox. When you click OK, the Search Criteria tab displays again. You can modify the search options, if necessary.
- Continue selecting additional options in the Flex Processor Rules Manager. The search will be added to the listview in the Search Request dialog box. You may then select that search item for a future search.
-
Set the Search For option. For more information, click
here.
There are 4 options under Search for: Any Words, All Words, Boolean-Search (and, or, not, ...), and Natural Language. Only one can be selected at a time.
-
Any Words: This search request is for unstructured natural language or "plain English" queries. The Boolean operators AND & OR are disregarded. Examples follow:
-
Quotation Marks: You may use "quotation marks" around phrases.
For example, "personal computer". Quotes are used when the search requires that the words are contiguous and in the order they are indicated.
-
Plus + and Minus - Signs: Add + in front of any word or phrase to require it. Add - in front of any word or phrase or to exclude it.
Example: "personal computer" -monitor +"flash drive"
-
- All Words: This search request is similar to Any Words (previous bullet item), with the exception that all of the words in the search request must be present for a document.
-
Boolean Search: Activates and, or, not, w/5, w/25, and fields under the Search Request box. Use these as you compose your search request. The following table describes Boolean examples/interpretations and additional search options.
Examples of Boolean Search Terms
Boolean Usage Example
Interpretation
computer and monitor
both words must be present
computer or monitor
either word can be present
computer w/5 monitor
computer must occur within 5 words of monitor
computer not w/5 monitor
computer must occur, but not within 5 words of monitor
computer not monitor
only computer must be present
[fieldname] contains smith
the field name must contain smith
computer w/5 xfirstword
computer must occur in the first five words
computer w/5 xlastword
computer must occur in the last five words
-
-
Use Special Characters, if necessary.
Use ? to match any single character. For example, appl? matches apple or apply
Use * to match any characters. For example, m*g matches mustang, morning, mug, etc.
~~ matches a numeric range. For example, 14~~18 looks for 14, 15, 16, 17, or 18
-
Click
to display the Search Fields dialog box.
-
Select the metadata field from the list and click OK. For example, if you selected Filename, the Search Request box would contain the following:
From the Search Request box: (Filename contains ( ))
The cursor automatically appears between ( )) ready for an entry. Enter the filename. The finished result would look like this:
From the Search Request box: (Filename contains (ProfessionalReport.doc))
- To select an additional metadata field, click and repeat
the above instructions.
-
To search for dates, email addresses, or credit card numbers:
Ensure that the option, Recognize Dates, Email Addresses, and Credit Card Numbers, is selected under Search Indexing in the Discovery Options dialog box for the relevant Discovery Job(s). See Modify a Completed Discovery Job for more information.
To search for dates (in various formats), email addresses (complete or partial addresses), or credit card numbers, enter:
-
date() e.g. date(jan 15 2006) or date(15 Jan 06) or any of these other formats:
date(2006/01/15)
date(1/15/06)
date(1-15-06)
date(The fifteenth of January, two thousand six)
-
mail() - e.g. mail(sales@iprotech.com) or mail(s*@iprotech.com)
-
creditcard() - e.g. creditcard(5555 6666 9999 3333) or any of these other formats:
creditcard(5555666699993333)
creditcard(5555-6666-9999-3333)
-
-
Check the Natural Language option if you want to enter natural language text. This option automatically weights the words in an "Any Words" search to disregard words such as AND and OR and focus on the more relevant, less frequently found words. For example, enter the terms Find the memo on ski-induced paralysis to weight "ski-induced" and "paralysis" very high in the search results, helping to weed out hits for "memo".
-
Check Stemming to extend a search to cover grammatical variations. Use ~ at the end of the word to search for stemming variations. For example, enter the terms fish~ swamp applied~ to find fish, fishing, swamp, as well as applying, applies, and apply.
Stemming rules are designed to work with the English language. They are stored in the stemming.dat file in the dtSearch folder. The default path starts with the directory you indicated during the eCapture installation followed by \Shared\dtSearch.
-
Check Phonic to look for words that sound like the word you entered in the search request. For example, enter #Smith to find Smith, Smithe, and Smythe.
For best results, use a # in front of individual words to be searched phonically. If you simply select Phonic searching under Search Features, the search will apply phonic rules to all words and can return too many inappropriate results.
- Check Synonyms to find synonyms established by eCapture’s dtSearch function or user-defined. Use & at the end of the word to search for its synonyms. For example, enter watchful& monitor to search for the word watchful or its synonyms and/or the word monitor (without synonyms).
- Check the Related Words option to support synonym searches. Standard synonyms and related words are supplied by WordNet (supplied with dtSearch and built into eCapture).
- Check Fuzzy Searching to find words even if they are misspelled. A search for alphabet with a fuzziness of 1 would also find alphaqet. With a fuzziness of 3, the same search would find both alphaqet and alpkaqet. It is useful for text that may contain typographical errors or that has been scanned and OCRed. Use the slide meter to adjust the fuzzy search level.
- Check Include Non-indexed Files as Matches to pull all Non-Indexed files that dtSearch could not Index and whose hits could not be applied. This is a useful option because it can create and apply a flag, such as NON-Indexed File, and then export out only this data collection for review in order to verify that no Privileged or Hot documents were missed. File examples include: PDFs, Graphics, JPEGs, TIFFs, etc.
- Click Apply Language Analyzer and create a new rule if you have a job that requires multi-language capability handling. For example, CJK (Chinese, Japanese, Korean) text appears as lines of characters with no spaces between the words. The Language Analyzer provides a way to add customized word breaking and morphological analysis (components, morphemes, which comprise words) to the dtSearch engine. The ApplyLanguageAnalyzer field (FilterManager) carries over to rules for importing, exporting, and Master Rules operations. This option is disabled by default.
-
Click
to display the Search Status dialog. The Rule ID is displayed in the Title
Bar. Immediately after the search progress completes, the Search Hits
Preview dialog appears. (Note: Not available if the Discovery Job is not
completed.) The Search Hits Preview dialog displays the following search
results in a grid format for each file that meets the criteria:-
ItemID
-
Name of the File
-
Score (Percentage Value)
-
Hits - total number of search terms that appear in a single document. For example, the number 7 may indicate that a single term appeared 7 times in the document or that 2 terms appeared a total of 7 times: one term 3 times and the other term 4 times.
-
Location (File’s path)
-
Size of the File
-
- Select an item and click
to view the file in its
native application. The native application must be installed on the workstation.
If it is not, the Windows dialog box appears with a message stating that
"Windows cannot open this file:" and offers additional options
for opening the file.
- To save the results to
a .CSV file, click to open
the Save As a .CSV File dialog. Navigate to the location to save the file.
Accept or change the default filename. Click Save.
Define the Advanced Criteria for a Flex
Processor Rule
You can define advanced criteria for a given Flex Processor Rule. These settings identify files for action mapping. These different selection types depend on hash values or Item IDs, which need to be identified in order to be used. NIST NSRL files have already been identified through NIST. The following procedure describes how to set the Advanced Criteria for a given rule.

Important: When loading or importing lists, the existing list is overwritten. If you want to import more than one list, create a separate, additional rule.
-
If desired, click on the ItemIDs option or the ItemGUIDs option.
-
Filtering by ItemID is typically done when producing files that were part of previous jobs from the same Client. Because ItemIDs apply only within a given Client, importing ItemID lists from other Clients will lead to incorrect results. Importing of Item IDs is useful for targeted TIFFing.
Note: Item ID list rules will not transfer to other jobs, master rule sets, or case (project) default options. The original item IDs associated with the native files that were included in the selected Discovery job or jobs can be loaded for use in a rule.
- Filtering by ItemGUIDs (Globally Unique Identifiers) gives a more reliable method to positively identify eCapture Items records for a Client.
-
- Click either the
 button or the
  button.
 -
When you select Import From Another Job, the Import from Job dialog displays.

- Select the job you want to import from.
-
Select either:
-
Items Processed - Specify which statuses (e.g. Queued, Error, etc.) to import.
-
Items with no effective rule - This option allows for the capability of using all items not in the results of the selected job.
The Flex Processor Rules Manager will then place the Item IDs that meet those criteria into the list.
-
- Select Load from File if you want to load a file of Item IDs into a rule. The file’s format should be one Item ID per line, with no punctuation. Only the ItemIDs that are already part of the selected Discovery Jobs of the current Job will be included. Use the Data Extract Import option when creating a new Job to automatically select Discovery Jobs based on the ItemIDs.
-
If you want to import a list of IDs into the Flex Processor Rules Manager to produce just the desired files from the same PST, click the Load From File button below the E-mail Entry IDs box. A rule with a list of E-mail Entry IDs loaded will apply to the files in the Processing and Data Extract Jobs whose e-mail entry IDs are an exact match.
- The file’s format is one EntryID per line, with no punctuation. If the PST from which the entry IDs were extracted is not part of the job, there will be no matches for the rule.
- Flex Processor Rules Manager will match the filenames, without extensions, with the EntryID imported from the file.
Note: This will not extract files from the containers; nor is it effective for removing e-mail.
-
If desired, check the NIST NSRL Matches check box. The optional NIST database must be loaded and set up for use with eCapture in order to use this feature. A rule with this selected will apply to the files in the Processing or Data Extract Job whose MD5 hashes match those of files in the NSR Library published by NIST. It is typically used in a Remove rule to eliminate non-responsive files such as OS files.
The option will be disabled unless the NIST match was completed on all Discovery Jobs that contribute to this Process Job/Data Extract Job. If not all of the discovery jobs have been NIST Matched, the following information message displays when you hover over the exclamation point next to the NIST check box.

Important: This is an exclusive criterion (it cannot be combined with other criteria).
-
If desired, check the Custom Hash List Matches check box and then select the HASH list from the drop down menu. The hash lists must be loaded before using this feature.
- In most cases, the Action will either be Remove or Placeholder. Multiple Custom Hash Lists can be used on one Job; however, a separate rule must be created for each list.
- When the Job is processed, the MD5 hashes of the times in the job will be matched against the MD5 hashes of the entries in the Custom Hash List. Any matching items will have the appropriate action applied. At this point, the later rules will supersede the earlier rules.
- In most cases, this option is used with the action of either Remove or Placeholder. Multiple Custom Hash Lists can be used on one Job; however, a separate rule must be created for each list.
Important: This is an exclusive criterion (it cannot be combined with other criteria).
-
Click
 or
or  to load all Parent item
IDs or Children item IDs (respectively). The Scope rule is automatically
changed to Treat items in a family separately to
ensure desired output. Changing the scope rule may produce incorrect output.
to load all Parent item
IDs or Children item IDs (respectively). The Scope rule is automatically
changed to Treat items in a family separately to
ensure desired output. Changing the scope rule may produce incorrect output. - A Parent item ID rule loads the item IDs for the parent documents. This essentially suppresses embedded file extraction items from being processed.
- The Child item ID rule loads the item IDs for the attachments. This option allows for attachments to be exported or to be used as a last rule to remove attachments and maintain parent (top level) item IDs only. The processing would be matched to the original source media.
These rule options are used in conjunction with the Export option, Use filename for Image Key (located in the last export wizard screen when running an export job), in order to maintain the original document numbering as the file goes through each phase in eCapture.
Important: This feature is grayed out and not available until the Discovery Job has completed.
-
If desired, click on the ItemIDs option or the ItemGUIDs option.
-
Filtering by ItemID is typically done when producing files that were part of previous jobs from the same Client. Because ItemIDs apply only within a given Client, importing ItemID lists from other Clients will lead to incorrect results. Importing of Item IDs is useful for targeted TIFFing.
Note: Item ID list rules will not transfer to other jobs, master rule sets, or case (project) default options. The original item IDs associated with the native files that were included in the selected Discovery job or jobs can be loaded for use in a rule.
- Filtering by ItemGUIDs (Globally Unique Identifiers) gives a more reliable method to positively identify eCapture Items records for a Client.
-
- Click either the button or the button.
-
When you select Import From Another Job, the Import from Job dialog displays.
- Select the job you want to import from.
-
Select either:
-
Items Processed - Specify which statuses (e.g. Queued, Error, etc.) to import.
-
Items with no effective rule - This option allows for the capability of using all items not in the results of the selected job.
The Flex Processor Rules Manager will then place the Item IDs that meet those criteria into the list.
-
- Select Load from File if you want to load a file of Item IDs into a rule. The file’s format should be one Item ID per line, with no punctuation. Only the ItemIDs that are already part of the selected Discovery Jobs of the current Job will be included. Use the Data Extract Import option when creating a new Job to automatically select Discovery Jobs based on the ItemIDs.
-
If you want to import a list of IDs into the Flex Processor Rules Manager to produce just the desired files from the same PST, click the Load From File button below the E-mail Entry IDs box. A rule with a list of E-mail Entry IDs loaded will apply to the files in the Processing and Data Extract Jobs whose e-mail entry IDs are an exact match.
- The file’s format is one EntryID per line, with no punctuation. If the PST from which the entry IDs were extracted is not part of the job, there will be no matches for the rule.
- Flex Processor Rules Manager will match the filenames, without extensions, with the EntryID imported from the file.
Note: This will not extract files from the containers; nor is it effective for removing e-mail.
-
If desired, check the NIST NSRL Matches check box. The optional NIST database must be loaded and set up for use with eCapture in order to use this feature. A rule with this selected will apply to the files in the Processing or Data Extract Job whose MD5 hashes match those of files in the NSR Library published by NIST. It is typically used in a Remove rule to eliminate non-responsive files such as OS files.
The option will be disabled unless the NIST match was completed on all Discovery Jobs that contribute to this Process Job/Data Extract Job. If not all of the discovery jobs have been NIST Matched, the following information message displays when you hover over the exclamation point next to the NIST check box.
Important: This is an exclusive criterion (it cannot be combined with other criteria).
-
If desired, check the Custom Hash List Matches check box and then select the HASH list from the drop down menu. The hash lists must be loaded before using this feature.
- In most cases, the Action will either be Remove or Placeholder. Multiple Custom Hash Lists can be used on one Job; however, a separate rule must be created for each list.
- When the Job is processed, the MD5 hashes of the times in the job will be matched against the MD5 hashes of the entries in the Custom Hash List. Any matching items will have the appropriate action applied. At this point, the later rules will supersede the earlier rules.
- In most cases, this option is used with the action of either Remove or Placeholder. Multiple Custom Hash Lists can be used on one Job; however, a separate rule must be created for each list.
Important: This is an exclusive criterion (it cannot be combined with other criteria).
-
Click
or to load all Parent item
IDs or Children item IDs (respectively). The Scope rule is automatically
changed to Treat items in a family separately to
ensure desired output. Changing the scope rule may produce incorrect output. - A Parent item ID rule loads the item IDs for the parent documents. This essentially suppresses embedded file extraction items from being processed.
- The Child item ID rule loads the item IDs for the attachments. This option allows for attachments to be exported or to be used as a last rule to remove attachments and maintain parent (top level) item IDs only. The processing would be matched to the original source media.
These rule options are used in conjunction with the Export option, Use filename for Image Key (located in the last export wizard screen when running an export job), in order to maintain the original document numbering as the file goes through each phase in eCapture.
Important: This feature is grayed out and not available until the Discovery Job has completed.
Advanced Options
Alternative system directories may be specified for the output files generated by Discovery, Data Extract, and/or Processing Jobs. This allows you to use larger capacity storage devices. This is also useful for organizing different Cases (Projects) under the same Client that may use different storage devices. The assignment of the system directories is done at the Case (Project) level.
-
Click on the Advanced tab.
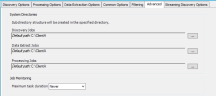
-
On new and existing Cases (Projects), the paths shown are the defaults and are indicated with informational text in each field. These default paths are the paths that were specified at the time the Client was added. This makes it easy to locate the original paths.
A directory must exist for each Job type whether it is the default directory or an assigned alternative directory. If an alternative path is cleared from any of the fields, the system reverts to the default path and displays the informational text.
- Optional: For the Discovery Job, click
, select a location, and click OK. The specified
path cannot exceed 100 characters.
- Optional: For the Data Extract Job, click
, select a location, and click OK. The specified
path cannot exceed 100 characters.
- Optional: For the Processing Job, click
, select a location, and click OK. The specified
path cannot exceed 100 characters.
- Check Save as system default to save the alternative system directories as the System Default. If this is done, new cases (projects) and jobs will be organized under dedicated directories per client.
The following directory structure is created for each alternative path when the Case (Project) settings are saved and/or a Job is created: Project\Job Type\Job Directory. For example: the alternative specified directory for Discovery Jobs in ProjectID 7 is \\data\ecapture\ClientDirectory\LocationOne, then the directory structure for DiscoveryJobID 77 would be: \\data\ecapture\ClientDirectory\LocationOne\PR000009\DiscoveryJobs\DJ000077
All subdirectories under the Job directory will remain the same for each Job type. When a Job is running, all output files will go to the alternative specified location.
Changes may be made to the assigned system directory at any time. Jobs in progress or completed are not affected by the changes made to the assigned system directories. Directories that are removed will not be deleted on disk. Only new Jobs will use the newly specified locations.
Note: In the Limited Controller, the options can only be modified at the time the Case (Project) is first created.
Different Clients using the same Alternate Paths
Scenario: If two Clients are created and will use the same alternate Job paths, the system creates a unique Identifier (e.g. 5K82SZHA) Client directory for each Client. Therefore, job names may be identical for each Client, but data will not be combined. For example, the paths for each identically named Discovery Job are:
C:\AltPath\5K82SZHA\PR000001\Discovery Jobs\DJ000001
and
C:\AltPath\5KRTOUIY\PR000001\Discovery Jobs\DJ000001
The unique identifier is stored in the Clients table SystemDirectoryName field.
This structure allows each Case (Project) to maintain its own directory when System Wide defaults are used.
Note: If a Client is deleted, the job directories and files are also deleted, but an empty directory structure down to the Job level remains.
Streaming Discovery Job Options
The following sections describe how to set Streaming Discovery Job options at the Case (Project) level and for individual Streaming Discovery Jobs.
Streaming Discovery: Discovery Options
Option
Description
Container Handling
PDF Portfolio files allow email boxes to be stored/converted within a folder structure. As of 2018.5.2, this folder structure information is extracted and available for export in the existing ‘MailFolder’ metadata field.
-
Treat archives as directories: Select this option if you want the files in the archived folder to be treated as parent and child docs when running a Discovery Job. In addition, WINMAIL.DAT attachments are treated like archives and will be processed like .ZIP files. The following are treated like archive files:
FI_ZIP = 1802
FI_ZIPEXE = 1803
FI_ARC = 1804
FI_TAR = 1807
FI_STUFFIT = 1812
FI_LZH = 1813
FI_LZH_SFX = 1814
FI_GZIP = 1815
IPRO_FI_RAR = 13000
FI_TNEF = 1197
-
Treat PDF Portfolios/Packages as Containers: This option is selected by default. The PDF Portfolio file is treated as a directory and its contents extracted and treated as loose files (except children of the contained PDFs). The PDF Portfolio will not be treated as an item, only as a container in the Nodes table. Documents inside the PDF package are treated as parent files. If this option is not selected, the PDF Portfolio file will be treated as a file parent and its contents extracted and treated as attachments in the items table. The PDF Portfolio will be treated as an item and can be processed/filtered/exported.
Enable File Extraction
The Enable File Extraction check box is selected by default. The related Extract options are also selected by default and may be cleared independently, if desired.
If the Enable File Extraction check box is cleared (the related Extract options are also cleared) and data is submitted for extraction; no extraction occurs from file types, such as mail stores and archives. This enables documents to be sent through Streaming Discovery knowing that all the docs were already extracted including file parents (e.g., emails and edocs).
Note: Node records are generated for container files such as .PST, .NSF, and archives; however, no items are extracted. The status indicator states: "No Content extracted, file extraction disabled by user".
-
Extract email inline images: When enabled, inline images in email messages (e.g., signature files) are extracted as attachments and treated as child documents. Apple Mail Message (EMLX) files are supported. The attachments for EMLX files are extracted from the emails and it recognizes and handles the inline images. When EMLX files are processed or data extracted, they are treated as emails. The output resembles an email displayed in Outlook Express or Outlook.
When disabled, inline images are not extracted as children. The images are not treated as separate documents, and therefore are not OCRed, language-identified, or indexed. The images are rendered inline as they would look in the native file.
Black Ice™ does not return text for any images that are printed. Therefore, extracted text for the (parent) document does not include text from the inline image.
The images are only OCRed if the image it is printed on does not have any text, and the option OCR Pages Missing Text is enabled under the Processing Job, General Options tab.
-
Extract Embedded Files: An embedded file is an object that has been inserted into a document and, if extracted, can act as a standalone document. This option consolidates Excel documents, Word documents, PowerPoint documents, Email File Attachments (Outlook.FileAttach), Visio drawings, Package-Embedded documents, Acrobat documents, Email Message Attachments (MailMsgATT), and Email File Attachments (MailFileAtt).
When selected, the embedded files are extracted as separate documents and treated as child documents. If this option is not selected, then the embedded files are not extracted as separate documents.
All files embedded inside of non-emails (e-docs) are extracted. These files are sent through the discovery, text extraction, metadata extraction and export with their parent. However, if this option is not selected, all files embedded inside of non-emails (edocs) are not extracted. They are ignored and only the parent document is processed.
OCR
-
OCR images: Images are OCRed to retrieve any available text from the image. The OCR is available for indexing and searching in the Review application.
-
OCR PDF Pages Missing Text: PDFs with no embedded text perform OCR before indexing or language identification. PDF pages with embedded text (text-behind) will have text extracted. Comments on a PDF file are also extracted. The OCR text is added to any extracted text from the PDF. All text is available for indexing and searching in the Review application.
Optionally, select the option OCR any page with fewer than n characters and indicate a value. The default value is 25 characters. The maximum value is 10000. If the value is less than 25, eCapture will send the page to be OCRed; otherwise, the text will just be extracted. If necessary, enter a different value.
-
OCR PowerPoint Documents: Turn this option on to perform OCR on Microsoft PowerPoint files during indexing to get text from embedded content in the slides. This results in slower indexing speeds for PowerPoint files, but more accurate search results.
-
Minimum average OCR confidence (1-100): The level range settings are from 1 to 100. The default is 50. The confidence level is the average percentage of confidence for each document for all pages within a document on which OCR was performed. Success or failure of OCR results is based on the average confidence level of the document. If the average confidence level is below the selected threshold, the page is considered as an OCR error.
The Discovery Job Status and Summary Panel displays OCR Applied[Errors], where Applied shows the number of pages that required OCR (not OCRed) and where [Errors] shows the number of those pages that did not meet the specified average confidence level.
Note: For calculating average page confidence, pages in PDF docs with text behind them are considered 100%. OCR failures are considered 0%.
-
Use OCR Workers: Select this option to simultaneously create an Enterprise OCR job with the Enterprise Streaming Discovery Job. The Job remains active until the Enterprise Streaming Discovery Job is complete.
OCR must be complete before the document is eligible for export.Workers that are Enterprise Eligible or Enterprise Exclusive will accept OCR tasks if licensing is available. A different task table may be specified for Enterprise OCR Workers.
Selecting this option can improve performance. If the Use OCR Workers option is not selected, OCR tasks are assigned to licensed Enterprise Streaming Discovery Workers.
OCR Worker Task Table: If a custom task table is selected from the drop-down menu,Enterprise OCR tasks are sent to those Workers assigned to the selected task table.
Note: For information about the OCR Worker Task Table, see Create Task Tables and Assign Task Tables to Workers.
-
OCR Languages: eCapture includes multi-language OCR capability. The QC document contains the original OCR languages that were selected for the Data Extract Job. A valid multi-language OCR license must be available in order to modify the original selected languages, if necessary.
To reserve a portion of the multi-language OCR licenses for QC and to keep the Worker from consuming all available licenses, use the Multi-Language OCR License slider located in the Controller System Options dialog box.
Click OCR Languages to display the Language OCR dialog box.

After selecting the languages, click OK to close the dialog box. The selected languages appear in the OCR Languages field. Place the mouse pointer on the OCR Languages field to display a tool tip that lists all the selected languages that were not visible in the OCR Languages field. The OCR Languages field is a read-only field.
Click
here to view a list of supported languages.-
English
-
Arabic
-
Chinese Simplified
-
Chinese Traditional
-
Japanese
-
Korean
-
Afrikaans
-
Albanian
-
Basque
-
Belarusian
-
Bulgarian
-
Catalan
-
Croatian
-
Czech
-
Danish
-
Dutch
-
Estonian
-
Faorese
-
Finnish
-
French
-
Galician
-
German
-
Greek
-
Hungarian
-
Icelandic
-
Indonesian
-
Italian
-
Latvian
-
Lithuanian
-
Macedonian
-
Norwegian
-
Polish
-
Portuguese
-
Portuguese Brazil
-
Romanian
-
Russian
-
Serbian
-
Serbian Cyrillic
-
Slovak
-
Slovenian
-
Spanish
-
Swedish
-
Turkish
-
Ukrainian
Click here to view some
caveats to OCR Language handling.English is the only language that is selected by default. The more languages that are selected; the lower the confidence level will be for correctly identifying the languages in a document.
-
If English is selected, Arabic will not be available for selection.
-
If Arabic is selected, all other languages will not be available for selection.
-
If one of the CJK (Chinese, Japanese, Korean) languages are selected, then all remaining CJK languages will not be available for selection. Other languages (excluding Arabic) may be selected.
-
If Chinese Simplified is selected, Chinese Traditional, Japanese, and Korean will not be available for selection.
-
If Chinese Traditional is selected, Chinese Simplified, Japanese, and Korean will not be available for selection.
-
If Japanese is selected, Chinese Simplified, Chinese Traditional, and Korean will not be available for selection.
-
If Korean is selected, Chinese Simplified, Chinese Traditional, and Japanese will not be available for selection.
-
Time Zone Handling
-
Convert all times to UTC: Default setting.
-
Specify Time Zone: Select this option to specify a time zone to convert original times to the times for the selected time zone. For example, you might select the time zone of the workstation where the files originated. The selected time zone will be applied to Metadata output from the IPRO (Cloud) Streaming Discovery worker. Updates to extracted text will only be applied to the header of emails (the Sent Date).
For more information about Time Zone Handling, see How eCapture Handles Dates and Time Zones
De-duplication
A list of matching hash values is retrieved for each parent document. The de-duplication scope is determined by grouping the results by Case (Project) - e.g., all documents or by Custodian.
De-duplication occurs after Date, File Type and File Extension filters are applied.
De-duplication is always performed at the parent level. If a parent is marked as a duplicate, then it, along with the rest of its family, is not exported.
From the de-duplication drop-down menu, select one of the following:
-
Custodian: (default option) Documents that are duplicates of any documents within the Custodian are removed.
-
Case (Project): Documents that are duplicates of any documents within the Case (Project) are removed.
-
None: All documents including duplicates are exported.
Displays the Custom Email Hash dialog box. Select from the following options:
Some emails may have identical values in the properties that eCapture uses to generate hashes; however, the values may differ in the attachment contents. Family hash accounts for this by using the hash values of the extracted attachments to calculate a second hash for the email parent.
De-duplication may be performed on parent hash values rather than family hash values for newly created Streaming Discovery Jobs that are using version 2016.3.3 only. (Note: Existing Streaming Discovery Jobs retain the family hash setting.) The default setting uses family hash.
This setting is found in the DedupUseFamilyHash field of the ConfigurationProperties table for the eCapture Configuration database. The default value is 1. To switch to parent hash value, change the value from 1 to 0 in the DedupUseFamilyHash field. If the value is set to 0 in the ConfigurationProperties table, then family hashes will not be considered when applying de-duplication.
The method of gathering and creating the MD5 hash values changed for newly created Cases (Projects). Hashing of emails uses Coordinated Universal Time (UTC) to ensure proper de-duplication across time zones.
In most cases, MD5 hash values are calculated on the file itself. For more reliable de-duplication of emails though, it is required that de-duplication occur on the information contained within it and not the file itself. There are many reasons for this; the simplest is that when an email is saved out of its container (PST, NSF, etc.), the file created contains information that would change the hash value of the same email each time the email is saved out.
When an email is discovered within eCapture, it is assigned a hash value based on fields chosen by the user. The values of these fields are concatenated, and the text is hashed. Select from the following email fields to generate the hash value:
-
Subject
-
From/Author
-
Attachment Count
-
Body Whitespace - Whitespace in the email body could cause slight differences between the same emails, which could result in different hashes being generated.
On the Body Whitespace drop-down menu, select either Remove or Include (default). Remove - removes all whitespace between lines of text in the email body before hashing. Include - keeps the whitespace.
-
Email Date: The following message types use the specified date values: Outlook: Sent Date, IBM Notes: Posted Date, RFC822: Date, and GroupWise: Delivered Date.
-
Attachment Names
-
Recipients
-
CC
-
BCC
Select from either Creation Date or Last Modification Date. The selected value will be used when calculating the MD5 hash value if the normal Email Date value is not present. This commonly occurs for Draft messages that have not been sent.
Start Time is always used if it exists.
By default, Subject, From/Author, Email Date, and an Alternate Email Date of Creation Date are used for email hash generation.Save settings as Case (Project) default
Displays when setting options at the Job level. Select this option to retain these settings for future Enterprise Streaming Discovery Jobs created for the Case (Project).
Save as system default
Displays when setting options at the Case (Project) level. Select this option to retain these settings for future Cases (Projects) created for the Client. The settings are saved to the eCapture Configuration database.
Streaming Discovery: Filtering Options
Option
Description
Dates
Date filters are applied to parent documents only. Date filter dates are in Coordinated Universal Time (UTC). For emails, Sent Date is used. There is no alternate date fall back. All emails are included that do not have a Sent Date (draft emails, etc.) as well. For non-emails, Last Modified Date is used. Any item that does not have a Last Modified Date is included.
All Documents: By default, all document families are exported unless the option Specify Date Range/s is chosen.
-
Specify Date Range/s: When this option is chosen, a single date-range pick list displays and defaults to the date range of the document set. The default time for the beginning date in the range is 12:00AM and the default time for the ending date in the range is 11:59PM. These default times apply to any date ranges that are added when filtering.
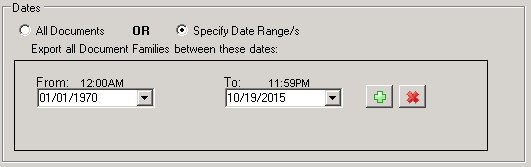
From: Click the button to display the calendar and select a month, day, and year.
To: Click the button to display the calendar and select a month, day, and year.
To specify an additional date range, click the button. Each time the button is clicked, another date range appears.
Multiple date ranges allows specific document families with specific date ranges to be included. Those document families whose dates do not fall within the designated ranges are excluded from export.
To remove a date range filter, click the button. If there is only one date range, the date range closes and reverts to All Documents.
File Types/Extensions
Export these File Types: Filters determine the types of files that you can bring into an electronic discovery job during an Enterprise Streaming Discovery session. The settings made here determine the file types you will be able to export in an Enterprise Streaming Discovery Job.
File Type and File Extension Filters are applied only to the matching files. These filters are inclusive; only selected file types or specified file extensions are exported. If at least one file in a document family is being included, then the entire family gets exported.
eCapture recognizes documents by their actual content and not the file extension.
You can filter (exclude) a myriad of file types by simply selecting the file type check box. When the processing job runs, it will process only those file types that you want and exclude all others that you selected in the Filters dialog box.
For example, you discovered a directory containing 15 different types of files. Some of these files were word processing documents. You want to run a Streaming Discovery Job that includes only Microsoft Word documents.
There is a separate category for Microsoft Word documents (and subcategories of all the versions of Microsoft Word under the Microsoft Word category) as well as a separate generic Word Processing category that contains subcategories of all other word processing file types such as Lotus Word Pro, WordStar, .RTF, and so on.
If you ask for only Microsoft Word DOC files then you would also select the generic Word Processing category to automatically exclude any other type of word processing file that exists in the Discovery Job that you selected. The Processing Job will process those documents that it recognizes as Microsoft Word documents based on their actual content.
The following file types are based on the Oracle’s Outside-In identification criteria.
Select All: Select every file type.
Clear All: Clear all the selected file types.
Export these File Extensions: You can specify specific extensions of files you want to export. Click Add to add the extension to the list. Repeat for each extension.
Load From File: To import a list of file extensions from a CSV file, click Load From File. Select the CSV file and click Open. An Import From File progress bar appears. If any errors, such as duplicates, were encountered during the import, an Information dialog box displays and contains the errors. The CSV file may contain extensions with or without a "." (period). Ensure that the CSV file contains only one column of file extensions, with each extension occupying its own row, e.g., Range A1 through A50 or Range E1 through E50. The file extensions are alphabetized when imported into the Flex Processor.
If you want to remove a specific extension from the list, select the extension and click Remove.
Clear removes all the extensions from the list.
Remove NIST Matches
NIST removal matching applies only to the parent document or loose documents. It does not apply to child documents. If a parent document is a NIST match, the entire family is then removed including its children.
During the filtering phase, document hashes are compared to the hashes in the NIST database. If the document hash is found, it is marked as a NIST match and will be excluded from Export Jobs.
NIST match removal is applied to documents that were slated to be exported after applying the date, file type, and extension filters.
For information about installing and using the optional NIST databases and the Ipro NIST Loader, see Use the NIST Loader Utility.
For more information about using hash lists and configuring eCapture to use NIST, see Load Custom Hash Lists and Establish a Connection with the SQL Server and Set the System Options.
Save settings as Case (Project) default
Displays when setting options at the Job level. Select this option to retain these settings for future Enterprise Streaming Discovery Jobs created for the Case (Project).
Save as system default
Appears when setting options at the Case (Project) level. Select this option to retain these settings for future Cases (Projects)created for the Client. The settings are saved to the eCapture Configuration database.
Streaming Discovery: Imaging OptionsStreaming Imaging options are defined on five different tabs, General, Excel, Word, PowerPoint, and Placeholder. See the following sections for more information.
Important: To define imaging options for the Streaming Discovery Job, you must first select the check box Enable Imaging located on the General tab. Once selected, the imaging options display on all five tabs.
Streaming Discovery Imaging: General Options
- Click the General Options tab.
-
Set the OCR options.
Note: If you are setting Case (Project) Level options, OCR and Time Zone Handling options are defined on the Common Options tab because Processing Jobs and Data Extract Jobs use the same OCR and Time Zone Handling options. For more information about setting options at the Case (Project) level, see Create a New Case (Project).
- OCR pages missing text - Select OCR Pages missing text to OCR pages within documents that are missing text. Optionally, select PDF page character threshold and indicate a value. The default value is 25 characters. The maximum value is 10000. If the value is less than 25, eCapture will send the page to be OCRed. If necessary, enter a different value.
- PDF page character threshold - Select a PDF page character threshold and indicate a value. The default value is 25 characters. If the value is less than 25, eCapture will send the page to be OCRed. If necessary, enter a different value.
- Minimum average OCR confidence - The level range settings are from 1 up to 100. The default is 50. The OCR Confidence Level is the average of confidence per document, for all pages within a document on which OCR was performed. Success or failure of a document for flagging is based on the average confidence level of the document. If the average confidence level is below the selected threshold, the document will be flagged in QC with the OCR Low Confidence Flag.
-
OCR languages - eCapture includes multi-language OCR capability. The QC document will contain the original OCR languages that were selected for the Data Extract job. A valid multi-language OCR license must be available in order to modify the original selected languages, if necessary.
To reserve a portion of the multi-language OCR licenses for QC and to keep the Worker from consuming all available licenses, use the Multi-Language OCR License slider located in the Controller System Options dialog box.
Click OCR Languages to display the Language OCR dialog box.
After selecting the languages, click OK to close the dialog box. The selected languages appear in the OCR Languages field. Place the mouse pointer on the OCR Languages field to display a tool tip that lists all the selected languages that were not visible in the OCR Languages field. The OCR Languages field is a read-only field.
Click here to view some
caveats to OCR Language handling.English is the only language that is selected by default. The more languages that are selected, the lower the confidence level will be for correctly identifying the languages in a document.
-
If English is selected, Arabic will not be available for selection.
-
If Arabic is selected, all other languages will not be available for selection.
-
If one of the CJK (Chinese, Japanese, Korean) languages are selected, then all remaining CJK languages will not be available for selection. Other languages (excluding Arabic) may be selected.
-
If Chinese Simplified is selected, Chinese Traditional, Japanese, and Korean will not be available for selection.
-
If Chinese Traditional is selected, Chinese Simplified, Japanese, and Korean will not be available for selection.
-
If Japanese is selected, Chinese Simplified, Chinese Traditional, and Korean will not be available for selection.
-
If Korean is selected, Chinese Simplified, Chinese Traditional, and Japanese will not be available for selection.
-
- Set the Color Depth, Paper Size, and other basic options.
General Color Depth - Applies to everything else outside of the five types (Word, Excel, PowerPoint, PDf, and Native TIFF) that eCapture does not process through Oracle (formerly Stellent). There are three exceptions to this rule: Lotus Notes, Internet Explorer, and Outlook Express; which also fall under the General type. All other email, except for Lotus Notes and Outlook Express at this time, are always Group 4 TIFF because it is rendered from text.
Single Page Output Type
General Color Depth Options
Rendered as
Black&White (1-bit)
Group 4 TIFF
Grayscale (8-bit)
LZW TIFF
256 Color (8-bit)
LZW TIFF
True Color (24-bit)
JPEG
Multi-Page TIFF Output Type
General Color Depth Options
Rendered as
Black&White (1-bit)
Group 4 TIFF
Grayscale (8-bit)
LZW TIFF
256 Color (8-bit)
LZW TIFF
True Color (24-bit)
JTIFF - (JPEG compressed TIFF)
Image Color Depth - Applies to: BMP, TIFF, PCX, GIF, WPG, WINDOWSICON, WINDOWSCURSOR, MACPAINT, CGM, DCX, SUNRASTER, KODAKPCD, PNG, DGN, PBM, and ADOBE PHOTOSHOP. However, if Lead fails to open a file, it then goes to Oracle (formerly Stellent) and uses the General Color Depth options.
Image Color Depth Options
Rendered as
As Is
If Original is Black&White, then Group 4 TIFF; otherwise, it will be a JPG matching bit depth.
Black&White (1-bit)
Group 4 TIFF
Grayscale (8-bit)
LZW TIFF
True Color (24-bit)
JPG
PDF Color Depth - Select a PDF Color Depth. A PDF always uses the selected color depth setting in the PDF area. There are two possible outcomes:
Successful Use of the Adobe Library
PDF Color Depth Options
Rendered as
As Is
If Original is Black&White, then Group 4 TIFF; otherwise, it will be a JPG matching bit depth.
Black&White (1-bit)
Group 4 TIFF
Grayscale (8-bit)
JPG (8-bit)
True Color (24-bit)
JPG
Unsuccessful Extraction of the Adobe Library
PDF Color Depth Options
Rendered as
As Is
Always 24-bit JPG
Black&White (1-bit)
Group 4 TIFF
Grayscale (8-bit)
JPG (8-bit)
True Color (24-bit)
JPG
- PDF Paper Size - Select an output paper size for PDFs. When the As Is option is selected, the internal PDF document size is used to draw the image.
Paper Size - Click the drop-down menu and select an output paper size for documents during processing.
- Image to PDF - When this option is selected, the system creates a PDF of the reprocessed document and places it in the Output directory with a .PDF extension.
Max Page Threshold - Set a Max Page Threshold (1 to 10000) if you want to limit the number of pages produced by larger files. By default, this option is not selected. If the Page Threshold is reached, the items are not flagged as exceptions, but flagged as Page Threshold Exceeded. All pages processed up until the threshold is reached are included in the document. The first page is the Page Threshold Exceeded placeholder, and subsequent pages are those that were processed within the Max Page Threshold setting.
Placeholder pages over threshold - Select this option to apply a placeholder to pages exceeding the threshold value indicated in the Max Page Threshold field.
Text handling - On the drop-down menu, choose either:
Truncate text to max pages - text is truncated to match the output of pages that fall under the threshold (existing behavior).
Retain all text for document - document text is associated to the number of pages below the set threshold value and all subsequent pages are blank.
-
Set the Time Zone Handling, as appropriate.
- Convert all times to UTC
- Specify Time Zone
For more information about Time Zone Handling, see How eCapture Handles Dates and Time Zones.
Note: If you are setting Case (Project) Level options, OCR and Time Zone Handling options are defined on the Common Options tab because Processing Jobs and Data Extract Jobs use the same OCR and Time Zone Handling options. For more information about setting options at the Case (Project) level, see Create a New Case (Project).
-
Click Advanced Options to set more complex General Options rules. The Advanced Imaging dialog box appears.
- Remove blank pages - Select this option and then set the Blank page threshold (1 to 2000) to a value that eliminates the speckles without eliminating any punctuation marks from the pages. eCapture removes any images that have fewer "dots" than this threshold. If this setting is too high, you may lose images with a few short words. We suggest a setting of 50 as a starting point.
- Process CSV files with Microsoft Excel - Select this option to process CSV files by using Microsoft Excel instead of Oracle (formerly Stellent).
- Process HTML files with Internet Explorer - Select this option to process HTML files by using Internet Explorer instead of Oracle (formerly Stellent).
-
Enable internet links in emails - This option controls whether inline images are downloaded from the internet. Clearing this option can improve performance on environments that do not have internet access.
-
Set Lotus Notes options, as appropriate:
- High Speed (Optimized for speed)
- Medium Speed (Balance of speed and quality)
- Low Speed (Optimized for highest quality output)
-
Click the Outlook/EML link, Select Handling/Order. The Outlook/EML Text Cutoff Handling dialog box appears. Select an option and click either the
or to move it to a specific order location. Repeat for additional options. Options include:-
Attempt in Landscape w Shrink to Fit
-
Attempt in Portrait w Shrink to Fit
-
Attempt in RTF
-
Attempt in Text
-
Assign Text Cutoff Flag and Manage in QC - This is the default setting. It cannot be repositioned.
-
-
Click the Lotus Notes link, Select Handling/Order. The Lotus Notes Text Cutoff Handling dialog box appears. Select an option and click either the
or to move it to a specific order location. Repeat for additional options. Options include:-
Attempt in Landscape
-
Attempt in Text
-
Assign Text Cutoff Flag and Manage in QC - This is the default setting. It cannot be repositioned.
-
- Click OK to exit the Advanced General Options dialog box.
Streaming Discovery Imaging: Excel Options
-
Click the Excel tab to set the processing options for Excel files.
-
Process with Outside-In (Stellent) - Selecting this option to:
- Allow for faster and more consistent generation of images on the first pass
- Reduce the amount of time spent manually QCing these document types
When selected, only Outside-In (Stellent) is used to process images; the Microsoft related options are grayed out by default. Full metadata is extracted and time zone imaged output reflects the time-zone handling options configured for the Processing Job. All files processed by Outside-In (Stellent) receive the Stellent Processed flag in QC.
The processing output differs when using Outside-In (Stellent) to view and image documents. However, the QC applied flags, metadata, and optional summary reports are similar if processing was done without Outside-In (Stellent). Other processing options, including Flex Processor processing options, are respected when using Outside-In (Stellent).
- Comments - Set where you want comments displayed. Select from None, At end of sheet, or As displayed on sheet.
-
Color Depth - Set the Color Depth options. Color processing for Excel files is handled separately from color processing of other types of files. This setting is independent of the General Color Depth.
Single Page Output Type
General Color Depth Options
Rendered as
Black&White (1-bit)
Group 4 TIFF
Grayscale (8-bit)
LZW TIFF
256 Color (8-bit)
LZW TIFF
True Color (24-bit)
JPEG
Multi-Page TIFF Output Type
General Color Depth Options
Rendered as
Black&White (1-bit)
Group 4 TIFF
Grayscale (8-bit)
LZW TIFF
256 Color (8-bit)
LZW TIFF
True Color (24-bit)
JTIFF - (JPEG compressed TIFF)
-
Paper Size - Click the drop-down menu and select an output paper size for documents during processing.
Note: For Excel Only - For Custom[8.5x11.0in], the Custom Paper Size dialog box appears.
The Custom Paper size defaults to 8.5x11 inches. The range values are shown for both Units: Inches and Millimeters. Maximum size in Inches 50.00x70.00; for Millimeters 1270.00x1778.00. When this option is selected, the document will be processed through the PDF driver (Text-Based PDF creation) regardless of the Flex Processor option selected. OCRing is not applicable in this instance. Export settings will be limited to Text-Based PDF Output only, even if image format is selected. Non-Excel documents will export as usual.
-
Center on Page - Determines where to center the image on the page.
-
Horizontally
-
Vertically
-
-
Page Order - Determines the page order to be used for imaging.
-
As is
-
Down, and then over
-
Over, and then down
-
-
Orientation - Determines the orientation of the page at the time of printing.
-
As is
-
Portrait
-
Landscape
-
-
Scaling - Specifies whether or not the image should be scaled and how. If scaling is used the options are adjusted to a percentage of the current size, or is modified to fit the page.
-
As is
-
Adjust to % normal size
-
Fit to page
-
-
If you want to set more granular processing options for Excel files, click the Advanced Options button. The Advanced Excel Imaging dialog box appears.
-
At the top of the dialog box, set the options for how to handle headers, footers, and other content in the Excel workbook. Click the Defaults button to revert to the default settings for these options, as shown in the following image:
If you have trouble locating the referenced options in Excel, click
here to view information about how to navigate in Excel to the option.-
Do not include headers - View > Header and Footer: Header/Footer Tab, Header drop-down list, None
-
Do not include footers - View > Header and Footer: Header/Footer Tab, Footer drop-down list, None
-
Reveal hidden columns - Format > Column > Unhide
-
Reveal hidden rows - Format > Row > Unhide
-
Unhide worksheets - Format > Sheet > Unhide
-
Unhide very hidden worksheets - Unhides worksheets that were hidden by a Microsoft Visual Basic for Applications program that assigned the property xlSheetVeryHidden. (From the Microsoft Excel Help File: If sheets are hidden by a Microsoft Visual Basic for Applications program that assigns the property xlSheetVeryHidden, you cannot use the Unhide command to display the sheets. If you are using a workbook with Visual Basic macros and have problems with hidden sheets, contact the owner of the workbook for more information.)
-
Autofit columns - Double click the right boundary of the column heading for that row.
-
Autofit rows- Double click the boundary below that row heading.
- Wrap text - Format > Cells: Alignment Tab, Wrap Text Option.
-
Print gridlines - File > Page Setup: Sheet Tab, Under Print, select Gridlines check box.
-
Unhide windows - Window > Unhide.
-
Apply Autofilter - Data > Filter > AutoFilter
- No fill color (for cells) - Format > Cells: Patterns Tab, Under Color, click No Color.
-
Clear print area - File > Print Area > Clear Print Area.
-
Clear print title columns - File > Page Setup: Sheet Tab, under Print Titles select the columns to repeat range.
-
Clear print title rows - File > Page Setup: Sheet Tab, under Print Titles select the rows to repeat range.
-
Display headings - File > Page Setup: Sheet Tab, under Print, select the Row and column headings check box.
-
Expand Pivot Tables - Right click Pivot Table to display context menu. Choose Expand/Collapse > Expand.
-
-
Set the remaining settings in the Advanced Excel Imaging dialog box.
The following table provides a list of the available options.
Setting
Options
Date field handling:
-
Replace with date created - will replace with creation date.
-
Replace with date last saved - will replace current date with last saved dated.
-
Replace with comments - displays the Date Field Comments field where you can enter the text that should replace the contents of the date field.
-
Replace with field code
-
Do not replace - will not replace the date (e.g., Macros)
Header/Footer Filename field handling
If path or filename options are found in an Excel header or footer, you can select from the following options to handle these occurrences.
-
Replace with filename (no path) - inserts the unqualified filename
-
Replace with filepath - inserts the fully-qualified path of the original file
-
Replace with comments - displays the Header/Footer Filename field comments field where you can enter your own comments
-
Replace with field code - replaces outputs &[Path] and/or &[File]
-
Remove - removes the codes entirely
Generate metadata
Select Generate a metadata summary images for each Excel spreadsheet, and then under Spreadsheet Metadata Summary Options select the individual types of metadata to capture.
-
Document Properties
-
Comments
-
Formulas
-
Linked Content - The data collected will include hyperlinks and OLE linked files. If any linked content exists in a document, a QC flag will be added. A separate page entitled Document Properties is generated and is placed at the end of each Microsoft Excel document.
For more information about metadata, click
here.Who creates the metadata? The native program (such as Microsoft Excel or Outlook) creates the metadata and maintains it with the native file (the letter or email).
What does eCapture do with this data? When a document is processed, the metadata is collected from the document and stored in the database.
How is metadata useful? It gives you valuable information as to “Who knew what, and when.” It can tell you who wrote a document and who edited it last. It also shows you a file’s revision number, the character count, and many other pieces of information about a file summary image for each Excel spreadsheet.
Blank page removal
This option is available if the Remove Blank Pages option is selected under the General Options tab. Select from the following two options to remove blank pages:
-
Based on selected Page Order: Down, then over or Over, then down.
-
If Down, then over is selected, all vertical page columns that are blank will be removed.
-
If Over, then down is selected, all horizontal page rows where all pages in a horizontal run are blank will be removed.
-
-
Based on both Page Order options: This bases the removal of blank pages on both horizontal page-rows and vertical page-columns.
Example of Page Removal
The following example pertains to using a spreadsheet with 12 pages that will be rendered.
-
If the sheet's page order is Over, then down, eCapture removes all horizontal page rows where all pages in a horizontal run are blank. In order to do that, eCapture steps through all HPageBreaks and makes sure the range from the first column to the last column is blank.
-
If eCapture determines that 1-3 is blank, then they will be hidden. If eCapture determines that 4-6 is blank, then they will be hidden, and so on.
-
If the sheet's page order is Down, then over, eCapture will remove all vertical page columns that are blank.
-
If eCapture determines that 1-A is blank, then they will be hidden. If eCapture determines that 2-B is blank, then they will be hidden, and so on.
By using this algorithm, all blank pages will not be eliminated, though many of them will be.
Note: All page-hiding is done by setting horizontal regions' RowHeight properties and vertical regions’ ColumnWidth properties to 0.
-
- Click OK to exit the Advanced Excel Imaging dialog box.
Streaming Discovery Imaging: Word Options
-
Process with Outside-In (Stellent) - Selecting this option:
- Allows for faster and more consistent generation of images on the first pass
- Reduces the amount of time spent manually QCing these document types
When selected, only Outside-In (Stellent) is used to process images; the Microsoft related options are grayed out by default. Full metadata is extracted and time zone imaged output reflects the time zone handling options configured for the Processing Job. All files processed by Outside-In (Stellent) receive the Stellent Processed flag in QC.
The processing output will differ when using Outside-In (Stellent) to view and image documents. However, the QC applied flags, metadata, and optional summary reports will be similar if processing was done without Outside-In (Stellent). Other processing options, including Flex Processor processing options, are respected when using Outside-In (Stellent).
-
Select the option Show Hidden Text to see hidden text, if any, contained in Word documents.
-
Select the appropriate revision option. The option you select determines how the system handles revisions within Word documents.
-
As is - Print the document as it is according to the Office Settings on the computer.
-
Detail Revisions - Print the document with revisions shown.
-
Final Copy (hide revisions) - Print the document with no revisions shown.
-
Both Copies - Documents are printed. If a document has revisions, it's printed again with the revisions shown. Documents with revisions will then have two sets of images, one right after the other.
-
-
Select the appropriate orientation option. The option you select determines how the system orients images of Word documents.
-
As is
-
Portrait
-
Landscape
-
-
Select the Scale to Page option to scale the contents of the page to fit in the printable area. This sets the PrintZoomPageWidth and PrintZoomPageHeight to the paper size of the printer when printing Word documents.
-
Color Depth - Color processing for Word documents is handled separately from color processing of other types of files. This setting is independent of the General Color Depth options located in the Processing Options: General Options tab.
Single Page Output Type
General Color Depth Options
Rendered as
Black&White (1-bit)
Group 4 TIFF
Grayscale (8-bit)
LZW TIFF
256 Color (8-bit)
LZW TIFF
True Color (24-bit)
JPEG
Multi-Page TIFF Output Type
General Color Depth Options
Rendered as
Black&White (1-bit)
Group 4 TIFF
Grayscale (8-bit)
LZW TIFF
256 Color (8-bit)
LZW TIFF
True Color (24-bit)
JTIFF - (JPEG compressed TIFF)
- Select the appropriate Paper Size for Word documents.
- If you want to set more granular options for handling of Word documents, click the Advanced Options button.
In the Field Handling section, select the Date Field Handling options:
Replace with date created - will replace with creation date.
Replace with date last saved - will replace current date with last saved dated.
Replace with comments - displays the Date Field Comments field where you can enter the text that should replace the contents of the date field.
Replace with field code
Do not replace - will not replace the date (e.g. Macros)
Remove - removes the codes entirely.
In the Field Handling section, select the Filename handling options:
Replace with filename (no path)
Replace with filepath
Replace with comments - displays the Filename Comments field where you can enter the text that should replace the filename
Replace with field code
Do not replace
Set the metadata options for Word documents
Select Generate metadata. The native program, in this case Word, creates the metadata and maintains it with the native file. When a document is processed, the metadata is collected from the document and stored in the database. Metadata gives you valuable information as to “Who knew what, and when.” It can tell you who wrote a document and who edited it last. It also shows you a file’s revision number, the character count, and many other pieces of information about a file.
Select the individual types of metadata to capture under Document Metadata Summary Options:
Document Properties
Revisions
Comments
Routing Slips
Linked Content - The data collected will include hyperlinks and OLE linked files. If any linked content exists in a document, a QC flag will be added.
A separate page entitled Document Properties is generated and is placed at the end of each Microsoft Word document. For example, The Document Properties page may contain the following data:
Title, Author, Company, Attached Template, Page count, Paragraph Count, Line Count, Word Count, Character Count (spaces excluded), and Character Count (spaces included).
- When finished setting Advanced Options, click OK to exit the Advanced Word Imaging dialog box.
- When finished setting Word Options, click OK to exit the Options for Processing dialog box or click one of the other tabs to set options for other types of files.
Streaming Discovery Imaging: PowerPoint Options
-
Select Original Settings (As Is) to use Microsoft PowerPoint’s default settings.
-
Select the Page Orientation. The options are: As is, Portrait, and Landscape.
-
Select the Slide Orientation. the options are: As is, Portrait, and Landscape.
-
Select the Color Depth to be used for processing PowerPoint presentations. Color processing for PowerPoint presentations is handled separately from color processing of other types of files. This setting is independent of the General Color Depth options located in the Processing Options: General Options tab.
Single Page Output Type
General Color Depth Options
Rendered as
Black&White (1-bit)
Group 4 TIFF
Grayscale (8-bit)
LZW TIFF
256 Color (8-bit)
LZW TIFF
True Color (24-bit)
JPEG
Multi-Page TIFF Output Type
General Color Depth Options
Rendered as
Black&White (1-bit)
Group 4 TIFF
Grayscale (8-bit)
LZW TIFF
256 Color (8-bit)
LZW TIFF
True Color (24-bit)
JTIFF - (JPEG compressed TIFF)
-
Select the Output Type. The options are: Slides, Outline, Notes Pages (notes and slide on one page), Notes Pages Split (notes and slide on separate page), or Handouts.
-
Select a Slide Size. Choose a slide size or As Is from the drop-down menu.
-
Select an output Paper Size or As Is from the drop-down menu.
-
To select more complex PowerPoint options, click the Advanced Options button.
- Print Hidden Slides - Select this option to print slides that are hidden from the slide show.
- Print Comments - Select this options to print comments for your slides.
- Frame Slides - Selecting this option prints a border around each slide.
- Scale to Fit Page - Select this option to ensure all available text appears on the slide that was imaged from eCapture,
-
Handouts - Select the desired handout options:
-
Slides per Page
-
Order (if generating 4 or more slides per page)
-
- Include Linked Content Summary - Select this option to ensure that the data collected includes hyperlinks and OLE linked files. If any linked content exists in a document, a QC flag is added.
-
Headers and Footers - For Headers and Footers, you can set options for Slides or Notes & Handouts. The tabs that display are based on the Output Type selected on the basic PowerPoint Options tab. The options are: Slides, Outline, Notes Pages (notes and slide on one page), Notes Pages Split (notes and slide on separate page), or Handouts.
Slides: For the Output Type of Slides, select from the following options from the Slide Tab:
- Select Date and Time if you want the page header to list the Date last saved or the Date created at the top of the image.
-
If Date and Time is selected, you can select the Update Automatically option. Select Date last saved or Date created.
-
Format: Select a format option for the date and time.
-
Select Fixed if you want to manually enter a fixed date and time in the image header.
- Select Footer if you want a footer at the bottom of the image.
-
If Footer is selected, enter static text that you want printed at the bottom of the image or check As is to maintain the existing footer for the slide.
- If Footer is selected, select a Slide Number option to define whether a slide number should show on the image. The options are: As is, Show, Do not show.
-
If Footer is selected, select a Show on Title Slide option to define whether to show the footer on the title slide image. The options are: As is, Show, Do not show.
Other than Slides: If, on the basic PowerPoint imaging options tab you set the Output Type to anything other than Slides, select from the following options on the Notes and Handouts tab:
- Select Date and Time if you want the notes/handouts to list the date/time.
-
If Date and Time is selected, select the Update Automatically option: Select Date last saved or Date created.
- Format: Select a format option for the date and time.
-
Select Fixed if you want to manually enter a fixed date and time in the image header.
-
Select Header if you want a header at the top of the image. You can either enter a fixed text to add or check the As Is option to maintain the existing headers.
-
Select Footer if you want a footer at the bottom of the image.
-
If Footer is selected, you can enter static text that you want printed at the bottom of the image.
- If Footer is selected, select a Page Number option to define whether or not a page number should show on the image. The options are : As is, Show, Do not show.
- Click OK to exit the Advanced PowerPoint Options dialog box.
- Click OK to exit the Options for Processing dialog box, or click one of the other tabs to set options for other types of files.
Streaming Discovery Imaging: Placeholder Options
- Click the Placeholder tab.
-
Click the
 button to create a new placeholder. The Create New Placeholder dialog box appears.
-
Enter a Placeholder Name. When you are finished creating your placeholder, the Placeholder Name will display in the Placeholder grid located in the Placeholder tab.
-
Select the check boxes next to the File Types/Extensions for which you want to have placeholders when a Streaming Discovery Imaging Job runs. By default, all File Types/Extensions are unselected.
- Click Select All to select all file types.
- Click Clear All to clear the selections and individually select the desired file types.
-
Expand a file type to view its subcategories. Filtering may be done on specific subcategories of a file type.
eCapture recognizes documents by their actual content and not the file extension. Keep this in mind as you exclude/include file types. You can filter (exclude) a myriad of file types by simply ensuring that the File Types/Extensions are unselected. When the Job runs, it will create placeholders for only those file types that are selected. These file types are based on the Oracle’s Outside-In identification criteria.
- If you want to add more file extensions to the placeholder definition you are creating, in the Placeholder these File Extensions list box, click
 to add the extension to the list. At least one file type or category must be selected. Repeat this step for each extension. File extensions are automatically alphabetized.
 - If you want to remove a file extension, in the Placeholder these File Extensions list box, select the extension and click
 .
. - If you want to clear all the extensions from the list, in the Placeholder these File Extensions list box, click
 .
. -
To import a list of file extensions from a CSV file, in the Placeholder these File Extensions box.
- Click
 .
. - Select the CSV file.
- Click Open. An Import From File progress bar appears. If any errors were encountered during the import, such as duplicates, an Information dialog box displays with the errors. The CSV file may contain extensions with or without a "." (period). Ensure the CSV file contains only one column of file extensions with each extension occupying its own row, for example, Range A1 through A50 or Range E1 through E50. The file extensions are alphabetized as they are imported.
- Click
- Set the File Size parameters. The default setting is None. If specified, file sizes may be Over or Under a specified amount. The selected file size applies to the files in the Imaging Job that have sizes on disk that are either greater than or equal to, or less than or equal to, the size specified. The size is expressed in KB. For example, a 1 MB file is entered as 1024 KB.
- Select the Extract Text of Document check box to extract the document text. By default, this check box is cleared.
- Select the Apply Max Page Threshold check box and indicate a threshold value (1 to 10000) to limit the number of pages produced by larger files. By default, this check box is cleared. If the page threshold is reached, the items are flagged as Page Threshold Exceeded. All pages imaged up until the threshold is reached are included in the document. The first page is the Page Threshold Exceeded placeholder, and subsequent pages will be those that were processed within the Max Page Threshold setting.
-
To use a predefined placeholder:
- Click
 to display the Open dialog box.
 - Select a placeholder image. File type options include JPG and TIF.
-
Click Open. The selected image displays in the view box underneath the option.
- Click
-
If you want to use a custom placeholder, click
 .
.The Custom Placeholder Configuration dialog box appears.

Complete the necessary fields in the Custom Placeholder Configuration dialog box.
-
Click the drop-down menu located above the Available Fields list and select a specific field type. By default, All Fields is displayed.
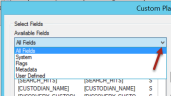
-
To narrow the field list:
- Enter a value in the Filter Value field located below the Available Fields list. For example, to see only those fields that contain the word “date”, enter date.
- Click
 .
. 
- To display all
fields, delete the value (in this example, the word date), leaving the field empty, and click .
- Click
 to
move a selected field from the Available Fields list to the Selected Fields
list.
to
move a selected field from the Available Fields list to the Selected Fields
list. - Click
 to
move a selected field from the Selected Fields list to the Available Fields
list.
to
move a selected field from the Selected Fields list to the Available Fields
list. - Click
 to open the
Insert Custom Field dialog box in which you can create new group fields and new
user fields.
to open the
Insert Custom Field dialog box in which you can create new group fields and new
user fields. - Use the and arrows to change the
order of the fields in the Selected Fields list. Select a field (or contiguous
fields) and then use either arrow to reposition the selected field(s).
-
Select a field in the Selected Fields list. The selected field appears in the Font section. Click
 to open
the Font dialog box.
to open
the Font dialog box. 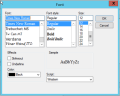
- Select the desired Font, Font Style, and Size; then click OK to return to the Custom Placeholder Configuration dialog box. Repeat this step for each additional field.
-
In the Field Options section, if necessary, select Include labels with values. When selected, both the field label and its value are included.
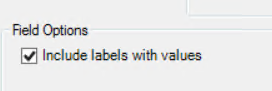
-
Click
 . The Date
Field Formatting Options dialog box appears.
. The Date
Field Formatting Options dialog box appears. -
Select the Date Field Formatting and Time Format for the custom placeholder.

-
If you want to change the date field to a different format, click the drop-down menu arrow and select from the following date formats:

-
YYYYMMDD
-
YYYY/MM/DD
-
MMDDYYYY
-
MM/DD/YYYY
-
DD/MM/YYYY
- Otherwise, select the option, Do Not Convert Date Fields.
-
-
If you want to change the Time Format, click the drop-down menu and select from the following options:

-
12-hour [displays time in 12-hour format e.g., 1:04]
-
24-hour [displays time in 24-hour format, e.g., 13:04]
-
Regional [formats the time according to the “default” regional settings of the Worker on which the document is being exported.
Note: Changing the format strings by using the Customize button of Regional Settings will have no effect; the actual region must be changed to see any effect.
-
-
Select Resolve times to second precision if you want to add seconds to all metadata date fields that have time. This does not apply to the images.
- By default, the Legacy Date Field Formatting check box is cleared. Clear this option to select from the Invalid date options and to select fields for date format handling.
-
-
If you cleared the Legacy Date Field Formatting check box, set the Invalid date options:
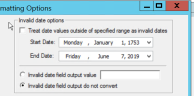
- Treat date values outside of specified range as invalid dates - Select this check box and then select a Start Date and End Date range. Any dates outside of the selected range are considered as invalid dates. The start date default is set to SQL minimum date. The end date default is set to SQL maximum date.
-
Choose one of the following options:
-
Invalid date field output value - enter text to display if an invalid date is encountered. This field may be left blank.
-
Invalid date field output do not convert - invalid dates will be output as a text field.
-
-
From the Available Fields list, select the fields you want to use for date formatting and move them to the Fields Selected for Date Format Handling list. There are a few considerations about date fields to keep in mind:
-
The only fields that are not present in the list are *DATE_ONLY* and *TIME_ONLY*. The fields in the Available Fields list comprise those that are marked as valid for date formatting. This is determined by the value of TRUE in the ExportAttemptDateParse field located in the EncounteredMetatdataFieldList table.
-
Date field formatting options affect only those fields in the Fields Selected for Date Format Handling list.
-
Date field formatting options are set at the Job level.
To select fields for date format handling.
-
Select a field for date format handling by selecting the field from the Fields Available for Date Format Handling list and clicking
 to move the single field to the Fields Selected for Date Format Handling list.
 -
For two or more fields, Ctrl-click to select non-contiguous fields or Shift-click to select contiguous fields. After selecting the fields, click
 to move them to the Fields Selected for Date Format Handling list.
eCapture creates two additional fields that “split” the date and time into a Date Only field and a Time Only field. These two additional fields are displayed in the Available Fields list in the Export Wizard, Select Export Fields screen. For example, if the DueDate field was moved to the Fields Selected for Date Format Handling list, the following additional DueDate fields would display in the Available Fields list: DueDate*DATE ONLY* and DueDate*TIME ONLY*.
-
- When you are finished setting the Date Field Formatting options, click OK. The Custom Placeholder dialog box appears.
-
In the Placement Options dialog box, select the placement settings for the placeholder.

-
Set the alignment positioning for the placeholder.
-
Vertical Alignment: Determines placement along the vertical axis. Options include Top, Center, or Bottom. Top is the default.
-
Horizontal Alignment: Determines placement along the horizontal axis. Options include Left, Center, or Right. Left is the default.
-
- Set the Indentation (Left and Right) for the placeholder. This setting determines the horizontal spacing to the left or right of the page margins.
- Set the Truncation for the placeholder. Truncation determines the number of characters at which the field value will be truncated. The default value is 128 characters.
-
-
If you want to save your Custom Placeholder formatting to a file, to be used later, click Save, enter a Description for the placeholder, and then click OK. You will also be prompted to save the custom placeholder definition before you exit the Custom Placeholder Configuration dialog box.
-
When you are finished creating the custom placeholder, click OK. The Save Changes dialog box appears.
- Click Yes to save the custom placeholder definition.
- Enter a Description for the placeholder.
-
Click OK.
-
Use the zoom in
 or zoom out
  buttons to view the image before finalizing.
 - To remove the selected image from the view box, click
 . The existing image must be removed before selecting a new image.
 -
To exit the Custom Placeholder Configuration dialog box, click OK. The placeholder displays in the Placeholder grid.

Note: More than one placeholder may be created for the imaging job. When two or more placeholders exist for a Streaming Imaging job, rule functionality, similar to the Flex Processor, is used. Each placeholder’s document criteria selection is applied in placeholder order with the last placeholder rule (applied to the document) determining the processing output. The Placeholder rule order may be changed before starting the job.
-
The Description field will contain the following values based on the selected Placeholder criteria:
- File Types
- File Types, Extensions
- File Types, Extensions, File Size
-
File Types, File Size
To edit the Placeholder criteria, double-click the Description field of the desired Placeholder. The Edit Placeholder dialog box appears. Make the changes and click
 to return to the Placeholder grid.
 - To delete a Placeholder from the grid, click
 . A prompt displays to confirm the deletion. Click
  .
. - To change the order of the placeholders in the grid, select a placeholder and click
 or
or  to move the selected placeholder into the correct position. Repeat this step for all placeholders until they are in the desired order.
Streaming Discovery: Export Options
Option
Description
Select Export Series (optional)
Select from an existing Export Series from the drop-down menu. If an Export Series is not selected, the Enterprise Streaming Discovery Job will not be exported to a review application. However, the job may be manually exported if desired. For more information, see Re-Export a Streaming Discovery Job. If an Export Series is selected, the area below in the dialog box displays the options/settings from that Export Series.
Important: If you are creating images during a Streaming Discovery Job, you must create and select an export series.
Export Interval (min)
This export interval setting dictates how often documents are exported to the specified export destination (Ipro Eclipse or Relativity).
Note:This option is not available unless an Export Series is selected, or a new Export Series is created.
The default setting is 30 minutes for new Case (Projects), where no System default options are in place. This change was made to reduce the number of created exports from large Streaming Discovery Jobs to better manage the volume of exports.
Any Streaming Discovery Jobs initiated under Cases (Projects) created before version 2016.2.0, the five‑ minute default setting remains.
The maximum setting is 60 minutes. If an existing Export Series is selected and the export interval is set to 0, only one Export Job will be created on completing the Enterprise Streaming Discovery Job.
As documents are created, Export Jobs are continuously created (based on the export interval setting). Each Export Job is started immediately on creation regardless of job size.
Only completed families are considered for export. Generally, the longer the interval setting, the more documents for each Export Job. The Enterprise Streaming Discovery Job may complete before all the Export Jobs complete; however, it will not be marked as Complete until the last set of documents start to export.
The Export Jobs inherit the settings from the parent Export Series; including the numbering schema. For direct export to the Review application (Eclipse or Relativity), the same eCapture auto-load rules apply: one load file for each volume.
Create New Export Series
Create a new Direct-to-Eclipse or Direct-to-Relativity Export Series. When a new Export Series is created (for Eclipse or Relativity), the criteria display in the Export Options dialog box as shown in the following figure:
In the previous figure, an existing Export Series was selected and shows the options/settings that were selected for that Export Series.
The bottom section shows the Export Fields that were selected for the Export Series Job. for more information about creating an export series, see Create an Export Series.
For Enterprise Streaming Discovery Job Export Series, the Export Series is Data Extract only.
Save settings as Case (Project) default
Displays when setting options at the Job Level. Select this option to retain these settings for future Enterprise Streaming Discovery Jobs created for the Case (Project).
Auto Publish Errors
Select this option to automatically publish Streaming Discovery node or item level errors (if any) so they may be moved forward to review without having to modify the Streaming Discovery Job and visually inspect the errors. Once it is completed, all remaining failures are published. This option is cleared by default; and if left cleared, no actions are performed.
Once the job completes normally, and if there are node level or item level errors, it will re-queue those errors one time and set the job to publish. The job displays in the Job Queue pane. Once the re-queue is completed, all remaining failures are published.
To see the nodes that were re-queued, open the AutoRequeue.TXT file stored in the Discovery Jobs folder. An example of the data is shown here:
NodeIDRequeue – NodeID: 1313
NodeIDRequeue – NodeID: 1314
NodeIDRequeue – NodeID: 1338
Errors do not get published if the auto publish option is selected on the case (project) level and cleared on the job level. This option is cleared by default; and if left cleared, no actions are performed.
Save as system default
Displays when setting options at the Case (Project) Level. Select this option to retain these settings for future Cases (Projects) created for the Client. The settings are saved to the eCapture Configuration database.
-
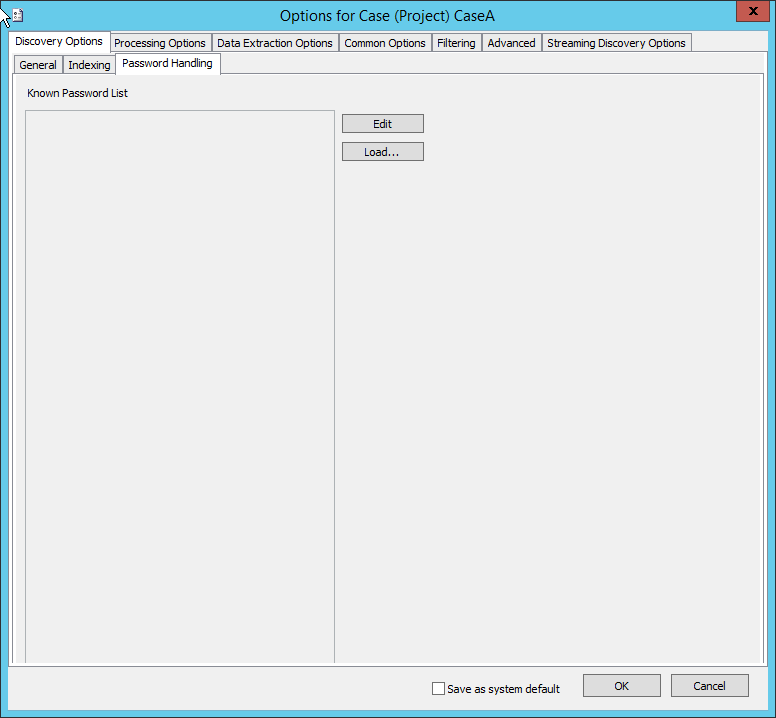

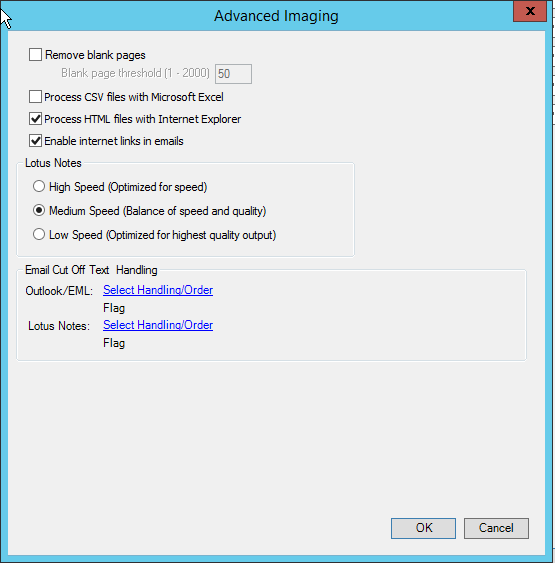


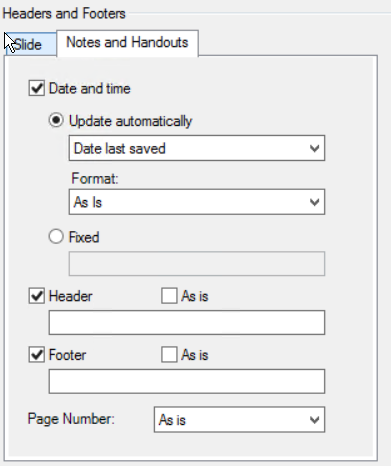
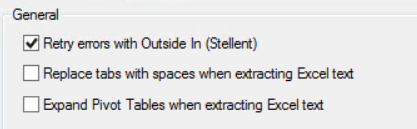

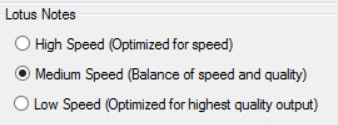

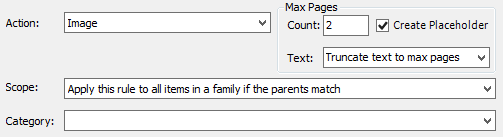

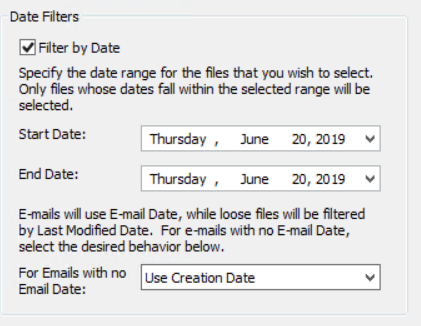


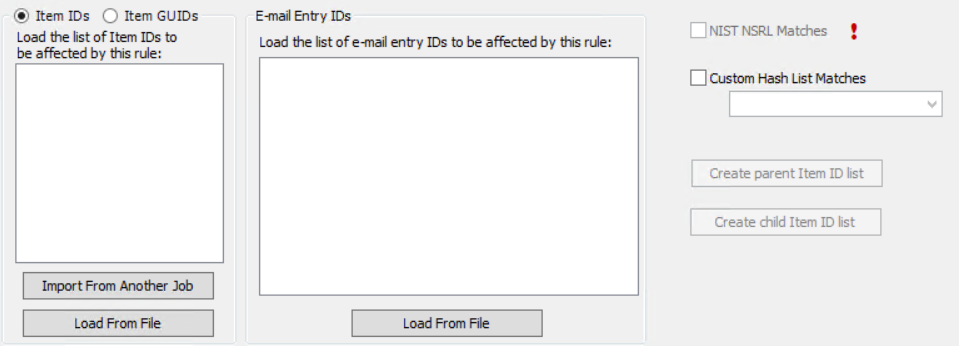
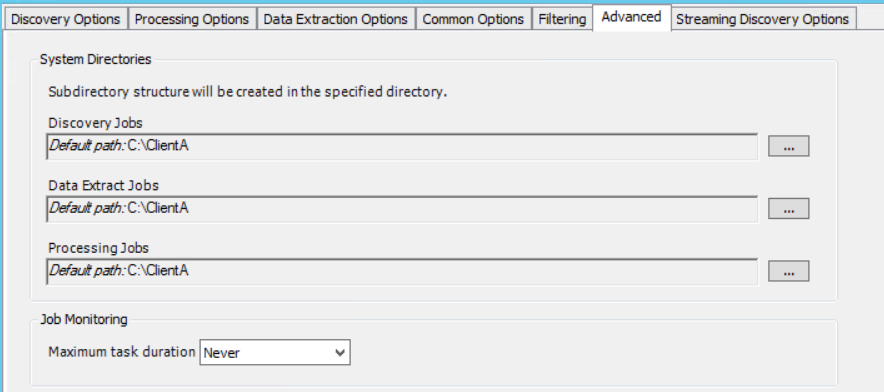
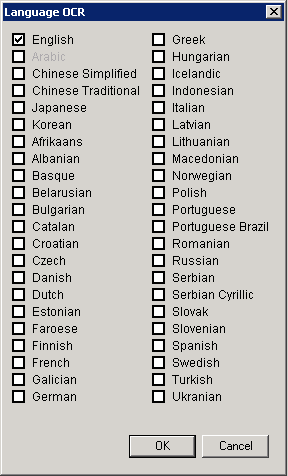

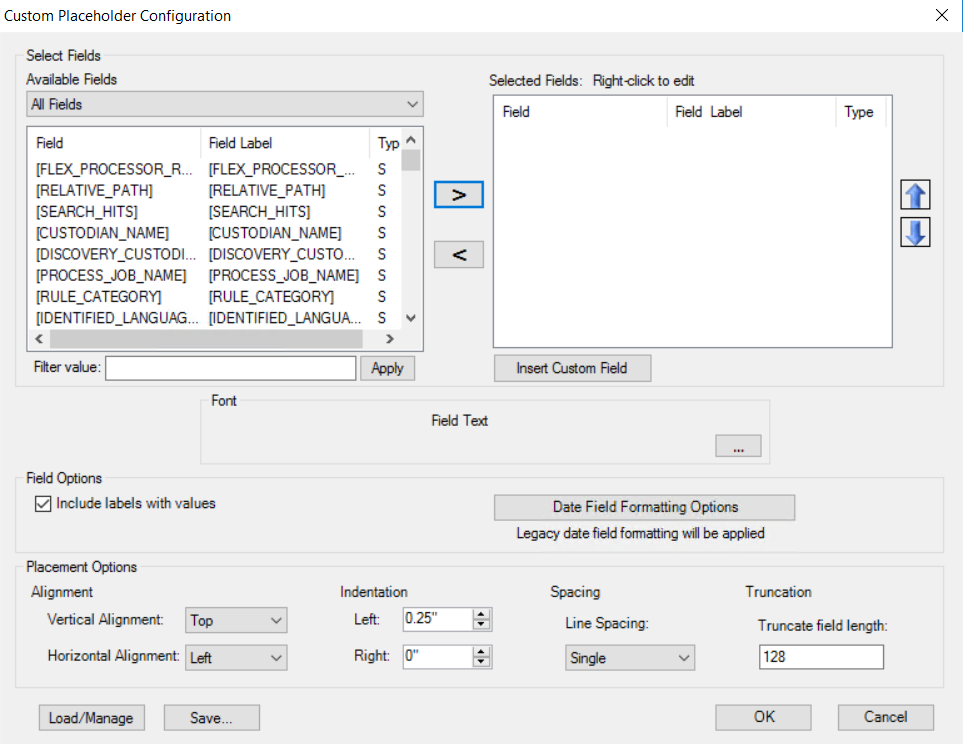

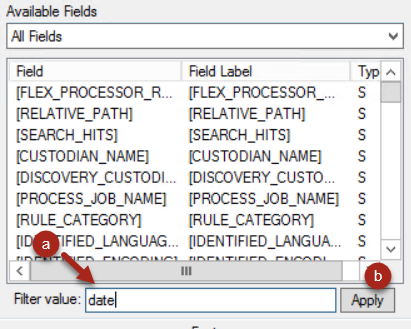
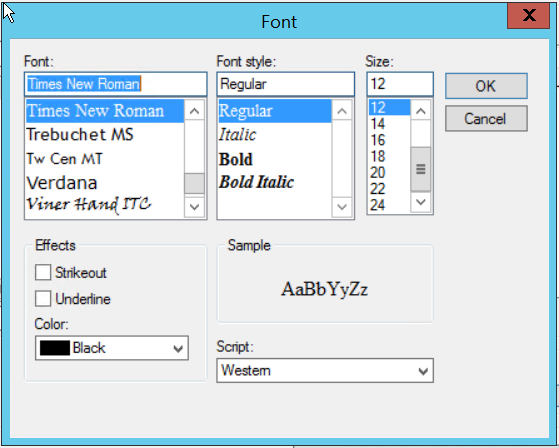

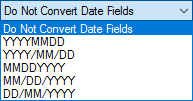


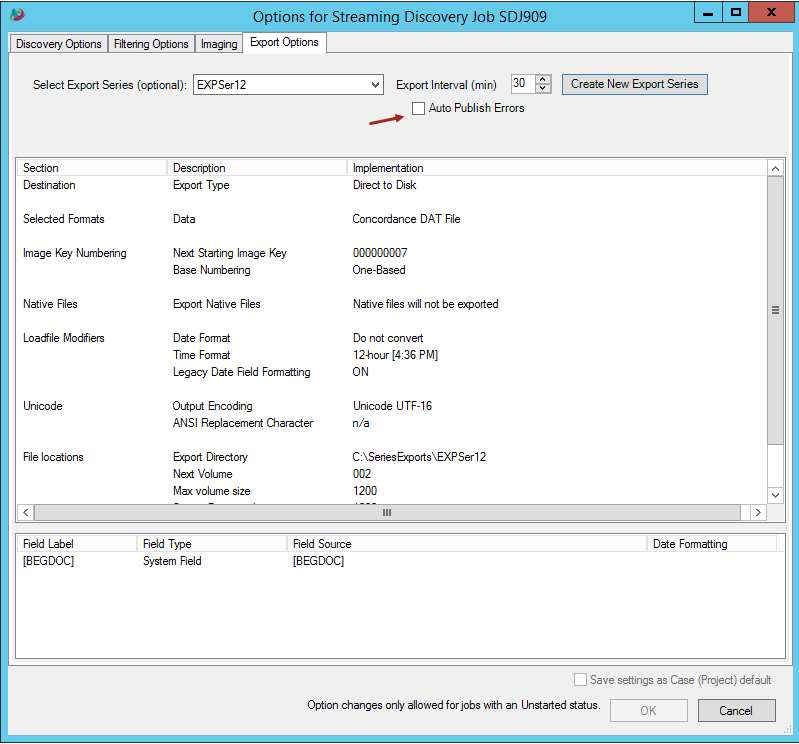
Related Topics
Overview: Enterprise Integration