Manage Users in the Web Portal
You created an account and now you want to add the rest of your team as users on the account.
With an IPRO professional subscription, several users can work on the same account. As the "owner" of the subscription, you can add, edit, activate and deactivate users, set and remove users' administrative privileges, and assign users access to IPRO applications, all from the Settings tab in the Web Portal.

To learn more about managing users in the web portal, see the User Management video, below.
Add a User
To add a user, follow the steps below:
- Launch the Web Portal by opening a browser and going to solutions.iprotech.com.
- Type in your email and password in the appropriate fields.
-
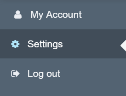
Once you have logged in, click Settings in the left navigation panel.
- Click the Add button above the user table.
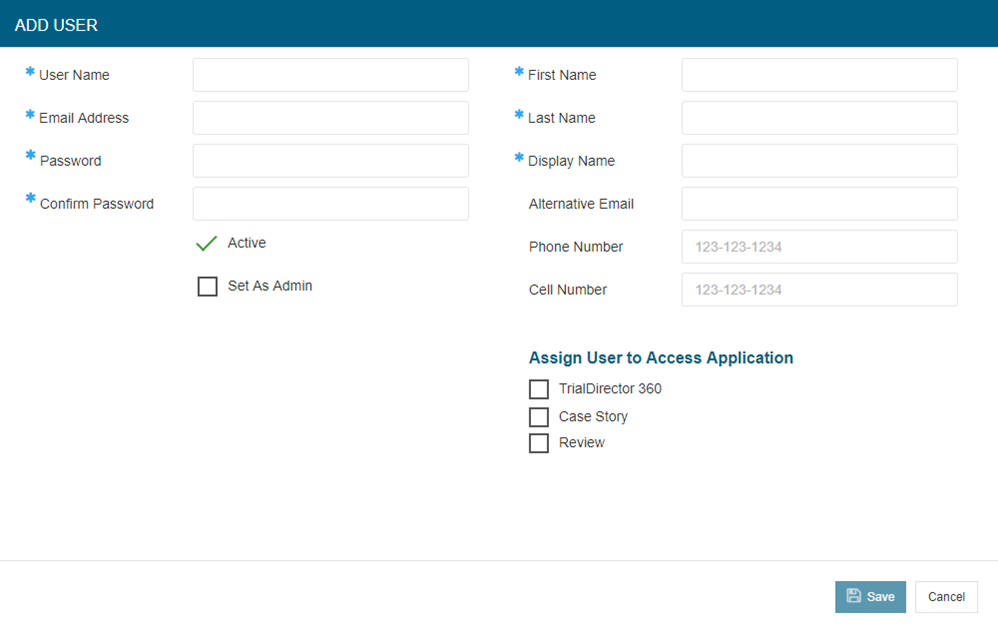
- Enter the user's information.
- User Name - The name to identify the user's account
- Email Address - The email address of the user where the email will be sent
- Password
- Confirm Password
- First Name
- Last Name
- Display Name - The name displayed after the user logs in
- Alternative Email
- Phone Number
- Cell Number
- Active - Set user's status to active by clicking the check box.
- Set as Admin - Give the user administrative privileges by clicking the check box.
- Assign User to Access Application - Assign what applications the user can access by clicking the check box next to each application.
- Click Save.

The Add User dialog appears.
You can enter the following information for the new user:
The user is added to the subscription.
Now it is up to the team members you added to activate their accounts. View the Sign In to the Web Portal with a New Account article for more information.
After you create an account for the new user, the user can log in and change his or her profile information.
Edit User Information
To change a user's information, follow the steps below:
- Launch the Web Portal by opening a browser and going to solutions.iprotech.com.
- Type in your email and password in the appropriate fields.
-
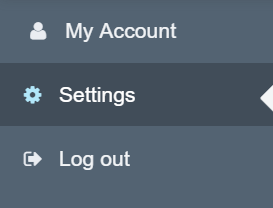
Once you have logged in, click Settings in the left navigation panel.
-
Select the user from the table and click the Edit button in the ribbon bar above the table.

- A dialog box appears. Change user details as necessary. Additionally, you can set a user's status to active by selecting the check box marked Active in the dialog box. When finished, click Save.
Activate and Deactivate

|
Important: When you click the Deactivate button, the selected user will no longer be able to log on to the Web Portal, will no longer be able to log in to LOCAL DISCOVERY or TRIAL DIRECTOR, and all licenses assigned to the user will be removed. |
To activate or deactivate a user, follow the steps below:
- Launch the Web Portal by opening a browser and going to solutions.iprotech.com.
- Type in your email and password in the appropriate fields.
-
Once you have logged in, click Settings in the left navigation panel.
-
Select a user from the table. To activate the user select the Activate button in the ribbon bar.

To deactivate the user select the Deactivate button in the ribbon bar. The user is then deactivated from the subscription and will no longer be able to access it.


Note: When you click the Deactivate button, a message displays warning you that the user will no longer have access to the Web Portal or the application. If you would like to proceed, click Approve. You then have the option to permanently delete the user's data. Click Yes to delete the data, and No to keep the data in the system.
- Repeat these steps to change the activation status for additional users.
Overview: Assign Users Access to IPRO Applications
In the Web Portal, Administrators have the power to assign users access to IPRO applications. Your subscription has a total number of licenses for each IPRO application. When you assign a user access to an application, the total number of available licenses decreases by one.
To better understand how available licenses work, consider the following example.
Your firm has the following IPRO application licenses:
- 1000 TRIAL DIRECTOR licenses
- 500 Case Story licenses
- 500 Review licenses
You have assigned the following licenses to users:
- 50 TRIAL DIRECTOR licenses
- 50 Case Story licenses
- 50 Review licenses
Your current license information looks like this on the Web Portal:

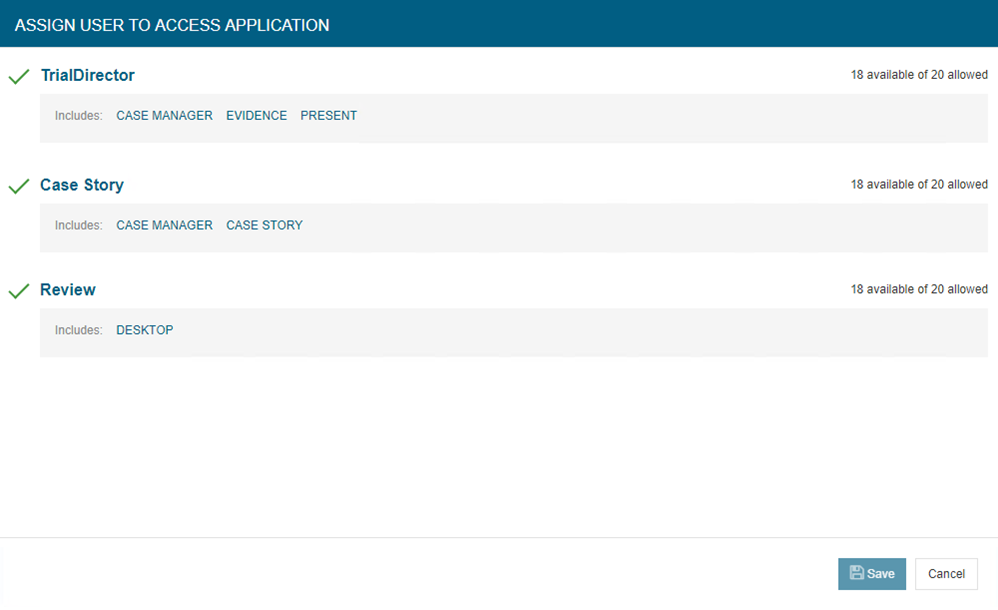
You click the Assign Access button for one of your users that is not currently assigned access to any applications. The Assign User To Access Application dialog looks like this:

You check the check boxes in the Assign User To Access Application dialog to give the user access to all three LOCAL DISCOVERY applications; TRIAL DIRECTOR, Case Story, and Review. The available license counts change to reflect the selections you've made.
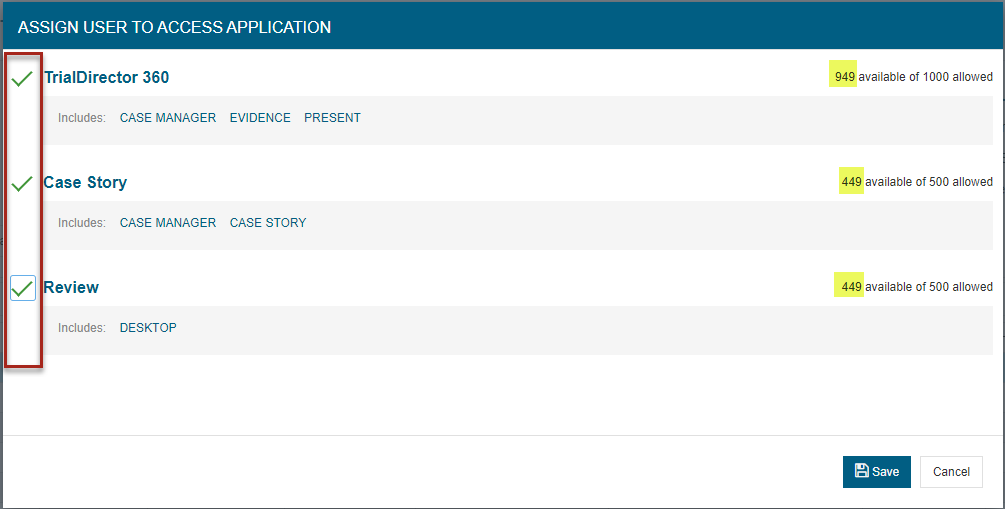
When you click Save, the Available license counts change to reflect fewer available licenses.

Assign Access to Users
Follow the steps below to assign users access in the Web Portal:
|
|
Note: For LOCAL DISCOVERY, ensure users are assigned access both through the Web Portal and the Case Management module of the application. If a user is provided access only in one place, rather than both, certain modules may appear grayed out for that user. |
- Launch the Web Portal by opening a browser and going to solutions.iprotech.com.
- Type in your email and password in the proper fields.
-
Once you have logged in, click Settings in the left navigation panel.
-
Select a user from the table. To assign that user access to IPRO applications, or to remove that user's access to these applications, select the Assign Access button in the ribbon bar.

-
A dialog box appears with the names of each module. To the right of each name is the number of available licenses, along with the total number of licenses purchased.
Assign access to an application by clicking the check box next to its name. A green check mark appears beside the applications the user can access. To remove the user's access to a certain application, click the green check mark. When finished, click Save.

- Repeat these steps for every user whose access needs to be changed.

Set Administrators
Individuals who were previously assigned Super Administrator privileges will need to be set as administrators in the Web Portal to have equivalent privileges. There is no limit to the number of users that can be set as administrators in the Web Portal. To add or remove a user's administrator privileges, follow the steps below:
- Launch the Web Portal by opening a browser and going to solutions.iprotech.com.
- Type in your email and password in the proper fields.
-
Once you have logged in, click Settings in the left navigation panel.
-
Select a user from the table. To give that user administrator privileges, click the Set as Admin button in the ribbon bar.

To remove that user's administrative privileges, click the Remove as Admin button in the ribbon bar.

- Repeat these steps as necessary for every user who needs to be added or removed as an administrator.


Related Topics:
Version: 2023.8.12
Last Revision: 11/8/2023