Add Patents to a Case
There are two methods for adding a patent to a case. You have the option of adding the patent directly to the Patents Explorer, or you can add the patent to the Documents Explorer, and then modify the document properties to classify it as a patent. No matter how you add it, the patent appears in both explorers. The sections below describe the steps you can take to complete these procedures:
Add Patents Via Explorer Ribbon Bar
To add a patent to the case via the Patents Explorer ribbon bar, follow the steps below:
-
Open the Patents Explorer. For help on this procedure, see Open an Explorer.
-
Click the Add button.
-
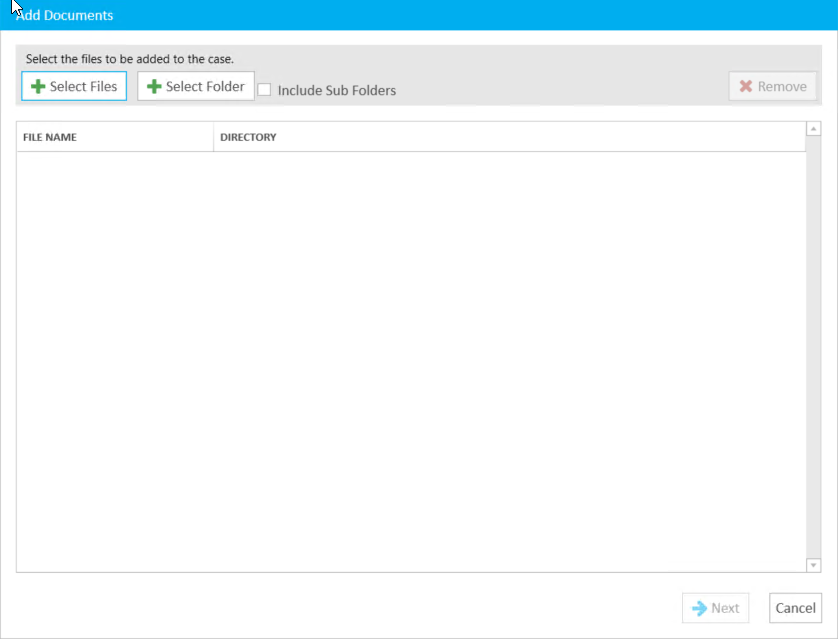
Click either the Select Files or Select Folder button. If you would like to include sub folders, ensure the Include Sub Folders check box is selected prior to clicking the Select Folder button.
-
If you click Select Files, the local file explorer appears. Locate the file you want to add, select it, and click Open.
-
If you click Select Folder, the Browse for Folder dialog appears. Locate the folder you want to use and click OK.

-
-
Click the Next button in the Add Documents dialog.
-
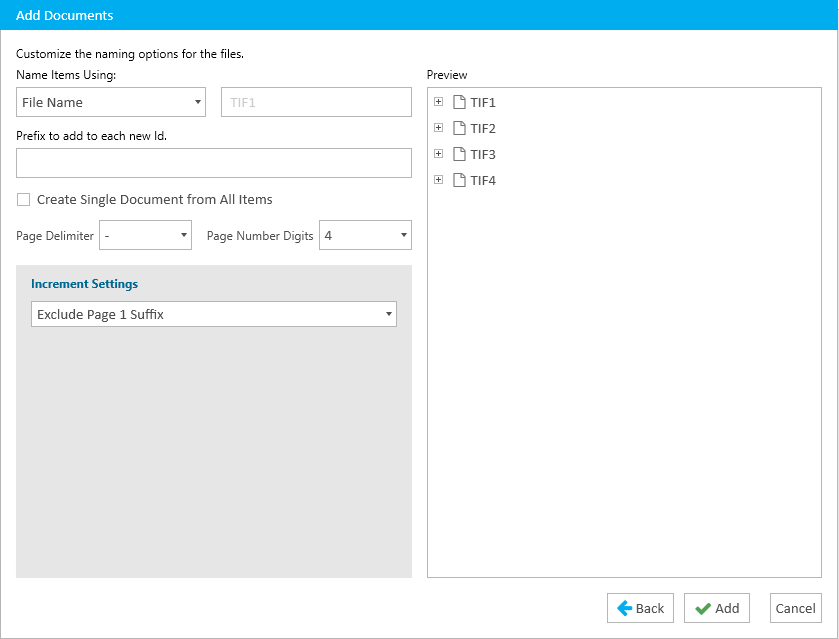
Review the document's naming options.
-
Click the Add button.
The Batch panel opens and displays the progress and status of the import. For more information about the Batch panel, see Work with the Batch Panel in TRIAL DIRECTOR.
Once the documents are added to the case they appear in the Patents Explorer.
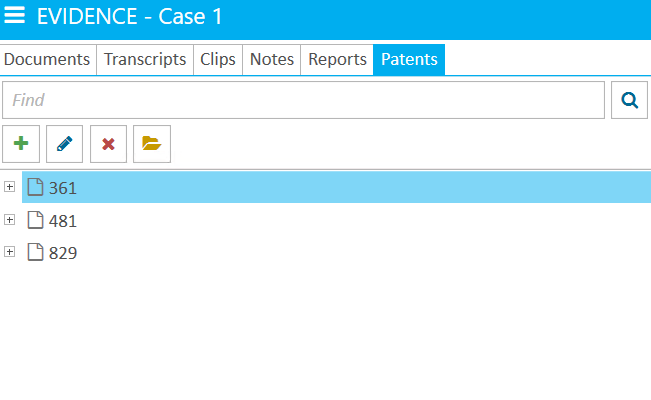
The items already added to the case appear.

The first step of the Add Documents dialog appears.


The document naming options appear in the dialog.

|
Note: For more information on adding documents, see Understand the Add Documents Dialog. |
Add Patents Via Document Properties
Let's say you've already added a patent to a case via the Documents Explorer. For organizational purposes, you would now like that patent to appear in the Patents Explorer. To accomplish this, you can simply modify the document's properties so that the document is classified as a patent, and thereby appears in the Patents Explorer. The following steps explain how to complete this procedure:
-
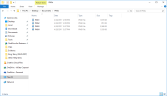
Open the Documents Explorer. For help on this procedure, see Open an Explorer.
- Locate the patent from the list of documents. Right-click on the document.
- From the context menu, select Properties. The Document Properties dialog box appears.
-
Click the field beside Classification. A drop-down menu appears. Select Patent.

- Click Save to save your changes. The document now appears both in the Documents Explorer and the Patents Explorer. Repeat these steps for other documents you would like to add to the Patents Explorer.


Related Topics
Save and Organize the Contents of Patents
Version: 2023.8.12
Last Revision: 11/8/2023