Generate and Export a History Report
You can generate a history report to evaluate actions, and filter by specific document range, dates, users, and/or actions if needed. Review maintains a record of the following actions taken by users:
-
Changes to case data (in Record View)
-
Addition and removal of document and page tags
-
Addition, removal, and changes to redactions and other annotations
-
Creation of new images using the Quick View tab’s Tiff-on-the-Fly feature
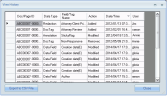
The following figure shows a typical History Report, sorted by date. This report can also be exported to a standard .CSV file.

Generate a History Report
-
On the Dashboard, click the Review module.

-
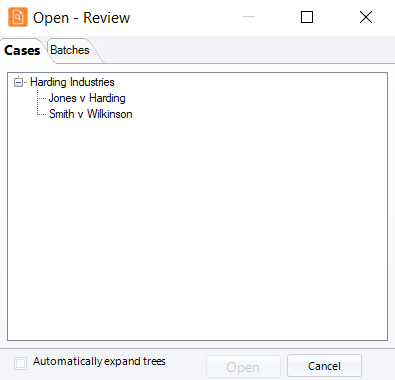
Select a Client and Case and click Open.
-
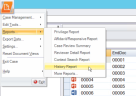
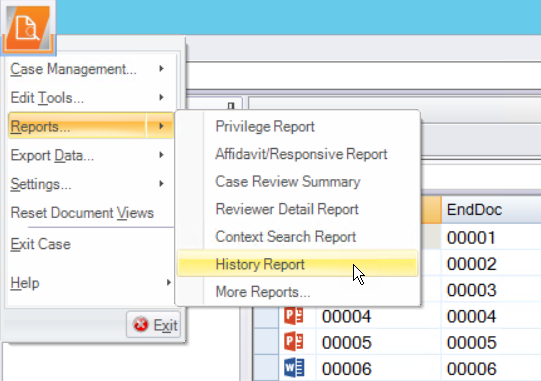
Click the Review button in the top-left corner of the Review work area. On the Review menu, click Reports. On the sub-menu, click the History Report option.
-
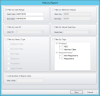
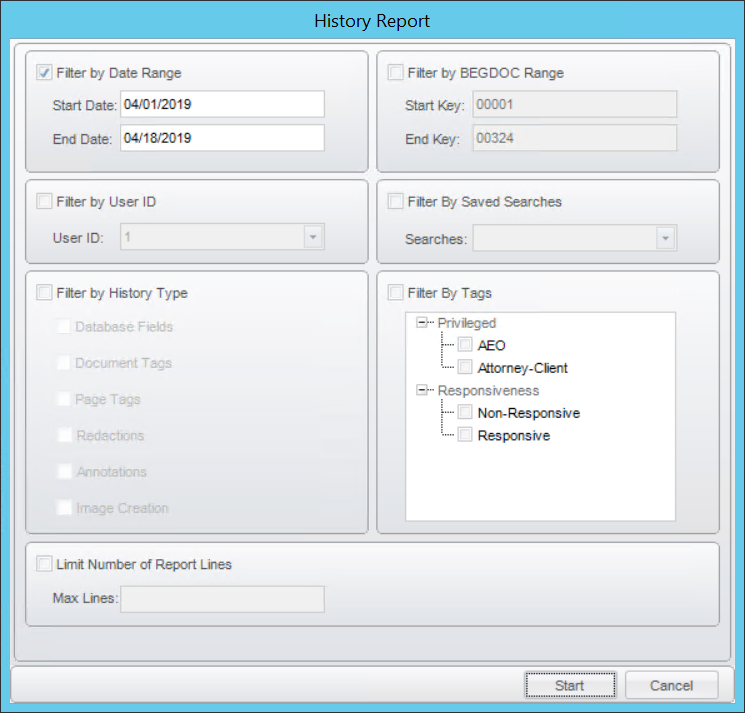
Select the data to be included in the report, on the report criteria dialog, as described in the following steps.
-
Date range: By default, the report includes details from the beginning of the current month to the current day. To choose another time frame:
-
Clear this option to generate a report for the entire time frame during which the case has been reviewed.
-
Select this option to restrict the report to a specific time frame; enter needed start and end dates using the date format shown in the Start and End Date fields.
-
-
Document range: By default, the report includes history for all documents. If needed, select Filter by BEGDOC Range and enter different starting and/or ending image keys.
-
Users: By default, the report includes actions taken by all users. If needed, select Filter by User ID and select a specific user.
- Saved Searches: By default, the report includes history for all searches. If needed, select Filter by Saved Searches and select specific searches saved in Review.
-
Activity details: By default, the report includes history for all user actions (as listed). If needed, select Filter by History Type and then select the actions to be included in the report:
-
Database Fields: Include data changes made in Record View.
-
Document Tags: Include details on document tags that have been added or removed.
-
Page Tags: Include details on page tags that have been added or removed.
-
Redactions: Include details on redactions that have been added, removed, or changed (such as redaction type).
-
Annotations: Include details on highlights, mark-ups, embedded text, and sticky notes that have been added, removed, or changed.
-
Image Creation: Include details on images that have been created with the Image tab’s Tiff-on-the-Fly function.
-
- Specific Tags: By default, the report includes history of all tags used. If needed, select Filter by Tags and select the tags to be included in the report.
-
Report Size: To limit the report size, select Limit Number of Report Lines and enter the maximum number of lines to be allowed. A limited report will include details from the starting date to the maximum number of lines specified.
-
-
When all selections are completed, click Start and wait as the report is generated. The report displays in a separate window.
-
View and navigate through the report. Tips:
-
Maximize the window as needed.
-
Use scroll bars to view all report details.
-
Sort a column by clicking the column heading.
-
Change column width by dragging the column heading separators.
-
If a cell’s content is truncated, point to the cell to view a tooltip containing the complete content.
-
-
If needed, copy data from the report and paste it into an appropriate file. Tips:
-
To select an individual row, click the leftmost cell of the row.
-
To select a set of rows, click the leftmost cells using Shift+click or CTRL+click for a contiguous or non-contiguous set of rows, respectively.
-
To select all rows on a page, click the top-left column heading.
-
To select individual cells, click a cell then Shift+click or CTRL+click others for a contiguous or non-contiguous set of cells.
-
When needed data has been selected, press CTRL+C to copy it.
-
Open an appropriate file (such as a spreadsheet) and press CTRL+V to paste the data.
-
-
When finished, click Close.


Export a History Report
To export a History Report to a comma-delimited (.CSV) file or paste it in a spreadsheet file:
-
Complete Generate a History Report.
-
Click the Export to CSV button.
-
Complete the Save As dialog box and click Save.
-
Close the report.
-
Open the file using an appropriate program (such as a spreadsheet program).
Related Topics
Version: 2023.8.12
Last Revision: 11/8/2023