Edit Case Details and Perform Basic Case Actions
There are some basic procedures you can complete on the Details tab in the Edit Case wizard when editing a case. On this tab you can:
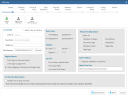
Edit Case Details

|
NOTE: Change details as explained in the following procedure. If review of a case has begun, some changes will not be appropriate/allowable. |
To change case details:
-
On the Dashboard, click the Case Management module.

-
In the navigation panel, click the Cases tab.

-
Locate the case you would like to edit. Double-click on the case to open the Edit Case wizard. The wizard opens with the Details tab already selected.
-
Complete the remaining steps as needed.
-
Matter Number: To change the matter number, enter the needed number. This entry is optional. If needed, enter a case matter number of up to 100 characters.
-
Data Directory: To change the data directory, enter or navigate to the data directory for the case. The Data Directory is the location where database-specific files and other files required for the case are placed. A case-specific folder will be created for each case. The entry may be a mapped drive or UNC path, but it must be accessible by all users. (A UNC path can help ensure this.)
-
Make other changes in the Modify Case Details dialog box as needed:
-
Native Time Zone setting and Load File Validation option
-
Tagging Options
-
History/Tracking Options
-
Date Format Options
-
-
If needed, select Mark case as inactive to make the case unavailable to Review users. An inactive case cannot be accessed in Review. It can be shown or hidden in the case list in Administration. Use the Inactive Case Report to locate all inactive cases. See Overview: Reports for details.

Note: Inactive cases are denoted in Case Management by the
 icon next to the case name. In contrast the
  icon next to a case name indicates that the case is active. In the image below, the first case in the list is inactive, while the other two cases are active.
.

-
When finished, proceed to make any other changes in the Edit Case wizard. When all changes have been made, click Save and Exit. All changes are implemented.


Refer to the procedure in Step 6: Select Case Options, in the topic Create a Case for details on these options.

Import Tags
To import tags from a case definition file:
-
On the Details tab in the Edit Case wizard, click the Import Tags button near the top of the wizard.

-
A dialog box opens. Navigate to and select the .CSE file. For details on .CSE files, see Export a Case Definition File.
-
Click Open.
Export a Case Definition File
After you create a case, LOCAL DISCOVERY allows you to export the definition to make it easy to create future cases that share similar characteristics. The load file you create is an .XML file with a file extension of .CSE.
This file contains the following case characteristics as selected by the user, but no case data. (A case definition file can be created whether or not data has been added to the case.)
-
User-defined database field definitions (field names, types, and options)
-
Control/pick list values
-
Tag palette (tag groups and tags)
-
Redaction palette
-
Stop words
-
Key words
-
Saved searches
-
Coding forms
|
|
NOTE: System fields are not included in .CSE files. If a .CSE file is used to create a new case, new system fields will be created automatically. |
The following case characteristics are included in the .CSE file by default:
-
Tagging options (document/case level tagging)
-
Date format
-
History/tracking options
-
Import validation option
Export procedure
To export a case definition file:
-
On the Dashboard, click the Case Management module.
-
In the navigation panel, click the Cases tab.
-
Locate the case whose settings you would like to export. Double-click on the case to open the Edit Case wizard. The wizard opens with the Details tab already selected.
-
Click the Export Case Definition button.

-
In the dialog box, select the items to export and click Save.
-
In the next dialog box:
-
Navigate to the location where you want to save the case definition file.
Tip: IPRO recommends saving the .CSE file in the case NDS (Network Data Store) location for easy access.
-
Enter a file name and click Save. The file extension is not required.
-
-
The case definition file is saved to the specified location. When appropriate, use the exported case definition file to create a new case as explained in Overview: Create Cases and Create a Case.
Export Desktop Layouts
Desktop layouts saved on one computer can be exported by an administrator (working on the same computer) and then imported into different cases. This is useful for administrators who want to distribute common Desktop layouts to reviewers.
Any or all of the layouts saved by users working on the computer can be exported.
To export Desktop layouts:
-
On the Dashboard, click the Case Management module.
-
In the navigation panel, click the Cases tab.
-
Locate the case whose Desktop layouts you would like to export. Double-click on the case to open the Edit Case wizard.
-
On the Details tab, click the Export Desktop Layouts button.

-
Select the layouts to be exported and click Save.
-
Complete the Save As dialog box and click Save. Selected layouts are saved in a single file with an extension of .layout.
-
Place the .layout file in a network location available to users. Inform them that new layouts are available.
Related Topics
Version: 2023.8.12
Last Revision: 11/8/2023